
 illustration")
WooCommerce has achieved great success in the past few years and has now become the king of e-commerce! It has a 92% market share!
, which has a 92% market share, is not only the most popular e-commerce plug-in for WordPress. It is also the most popular of all plug-in categories!
setting up your WooCommerce store to be successful requires a great deal of attention to many business-related and technical details. One of them is product transportation.
for shopkeepers who sell physical goods, one of the most important problems you need to solve is how to deliver your products to customers.
, let’s solve this problem today.
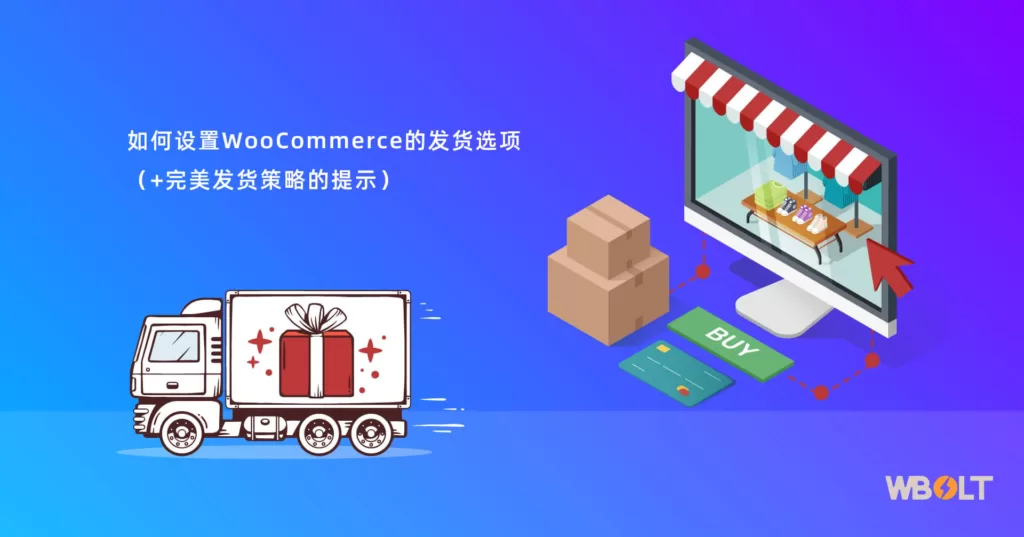
this article will outline the various shipping options you can use WooCommerce and how to set them.
at the end of this page, you will know everything you need to start shipping products from your WooCommerce store!
- WooCommerce Shipping options
- how does
- set WooCommerce Shipping options before setting up WooCommerce Shipping
- official WooCommerce Shipping extension
- how to find more WooCommerce Shipping extensions
- what do you need to pay attention to in the WooCommerce Shipping plugin?
- Best WooCommerce Shipping plug-in
- FAQ
- setting perfect WooCommerce Shipping Policy
WooCommerce Shipping options
here are some hot questions that you may encounter as a WooCommerce user: how does
set up WooCommerce shipping? What are the shipping options for
WooCommerce?
what is the best WooCommerce transport plug-in?
- can I offer free delivery or local pick-up in WooCommerce?
- can my visitors accurately calculate the rates of the shipping company in real time?
- how do they seamlessly track their orders after they are shipped?
- has quite a few elements to consider when setting up transportation. If you have been looking for an ideal transportation strategy for your store, this detailed guide will point you in the right direction.
- Let’s start with WooCommerce’s default product!
- ‘s default WooCommerce shipping option,
WooCommerce, meets most of your basic shipping needs when you open the box.
for new online stores, these default WooCommerce shipping options may only be enough to serve your customers. Before you decide whether you need additional features, there are three default modes of transportation:
Flat rate shipping: as the name implies, you will ship goods to your buyers at a uniform or standard rate for each commodity, order, or type of transportation. This means that your buyers can always predict freight, no matter what is in their shopping cart. This approach has both advantages and disadvantages because customers may pay too little or too much for freight.
Free shipping: here, website visitors do not have to pay any fees for shipping. This is ideal when the coupon is activated, the minimum consumption is met, or the price includes freight.
Local pickup: you can also allow customers to pick up goods at brick-and-mortar stores without freight. As long as you have a physical store, this option can save you a lot of time and energy.
- is at the front end, and buyers will generally see the choice between local pick-up and shipping options (depending on your preference).
- this is the default checkout experience provided by a newly installed WooCommerce. Fortunately for
- , you can use plug-ins to bring more choices.
WooCommerce Shipping extension and why you may need a
 illustration1")
We have seen all the default modes of transportation in WooCommerce. However, once your store starts to grow, you may need more flexibility to better serve your customers.
‘s wider range of buyers and website visitors tend to need more shipping options and features.
transportation is a broad topic. You should not only provide your customers with the opportunity to choose the mode of transportation. Ideally, buyers also want to be able to select from the carrier list, track their orders, and view dynamic freight rates.
shoppers like to choose, and the more options you offer, the more likely they are to buy.
this is the role of WooCommerce shipping expansion. They are ideal for adding almost any shipping option to your site.
there are some additional shipping plug-ins available here:
Table rate shipping: if you want to provide freight according to packing size, volume or weight, table rate transportation is a good idea. For example, you can ship orders at different fixed rates according to different weight categories (less than 2 kg, 2-5 kg, and more than 5 kg).
Real-time rates for third-party carriers: WooCommerce now allows you to connect shipping services directly to your store via API. Whether you use DHL, USPS or FedEx to deliver goods, shoppers can see the exact shipping charges when shopping.
Label printing: the ability to purchase and print shipping labels on your dashboard is a useful feature. Extensions like WooCommerce Shipping can help you provide this functionality.
- these are just a few of the most popular extensions used by e-commerce businesses in their stores. With the right plug-ins, there is almost no limit to the types of transportation functions you can bring to your store.
- before setting up WooCommerce shipping, the first step in
- setting up WooCommerce shipping is to prepare your website. As a basic prerequisite, you should already have a functional WordPress site that activates the WooCommerce plugin.
ideally, we recommend setting up shipping before starting your WooCommerce store. However, if your store is already online, you should consider using a temporary website. The
staging site is a clone of your real site that allows you to test multiple shipping options without affecting the user experience of your visitors. One of the best choices for
website temporary storage
This guide walks you through how to back up your entire WordPress website.
to achieve this goal is Duplicator. The plug-in is known for simplifying the migration process. This tool is available free of charge in the WordPress repository. Compared with other site testing methods,
has obvious advantages in using a temporary site. It is useful for testing changes in the local installation of WordPress before going live. You can experiment on a temporary storage site as much as you like, because you know very well that anything you do here will not affect your real store.
, however, the main disadvantage of this approach is that the local host and WordPress host servers often run in different environments. This means that some local host-compatible features may cause errors on your real site.
you can solve this problem by using the staging feature of your web hosting plan. If your plan supports it, you can create a temporary site on your host that fully reflects your real environment.
then, you can make any changes, test the results, and switch the staging site to the site with one click. Another best practice for
is to back up and update WordPress, WooCommerce, current themes, and plug-ins before making any changes.
this guide will guide you on how to back up your entire WordPress site. How
sets shipping options for WooCommerce
to set up WooCommerce shipping, we will focus on the default shipping options provided by the platform. These options can be created on your WordPress dashboard in four simple steps. Step 1 of
: create a new shipping area
WooCommerce allows you to provide specific shipping options for visitors from different geographic regions.
in WooCommerce terminology, these areas are called shipping areas.
in the past, WooCommerce provided two shipping areas by default: “US” and “Non-US”. Now, locations that are not covered by your other regional entries can be used out of the box.
to create your first WooCommerce shipping area, all you need to do is navigate to WooCommerce & gt; Settings & gt; Shipping and click Add shipping zone.
in rare cases where the Shipping tag is not available, you need to first re-enable the shipping settings. To do this for
, go back to the “General” tab and look for the “General options” section.
in the “Shipping location (s)” field, select any option other than “Disable shipping & shipping calculations”.
 illustration2")
returns to the shipping settings page. After clicking Add shipping zone, you will be directed to a new shipping area editing page.
fill in the necessary fields according to your requirements on this page.
Zone name is a simple descriptive title that refers to your new shipping area.
 illustration3")
adds a specific location in the “Zone regions” field by searching or selecting from a long list of available locations. The choice can be a city / state, a country, or an entire continent.
similarly, you can add a single zip code or a range of numbers, such as 90210. 99000 . Very convenient!
 illustration4")
Add and edit transport method
after adding all the necessary locations to the area, apply the transportation method you want to use in the area. To do this for
, click Add shipping method. Then, a pop-up menu allows you to choose from the available shipping methods.
, select any option, and then click Add shipping method. You can add all three modes of transportation to an area.
you can also switch any method you choose on or off after adding it. Once your regional settings are all in place, click “Save changes” and you have now successfully created your first shipping area
. If you choose, you can also modify your shipping mode. To do this,
 illustration5")
simply hover over the method and click Edit. The options available in the pop-up settings menu depend on the shipping method you are editing.
 illustration6")
For example, for uniform freight, you can set the fixed freight for the area, the title of the freight method (for the front end), or tax status.
in the Cost field, you can set the value of the variable to apply advanced cost rules to customer orders. Here are some useful things about
:
Standard uniform freight: enter a simple number, such as 10, and charge a fixed rate for all orders from the region (the freight will be $10. )
 illustration7")
Charge extra by quantity: enter 10 + (2 * [qty]). The freight is $10, plus $2 per shopping cart item.
Extra charge equal to percentage of total shopping cart: enter 10 + [percentage of cost = “2” max_fee= “100”]. The basic cost of the freight is $10 plus 2% of the total shopping cart (the maximum additional cost is $100. )
- when you are finished, click Save changes. Step 2 of
- : configure shipping category
- in addition to the shipping area, you can also determine the freight of WooCommerce based on predefined groups that contain similar products. These groups are called shipping categories.
normally, you want to classify products of similar weight or size into the same shipping category.
goes to WooCommerce & gt; Settings & gt; Shipping & gt; Shipping Classes, then click Add shipping class.
now, you can fill in the name of the shipping category, slug, and description of the category. Slug is a simple unique identifier. If you want the system to generate slug automatically, leave this field blank.
you can add multiple shipping categories by clicking the Add shipping class button multiple times. After that, click Save shipping classes to save your progress. After adding shipping categories to
, you can now attach specific uniform freight to them. To do this for
 illustration8")
, go back to WooCommerce & gt; Settings & gt; Shipping & gt; Shipping Zones and click Edit when hovering over any existing shipping area.
 illustration9")
is on the next page, scroll down to the Shipping methods section, and click Edit under the Flat rate method.
you can now add additional shipping cost rules for each shipping category you create.
as you can see, you can also specify a defined shipping fee for all products that do not have a shipping category. Once you have finished
 illustration10")
, click Save changes. Step 3 of
 illustration11")
: add or edit a product and specify shipping category
 illustration12")
after setting up your shipping area and category to meet your needs, it is time to assign these shipping options to each product.
if you have added products to your store, you can easily edit them.
otherwise, specify these shipping options directly when adding new products. To do this,
can find your product settings by going to Products & gt; All Products or Products & gt; Add New.
on the product settings page, scroll down to the Product data section. We only focus on the Shipping tag.
on this screen, you can choose any shipping category for the product. In this way, all of its uniform cost rules will be automatically applied to the product.
you can also add a shipping category to multiple products when editing products in bulk.
currently, this is the only two ways to specify freight categories for products. It is hoped that in the future we will be able to add products to a shipping category when editing a shipping category. Step 4 of
 illustration13")
: test your shipping settings
before showing your new shipping product to your store visitors, it is important to test your store. This will help you see how your shipping strategy works from the user’s point of view.
 illustration14")
testing your shipping configuration usually involves mimicking the average user process at the front end in order to detect errors related to shipping.
here are some important areas to keep a close eye on:
Shipping category and region: since these are key factors in determining shipping settings, you need to make sure that their behavior meets the requirements. In each case, make sure that the freight is accurately displayed on the shopping cart and checkout page.
Portfolio and cart size: if you have set some free or discounted shipping rules based on the portfolio or cart size, now is a good time to confirm these settings.
Third-party integration: if your site has any third-party shipping plug-ins, you need to make sure that all technical considerations are in place. Are important data such as real-time freight rates, tracking information, and return policies accurately synchronized? We will discuss this type of integration further later in this article.
- Access to information: do visitors to your site have easy access to key information, such as discount announcements and free shipping based on shopping cart size?
- Complete checkout: finally, you need to complete the entire checkout process to ensure that there is no interruption in the process.
- once these key factors are well covered, it can be said that you are ready to start shipping your product.
- ‘s official WooCommerce shipping extension
- , before considering the shipping plug-ins of other great WooCommerce developers, let’s take a look at the official WooCommerce shipping extension.
this extension can help you manage the following directly from your WordPress dashboard:
Shipping label: the shipping label is an important supplement to your transportation strategy. After installing the official plug-ins, it is very easy to set them up. Navigate to WooCommerce & gt; Settings & gt; Shipping & gt; WooCommerce Shipping. Here, you can choose the paper size of the print label and set the payment method. (label printing is a paid service, currently limited to USPS and DHL).
Shipment packaging: on the same page as the label, you can add details of your most commonly used packaging (such as size and weight). They can be custom envelopes and parcels, or packages from the carrier. A package provided by the carrier is called a service package.
 illustration15")
Tracking information: after completing an order, you can use the tracking number to track it, which can be found in the shipping label meta-box. However, you may need a more powerful solution, such as cargo tracking, for extensive tracking.
- Refund and pick-up: in addition to checking the detailed location of the shipment, you can also arrange to pick up or apply to the carrier for a refund (for packages that have not yet been shipped).
- WooCommerce Shipping is a convenient tool that brings useful additional shipping capabilities to your WordPress dashboard.
- but keep in mind that you need an active Jetpack connection to access these functions. How to find more WooCommerce shipping extension
- for
if you want to provide more functionality in your store’s shipping strategy, there is plenty of room for that. Several extensions from third-party developers can help you achieve this goal.
if you are hesitant about the shipping plug-in service to use, you can try to search in the extended list.
enters WooCommerce & gt; Extensions and click the Shipping tab.
you can also enter a keyword or product name in the search bar for easy navigation. What does
need to pay attention to when filtering the WooCommerce shipping plug-in?
here are some of the features we recommend looking for in the WooCommerce shipping plug-in:
 illustration16")
Powerful: the fewer plug-ins you need to deal with, the better. Therefore, finding a multi-purpose plug-in to meet your business needs in the most uniform way should be a top priority.
Flexibility: shipping is a complex process that involves multiple factors. To get things done, the ideal shipping plug-in must combine different shipping options in a flexible and easy-to-use way. A flexible WooCommerce shipping plug-in allows shoppers to choose from a variety of shipping methods, rates, and packages. In addition, suppliers must be prepared to update the software and add features on a regular basis.
Logistics support: in addition, it is also important to find an efficient shipping plug-in supplier with which you can work to meet customer expectations. You are bound to encounter problems when setting up and running your shipping settings. Your plug-in vendor should be able to solve your problem at any time.
- based on these important factors, we compared some WooCommerce shipping plug-ins and put the list of these plug-ins together.
- ‘s best WooCommerce shipping plug-in
- allows us to focus on the three most common use cases of the WooCommerce shipping plug-in and then share some multi-purpose solutions.
‘s best WooCommerce shipping plug-in for rate calculation
every shopper on your site wants to see how much freight they pay in advance. You want to be able to show your customers the exact freight rates at any time. If
does not have a plug-in, you can only set programmable rules for uniform freight.
has plug-ins that allow you to calculate freight in more interesting ways, such as table freight and real-time freight.
below are some of the best choices for achieving this goal.
1. Official real-time freight calculator
if you want to show real-time freight rates from well-known operators, WooCommerce offers two solutions you can trust. USPS Shipping Method and FedEx Shipping Method. The two plug-ins,
, are basically the same because they contain very similar functionality. The USPS shipping method only supports stores located in the United States, while FedEx extends its services to the United States and Canada.
you can use these two plug-ins for international transportation. You can explore available domestic and international parcels, such as FedEx freight economy, USPS priority mail, and international priority mail.
 illustration17")
, however, package size and other measurements are limited to inches and pounds. Other units will be automatically converted. The currency of the store is also limited to dollars (for USPS). FedEx supports both US dollars and Canadian dollars.
for these two plug-ins to run, you need to integrate a SOAP API on your server. If you are not sure how to do it, please contact your web hosting provider.
once you have set up the plugin, you can simply browse WooCommerce & gt; Settings & gt; FedEx (USPS), add your account information and adjust the relevant settings.
if you are already using USPS and FedEx, these official plug-ins will be ideal for displaying real-time rates to your store visitors. The annual subscription fee for each plug-in in
is $79. The idea behind the
freight rate table is to be able to set detailed shipping cost rules according to various conditions and display them at the same time on your front end.
Table Rate Shipping for WooCommerce does this perfectly, arguably better than any other plug-in we’ve tested.
BolderElements’s tool, which can be purchased on Envato’s CodeCanyon, has been well received after more than 20, 000 sales. It’s easy to see why. The
2. Table Rate Shipping for WooCommerce
 illustration18")
plugin allows you to set unlimited shipping rules using more than 15 conditions. Some of the most popular conditions include shopping cart subtotal, type of transportation, surface area of packaging, product category, and even one day of the week.
in addition, you can apply these conditions to each individual project, order, or group them together. There is more room for flexibility by limiting certain modes of transportation to certain user roles.
the one-time cost of the tool is only $25, which is good value for money. For this price, you only get 6 months’ support. You can pay an extra $7.50 to extend the support period to 12 months.
if you are looking for an alternative to Table Rate Shipping, Flexible Shipping may be a perfect match. This tool is one of the most popular WooCommerce table rate transportation solutions, mainly to create transport cost rules based on multiple conditions.
The most popular conditions include the total number of shopping carts, the weight of the shopping cart, the type of transportation, the total number of items or the specific number of unique items in the shopping cart.
in addition, you can set these conditions to trigger free shipping, or restrict the use of certain shipping methods only to logged-in users.
3. Flexible Shipping by WPDesk
 illustration19")
is different from Envato’s Table Rate Shipping, and you can download a free version of the plug-in from the WordPress plug-in library.
if you want to enjoy advanced features such as conditional logic and day of the week rules, you need to upgrade to the professional version.
you can pay $89 for a professional license for a single site, or $149 for all plug-in bundles.
‘s more expensive bundled payment covers several powerful WooCommerce plug-ins, such as flexible shipping locations, flexible printing WooCommerce,DHL Express WooCommerce real-time price professional edition. It also supports up to 25 websites.
the best WooCommerce shipping plug-in for printing labels
now that you have shown your visitors the correct carrier freight, it is time to organize the actual shipping process. The best way to do this is to use the shipping label.
depending on the carrier, these labels usually contain important information, such as address, tracking bar code, and customer name.
WooCommerce supports plug-ins that allow you to set and print these labels in your store.
here are three plug-ins we recommend for this purpose:
4. WooCommerce Shipping (official plug-in)
The official shipping plug-in for
Automattic was mentioned for the second time. This time, we will carefully study the printing function of the label. The main focus of the
tool is to simplify the entire implementation process of transportation. You no longer need to copy and paste order details into your execution software. This way, you can save a lot of time and money.
select Orders from your WordPress dashboard and press Create shipping label to print your shipping label.
 illustration20")
you can also pay the tag electronically. Then, you can pack and label the products you ordered. If you still need to arrange pick-up, you can do it on the same screen.
the plug-in currently supports only USPS and DHL and requires a Jetpack account connection to work. The plug-in is completely free to use.
5. WooCommerce Shipping Plugin for FedEx with Print Label
WooCommerce FedEx Shipping with Print Label provides a near-perfect solution for FedEx customers looking for label printing software. The tool is supported by PluginHive and can not only print and manage FedEx shipping labels.
you can also automatically display real-time FedEx rates, generate return labels, track shipments, and send custom email notifications to customers. It may be an ideal multi-purpose tool for companies that only use FedEx shipments. Another option for
is to automatically generate a shipping label each time an order is placed. The plug-in provider offers similar solutions, such as WooCommerce UPS Shipping Plugin with Print Label based on other popular express service providers.
 illustration21")
the plug-in costs $69, $99, or $199 and is licensed for a single site, 5 site, or 25 site. Each payment includes one year’s support and a 30-day refund guarantee. The last addition to the label printing section of
does not actually print the actual shipping label. Instead, it makes the process of packing goods easier and more efficient.
, as its name implies, WooCommerce Print Invoices & Packing Lists helps you print packing lists and invoices. Then you can include the list and invoice in the packing box. With this plug-in in
, you can print the necessary documents for delivery performance directly on the Orders page in WordPress.
6. WooCommerce Print Invoices & Packing Lists
 illustration22")
packing lists and invoices provide not only useful information for shipping companies, but also useful information for your customers. In addition to order details, you can also include policy information.
this plug-in includes a customizer to help adjust the appearance of the file and the information it contains. For
to use this tool, SkyVerge will charge $79 a year, including updates, support and a 30-day refund guarantee.
the best WooCommerce shipping plug-in for express tracking
you may need an extension to handle the last component of the shipping process is tracking. This component is particularly important for achieving a satisfactory user experience.
although some of the plug-ins mentioned above do some tracking, the following two options are specific to freight tracking and provide a wider range of tracking tools.
7. Advanced Shipment Tracking for WooCommerce
if you are looking for a Swiss Army knife for WooCommerce shipping tracking, then Advanced Shipment Tracking for WooCommerce is obviously the preferred plug-in.
this tool provides everything you need to manage and display tracking information from more than 150 operators.
you can easily advise the carrier or yourself to add one by setting a trace link that contains all the tracking information variables.
 illustration23")
you can notify your buyers via email and provide comprehensive tracking information on their account page.
also has a lot of room for customization. You can adjust the way tracking information is displayed (edit colors, fonts, and content), add custom order status tags (such as “shipped” and “delivered”), and even filter outstanding orders.
although the tool is completely free, you may want to try integration like TrackShip. This paid service issues automatic alerts at some checkpoints, such as “shipped”, “shipping” and “delivered”.
The fee for TrackShip starts at $9 a month.
8. AfterShip
Another honorary nomination for the
tracking category is AfterShip. Just like Advanced Shipment Tracking, this plugin brings simple and powerful tracking capabilities to your WordPress dashboard.
AfterShip supports more carriers-more than 760 international shipping providers! You can attach a tracking number to an ongoing order!
you can attach tracking numbers to ongoing orders and then display customized tracking information on the customer’s order history page. All they have to do is click the AfterShip tracking button when they log in to the account. All of these features of
 illustration24")
are available free of charge.
if you want to send real-time notifications based on different trigger conditions, you need to upgrade to the advanced version. The elite and professional editions cost $9 and $199 per month, respectively, and support 100 and 5000 shipments per month.
large enterprises plan to support more than 25000 pieces of goods per month, you need to contact sales. In order to improve our short list of WooCommerce shipping plug-ins,
must also consider multi-purpose solutions such as ShipStation and Shippo.
tries to do all this, from tracking goods to printing labels.
they are more like stand-alone e-commerce software as a service (SaaS) tools that support WooCommerce integration rather than plug-ins. Both of these services are worth a try! Common problems with
what types of shipping methods does
WooCommerce provide by default?
WooCommerce provides three types of shipping methods by default. They include uniform freight, free freight and local pick-up. Using uniform freight, you can ship goods to your buyers at a uniform or standard rate for each item, order, or shipping category. Otherwise, you can ship or allow customers to pick up their orders at the actual location for free. If you need more shipping methods, there are a large number of shipping plug-ins that can provide these methods. Is
WooCommerce compatible with USPS, FedEx and other express companies?
WooCommerce is compatible with USPS, FedEx and other shipping companies. You can use plug-ins such as WooCommerce FedEx Shipping with Print Label and USPS Shipping Method to connect them to your WordPress dashboard. You can not only display real-time freight rates at checkout, but also print labels and monitor tracking information.
can I use WooCommerce to provide free delivery service?
you can use WooCommerce to provide free delivery service. This mode of transportation is one of the three default methods. It can be triggered when a coupon is activated, a minimum consumption is reached, or both conditions are met. Similarly, you can limit free delivery to a certain delivery area or category.
what is the WooCommerce shipping area and category?
WooCommerce shipping areas and categories are simple e-commerce terms that make it easy to manage the shipping process according to certain rules and conditions. The shipping area is a geographical area. A shipping category is a predefined group that contains products based on weight or size. Does
WooCommerce allow local pickup?
WooCommerce allows you to pick up goods on the spot out of the box. As long as you have a location where you can store and classify products, you can simply let customers pick up their orders there. This option can save you a lot of logistics work.
sets perfect WooCommerce shipping policy
Transportation is a broad e-commerce category that needs to combine several mobile parts to make things work flawlessly. WooCommerce transportation is no exception.
has almost no general one-size-fits-all transportation strategy. Your ideal solution will mainly depend on your needs and the size of your business. But in most cases, you need to combine different plug-ins and shipping options to be successful.
you can set the default WooCommerce shipping options in four simple steps:
create a new shipping area
configure shipping category
add or edit a product and specify shipping category
- test your shipping settings
- once you have used up these default options, you may want to try other features to add more impact to your shipping product.
- but keep in mind that the end result depends largely on the plug-in vendor you choose. This is why you should give priority to first-class support and powerful features when choosing. With the right tools for
- , you can always ensure that your customers have a healthy shipping experience.
if you still have questions about WooCommerce shipping options, please share them in the comments section below. Otherwise, please check out our article on different ways to provide free shipping in WooCommerce.
但请记住,最终结果在很大程度上取决于你选择的插件供应商。这就是为什么你在选择时要优先考虑一流的支持和强大的功能。
有了正确的工具,你总是可以保证你的客户有一个健康的运输体验。
如果你对WooCommerce运输选项仍有疑问,请在下面的评论区分享。否则,请查看我们关于在WooCommerce中提供免费发货的不同方式的文章。