
The loading speed of WordPress website is very different from that without caching mechanism. Tools such as Google PageSpeed Insights or GTmatrix or Pingdom may recommend that you set up browser caching through htaccess or Nginx. Or use the existing WordPress caching plug-in to implement browser caching for WordPress sites. We explained the website speed measurement method in detail in another article, “website speed measurement performance testing tutorial [with 15 commonly used website speed measurement tools]. Webmasters who are interested can also refer to and read it.”
well, in this article, we will discuss how to solve the browser cache setting reminders mentioned by the website speed tool. In addition, there will be some simple but very effective techniques for implementing browser caching in WordPress.
based on our experience, use browser caching to help you increase your website loading speed by up to 50%.
article read Navigation
directory
what is optimized browser caching?
optimizes the browser cache, that is, setting the time value of the cacheable resources of the website stored locally by the browser (that is, images, JavaScript and CSS), reducing the resource download required by HTTP requests when the client visits the same page, and improving the loading speed of the site. When
uses Google Pagespeed for website speed testing, you will usually notice that you are advised to set browser caches for some of the resources in WordPress. In most cases, cacheable resources are Web site files (such as images, JavaScript, and CSS) that can be temporarily stored by a browser. How
browser caching accelerates your website
before going into this article to optimize the WordPress Web site browser cache details, let’s first understand how browser caching in WordPress works. And how it loads your web page faster.
Web browsers need to retrieve many resources (i.e. HTML files, CSS files, JS files, text, images, etc.) from the server in order to load the site.
Web caching is a technology used in Web browsers and software applications to “temporarily store” or “remember” web resources visited on a local disk. This temporarily stored data is called “Web cache” or “HTTP cache”.
when you visit the same website again. Web browsers only download updates from the site from the server, while “temporary storage” data is read directly from your local computer.
therefore, Web caching helps reduce bandwidth usage, server load, and so on. Therefore, using browser caching is very important to speed up the loading of web pages.
in other words, it commands your Web browser (I) to cache the Web site file locally for a period of time (ii) and load the file from the local store for next access until the cache time expires. (iii) therefore, loading Web site files from local storage helps Web browsers render and display Web sites faster. How
fixes browser cache warnings
in order to fix browser cache settings warnings, your Web server should allow Web browsers to temporarily store visited Web page resources on the local disk. In addition, when users visit your site again, it will load faster because some of the available static resources have been cached locally. As a result, you will find that the loading speed of the website has been significantly improved.
so the question is how to enable browser caching for WordPress sites?
to enable browser caching in WordPress, you need to set the content expiration date by adding cache control headers and ETag headers to the HTTP header.
- The Cache-Control state indicates the cache cycle of a particular file through a Web browser.
- and ETag are used to verify changes between the cache resource and the requested resource.
We can set a specific time period (months or years) to maintain local cache resources (that is, HTML,CSS or JS files, images, etc.).
warm Tip: please set the expiration date based on how often the resource changes, or in other words, how often the site’s static resources are updated. Instead of following the script and referring to the methods mentioned below, the caching strategy should be adjusted appropriately according to local conditions.
enables browser cache
in WordPress you can set the browser cache for your WordPress site in the following ways:
- Adding Expires Headers-HTTP add expires header
- Adding Cache-Control Headers- add cache control header
- Turning ETags Off- turn off ETag.
below we discuss in detail how to add Expires Headers and Cache-Control Headers and turn off ETag.
sets the browser cache on the Apache server through htaccess (without using the WordPress plug-in)
if your site is hosted on Apache Server, you can edit the WordPress htaccess file (usually stored in your WordPress site root directory).
Then, copy and paste the following code into the htaccess file and save it.
# TN-START EXPIRES CACHING #
ExpiresActive On
ExpiresByType text/css "access 1 month"
ExpiresByType text/html "access 1 month"
ExpiresByType image/gif "access 1 year"
ExpiresByType image/png "access 1 year"
ExpiresByType image/jpg "access 1 year"
ExpiresByType image/jpeg "access 1 year"
ExpiresByType image/svg "access 1 year"
ExpiresByType image/x-icon "access 1 year"
ExpiresByType application/pdf "access 1 month"
ExpiresByType application/xhtml-xml "access 1 month"
ExpiresByType application/javascript "access 1 month"
ExpiresByType text/x-javascript "access 1 month"
ExpiresByType application/x-shockwave-flash "access 1 month"
ExpiresDefault "access 1 month"
# TN-END EXPIRES CACHING #
Tips: set the cache time based on how often your site’s static resources are updated. For example, image resources are generally set for one year.
in addition, you should add Cache-Control Headers under the Expires Headers code in the htaccess file, as shown in the following example.
# TN - BEGIN Cache-Control Headers

Header set Cache-Control "public"

Header set Cache-Control "public"

Header set Cache-Control "private"

Header set Cache-Control "private, must-revalidate"

# TN - END Cache-Control Header
finally, you need to close ETag and add the following code to the htaccess file. You can read more about ETag here. After
# TN - BEGIN Turn ETags Off
FileETag None
# TN - END Turn ETags Off
, if you use the caching plug-in, save your WordPress’s htaccess file and clear all caches.
so far, you have successfully enabled browser caching for the WordPress site through htaccess.
warm Tip:do you know that Gzip compression can also improve the loading speed of your website? Did you use it? If not, please read the reference article “WordPress website uses Gzip Compression to improve site loading Speed tutorial.”
enables browser caching on the Web server NGINX (without the WordPress plug-in)
if you are using a Nginx server, you can enable Web browser caching by editing and adding the following code in a .conf file (usually stored in / usr/local/nginx/conf).
Add Expires Headers (NGINX)
location ~* .(jpg , jpeg , png , gif , ico , css , js , pdf , svg)$ {
expires 365d;
}
location ~* .(pdf , html , swf)$ {
expires 90d;
}
Add Cache-Control Headers (NGINX)
location ~* .(jpg , jpeg , png , gif , ico , css , js , pdf , svg)$ {
expires 90d;
add_header Cache-Control "public, no-transform";
}
if there are multiple websites on the NGINX server. I suggest you create a xyz.conf file and add the code mentioned above. Save this file in this folder / etc/nginx/vhost/xyz.conf and reload the Nginx server after
editing to successfully activate the browser cache rules on the NGINX server.
uses the WordPress caching plug-in to implement browser caching
. Now let’s take a look at the mainstream WordPress caching plug-in that supports enabling browser caching. If you can do this by configuring Web server configuration files, do not use plug-ins as much as possible. Of course, it is easier and faster for
to use plug-ins and does not have to mess with the server (if it is broken, it has to be restored). We recommend the following three WordPress cache plug-ins.
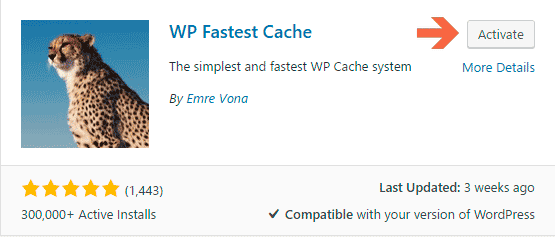
#1 WP Fastest Cache
WP Fastest Cache is one of the most popular WordPress caching plug-ins recommended by many well-known WordPress blogs. This five-star WP plug-in is available free of charge in the WordPress plug-in market. So far, there have been nearly one million active installations of the WP Fastest Cache plug-in.
- Download and install the enable WordPress plug-in WP Fastest Cache.
- enters the WP Fastest Cache settings interface and click the tab Setting.
- checks the necessary cache settings as shown in the screenshot below, and then clicks the submit button.
- enables browser cache settings when it prompts that the settings have been saved. The

WP Fastest Cache plug-in sets up
in addition to implementing browser caching, this plug-in also provides other options to improve page speed, such as
- enabling Gzip compression
- thin HTML and CSS
- merging CSS and JS to reduce HTTP request
- in addition, it can also generate static HTML files for dynamic WordPress sites. Another plug-in for
room2 Cache Enabler-WordPress Cache
is Cache Enabler-WordPress Cache, developed by KeyCDN. This is a 4.5 + star rating plug-in. In addition to the browser cache, this plug-in has some unique features to speed up your site. In addition, it implements what it calls functionality and is compatible with other WordPress performance plug-ins.
- first downloads, installs and enables the plug-in
- to enter the plug-in settings interface
- check to enable leverage browser caching
- to save settings. The plug-in
has many other features, such as…
- supports automatic and / or manual removal of cache
- manually clears page-specific cache
- displays total cache size on dashboard
- supports HTML and inline JavaScript slimming
- in addition, supports custom article types, such as
“3 W3 Total Cache-WordPress plugin
, etc. I believe that most WordPress webmasters have heard of the W3 Total Cache-WordPress plug-in, a very powerful WordPress cache plug-in.
- first downloads, installs and enables the plug-in, and then goes to the General Settings
- of W3 Total Cache Plugin to scroll down and enable browser caching and save all settings
- . In addition, navigate to the browser Cache Settings tab at the top of the page.
- specifies the available cache headers in General Settings on this page.
- sets Expires Headers,Set Cache-Control Headers and Set entity tag (eTag)-check all boxes.
- finally saves all settings.

W3 Total Cache browser Cache Settings
warm Tip: if you make any changes to the theme after you install the enable caching plug-in, especially in the CSS stylesheet. Because of the browser cache, you may not be able to see the changes immediately. Therefore, if you make changes to the style file / JS file, it is recommended that you open your website in the invisible window to view the changes. If the CSS changes are not shown in WordPress, use the plug-in Busted to refresh or clear the cache to make the changes take effect.
I hope you can find an effective way to improve the loading speed of your WordPress site through this article. What methods do you finally use to improve the loading speed of your website? leave a message to discuss with us.