
The course provides you with a great way to increase business revenue and email lists by providing value to your audience in an instructive and easy-to-follow way. You can achieve this goal by offering mature courses, which may earn tens of thousands of yuan, or simply use free mini-courses as magnets to attract new subscribers to your email list.
No matter why you create a course, LearnPress can help you build it in WordPress. LearnPress is a free learning management system (LMS) plug-in provided by ThimPress. It essentially allows you to turn your website or at least part of it into an online school similar to Udemy, Teachable, and similar platforms. We will look at this plug-in and review the basics of using it.
How to use LearnPress
Let’s start with the installation and configuration process and learn how to use LearnPress step by step.
Step 1: install and configure LearnPress
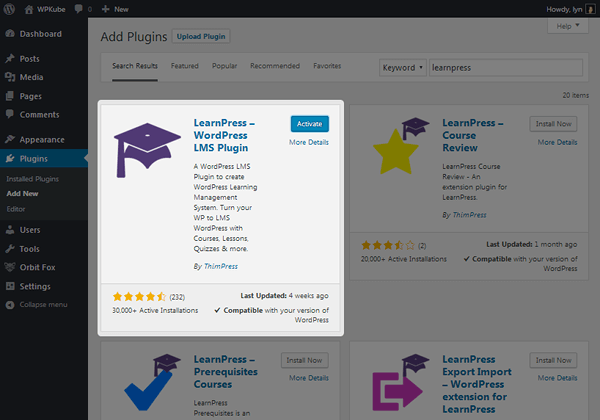
As I said, LearnPress is available in the WordPress plug-in library, so just search for it to install and activate it. You will also notice many other LearnPress plug-ins here. These are provided by ThimPress and serve as free add-ons that you can use to extend the school’s capabilities.

Once activated, you will be directed to the plug-in’s setup wizard. Click to run the installation wizard and complete these steps. You can skip any step using the “Skip to Next Step” button in the lower left corner:
- Configure your currency settings based on the type of currency available for your price and the way you want the price to be displayed.
- Create the required pages for the school. The setup wizard wants all the pages you create to be optional. However, you should at least create a course page and a checkout page. Profile pages are useful for users (students), and being a teacher page is not necessary unless you want to create a Udemy-like site in which you host courses for other teachers.
- If you want to use it as a payment method, please enable PayPal and enter your PayPal email address. ThimPress also provides advanced plug-ins for other payment gateways such as Stripe, Authorize.net and 2Checkout.
- Enable LearnPress’s email system in the next step. The system can help you communicate with your students. Admittedly, email marketing is one of the biggest drawbacks of the plug-in because they lack support for email marketing service providers. The solution used by many LearnPress customers is to purchase paid member Professional add-ons and integrate paid member Professional with their email marketing service providers.
- Select to complete the step. I chose to create a course so that we could get to this point directly in the tutorial. Configure some miscellaneous settings at will by returning to the dashboard.
Step 2: create a course
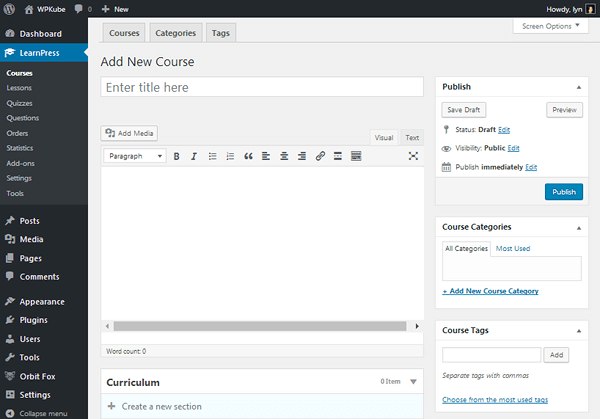
The first thing you’ll notice is how similar or almost identical the LearnPress course editor is to the WordPress editor. This gives the tool an advantage over platforms such as Teachable and Udemy because it uses UI that you are already familiar with.
First of all, give your course a title and description, just like you write a blog post.
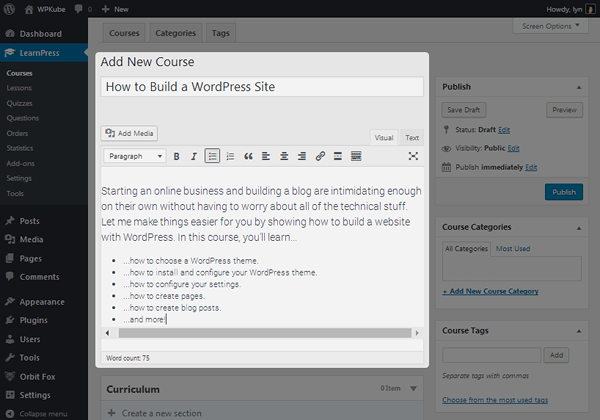
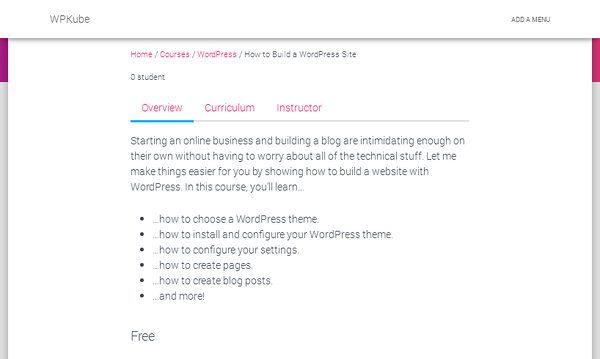
Some additional projects that are similar to the way blog posts work are the Save as draft / publish feature, which you can use to control the status and classification of your blog. You can build a structure in your school by assigning courses to categories and assigning labels to courses. This is a screenshot of my course page using Hestia themes:
Let’s see how to add a course to your course.
Step 3: create your first lesson
You can break up the course into multiple parts and split those parts into courses. Start by creating your first part, such as an introduction to welcoming students to the course and explaining how to use the course software.

Be sure to provide a description of your section (the gray text in the screenshot above). One or two short sentences will suffice. After that, you can begin to add courses to your section, which have blue book icons associated with them. You can hide, edit, or delete the course completely. This is what the course’s Edit screen looks like, because you spend most of your time adding content to the course.
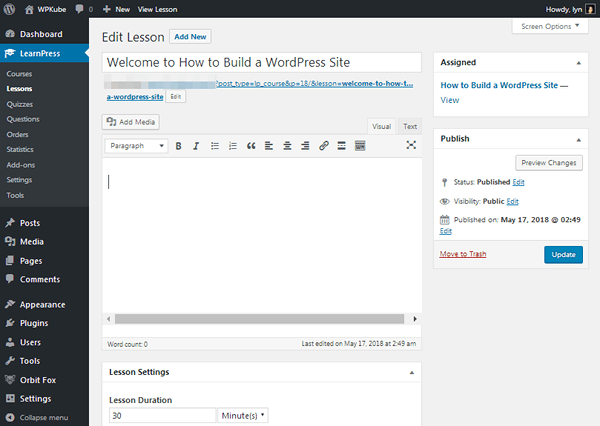
The preview function is an interesting feature. It allows users to view courses without having to buy or choose to join the course. This is a sales technique used by many online lecturers because it allows users to access free courses or “free samples”, which may further encourage them to buy if you like. It’s nice to see such a feature available in the free LMS tool.
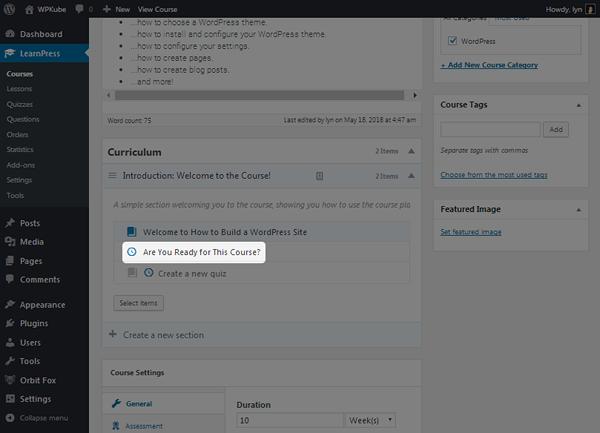
Alternatively, you can use the clock icon to add the quiz to your section, where the editing page has many different settings for you to configure. Elements include a typical WordPress editor that can be used to add descriptions to quizzes, modules that allow you to add questions in true / false, multiple-choice, or single-choice formats, and affecting students and quizzes.
What do the students see?
Again, I use the Hestia theme in these examples, so your course page will look a little different. I’ve shown you what the course sales page looks like using this plug-in, so let’s make changes and look at the course page.

You can add feature pictures to your course, just as you can add to blog posts. When you do this, the image will be used to represent that particular course on your course page, which you can clearly see in the screenshot above. You will also notice that visitors can easily find courses on a specific topic using search elements. Finally, you can see that this page shows the elements of the course price, instructor, and buy button, but unfortunately, I don’t see the settings that allow you to change.
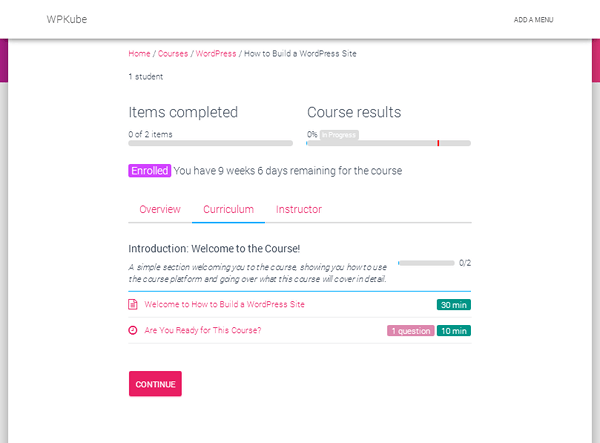
The following is what your students will see when they register. Again, your course will look different depending on the topic you use, the content you add, and the settings you configure.
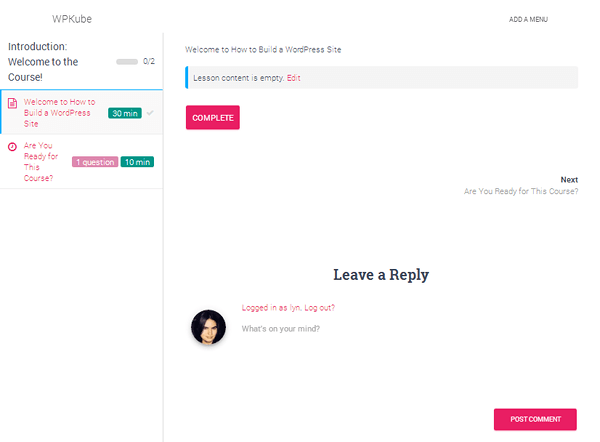
This is the interior of the course, and Hestia looks good. Your students can mark the course as completed when they are ready to move on to the next section, or comment (if you have enabled it) in case they have questions. It may be more efficient to create a forum, but fortunately, ThimPress offers bbPress integration for free.
Advanced topics and add-ons

The LearnPress plug-in itself is completely free. There is no advanced version of it. The closest thing to the premium version of the plug-in is the premium bundle, which sells for $249.99. They either come with each add-on that ThimPress provides for LearnPress, or they come with add-ons and advanced topics. An important feature that comes with them is ThimPress.com ‘s forum support.
The company offers 24 advanced themes for LearnPress, some of which are multi-purpose, while others are designed for specific areas. The normal price of the theme is $129, but it is sold regularly. As for add-ons, you can use some free, including the aforementioned integration with BuddyPress, students can use to track the wish list of courses they want to buy in the future, “coming soon” features, and so on.
In addition to the integration of various payment gateways, advanced plug-ins also include score book functions, content drip irrigation functions, support for WooCommerce, and so on.
Summary
LearnPress is a powerful plug-in with many free features. It provides a very simple way to transform your site or subdomains / subdirectories on your site into an online school. Because it uses WordPress editors and meta-boxes that you are already familiar with, it’s even better that you don’t have to learn an entirely new platform. In addition, your customers may be more willing to buy courses hosted on the same website as your blog.
The only major drawback I can think of is the lack of support for email marketing service providers, the inability to change some features (such as the Buy button), and the lack of an appropriate version of the advanced plug-in. Add-ons and themes are great, but some customers may prefer to buy premium licenses with advanced support other than WordPress.org.

