
In this article, we will introduce all the knowledge about WordPress blocks. If you are an old-school WordPress user like me, you may still think that blocks are “new” WordPress because you started with a classic editor.
It has been more than five years since WordPress introduced blocks, but they are still one of the most misunderstood and least utilized CMS features.
WordPress blocks are a bit like Lego blocks-see, I told you there will be connections-they allow you to build and customize your site in a way that would have required professional website designers and developers just a few years ago.
This is one of the reasons why people love them so much. Once they get to know them, that’s it.
After I explained how they work, there is no doubt that you will fall in love with them, too.
- What is a WordPress block?
- What blocks does WordPress already have?
- How to create custom blocks using the WordPress plug-in
- How to create custom blocks without plug-ins
- Summary
What is a WordPress block?
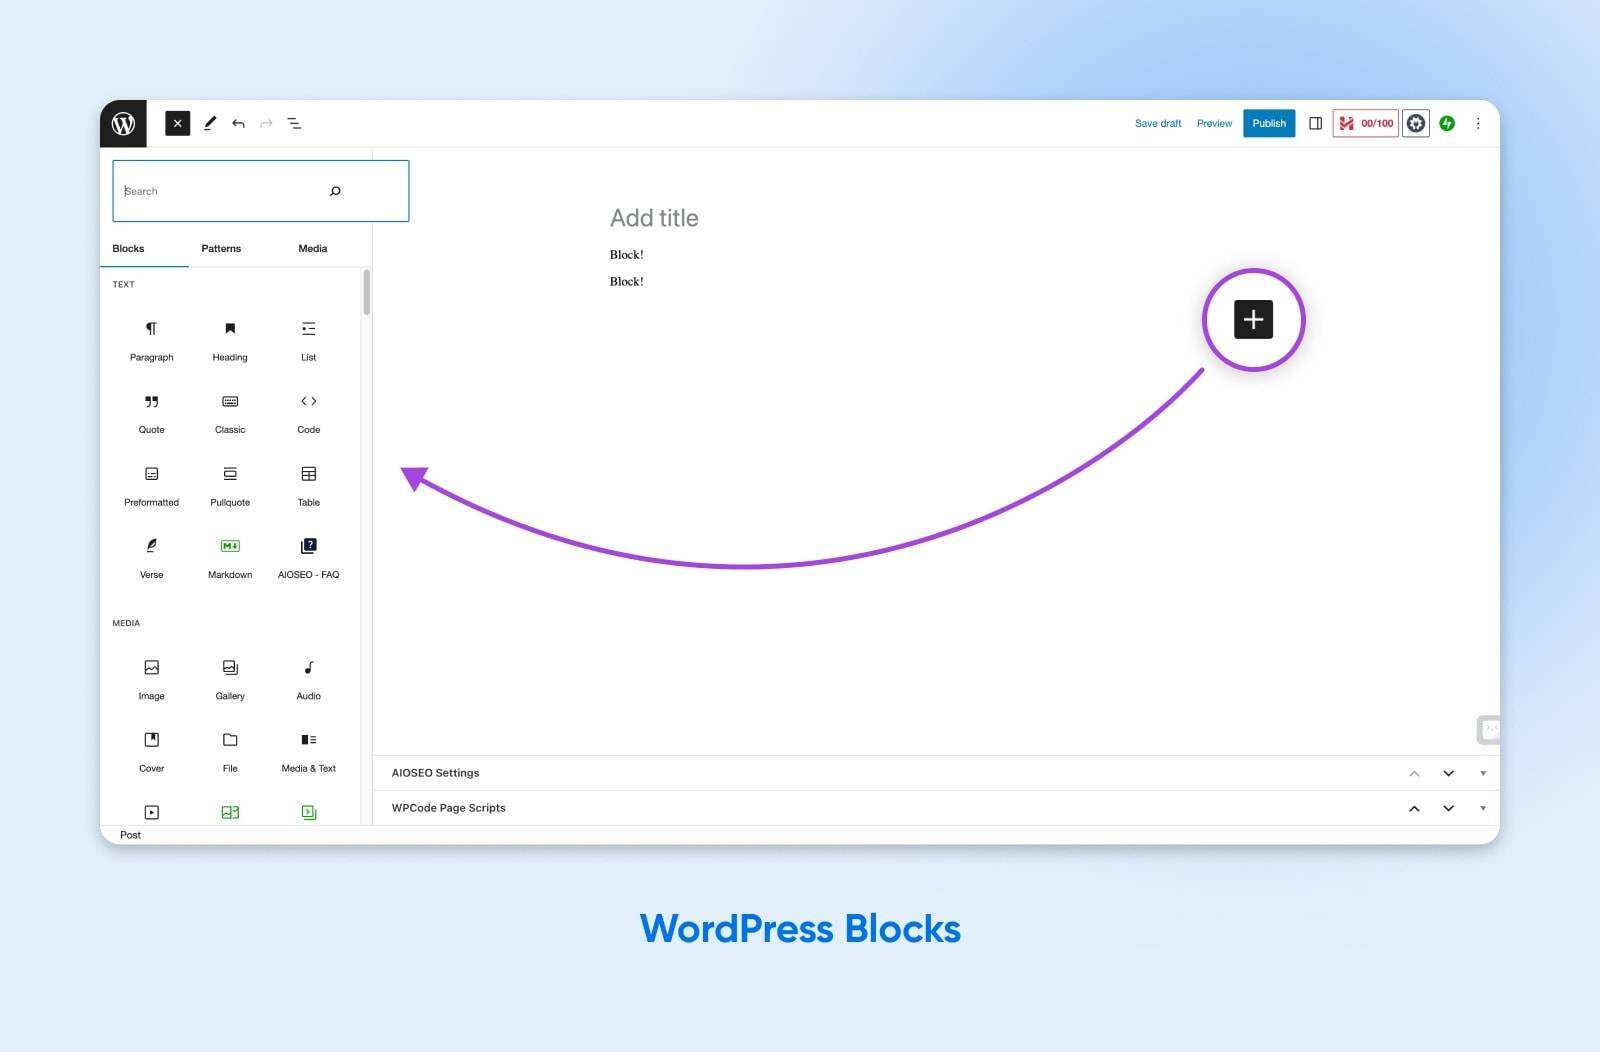
WordPress blocks, as the name implies, are like stackable building blocks that you can add to pages and posts on WordPress sites. WordPress5.0 joined the Gutenberg editor as well as building blocks, and most of us are now familiar with the Gutenberg editor. Blocks are now the standard way to customize WordPress sites, and you can use them throughout the site, not just in posts.
Come to think of it, it’s a bit like a website or page generator. You can click the “+” button to add blocks to the page or post, and then select from various block options. The current version of WordPress comes with more than 90 options out of the box.
Each block is essentially a widget. They can do a variety of things, such as embedding content from other sites or services, adding new features such as calendars or contact forms to the page, or even adding specific content in a predefined format.
In addition, most blocks have custom options that allow you to adjust the way they are displayed or function on the site.
The WordPress Block Editor is a major upgrade to the classic editor. In the days before Gutenberg, WordPress users could only add text and pictures to posts before they could dive into custom code.
Note: if for some reason you cannot access blocks in the WordPress editor, there may be two reasons: first, your WordPress installation may be seriously out of date (for example, a few years ago). Second, the classic editor plug-in may have disabled the block editor. After activating the plug-in on the WordPress website, you will restore the classic editor experience. Check the plug-in page in wp-admin to determine if this situation exists.
What blocks does WordPress already have?
By default, the Block Editor provides a large number of available blocks. You can use these blocks to customize WordPress themes, let writers and bloggers add rich content to articles, pull in social media content, and so on.
Let’s take a look at some of the most popular and useful default Gutenberg blocks.
The most common block
Blocks are required to add any type of text or image. This means that the most common blocks are usually different styles and types of text or image elements that you may add to the page.
For example:
- Text blocks-each paragraph you write in the Block Editor has its own text block, but text blocks are not limited to paragraphs. You can write a little or a lot.
- Picture block-when you want to show and tell, you can add a picture to it to add some highlights.
- List block-do you need to write an outline? Do you want to write an orderly list? You can use the list block to do this!
- Photo Gallery Block-sharing vacation photos or product photos has never looked better. ?
- Table block-easily create pricing tables or share spreadsheet data.
- Citation Block-want to draw attention to an observation? Inspired by a sentence related to the article you are writing? Highlight it using the reference block!
These elements can be added to the site through the Block Editor. You can then locate and style them in the content section of the page.
Embedded content block
Blocks make it easy to embed external content and gadgets into WordPress sites without adding new plug-ins or third-party add-ons.
The following are some of the most common embedded block types that can be used to insert external content:
- Calendar block
- Customize the HTML block
- Twitter block
- YouTube block
- Customer evaluation block
- WooCommerce
- Contact form
- common problem
Using these block types, you can go beyond a basic text editor to create interactive content with a variety of functions and features.
Dedicated block
The content here is very wonderful.
In addition to basic features and embedded content, there are a large number of advanced blocks that you can use in special situations. For example, you may want to improve your site’s navigation and user experience, or use WordPress as a complete site building tool.
Here are some things worth looking at:
- Button block
- Column block
- Block
- Post merry-go-round block
- Post content block
- Query Loop Block
- Reusable block
- Short code block
- Directory block
Through these blocks, you can call in custom content directly from the WordPress database, or completely customize the layout, spacing, and flow of each page or post on the site.
It’s all good.
But what if the block you need is not included with WordPress by default?
Fortunately, blocks can also be customized. Just like widgets, you can add new blocks or even create your own blocks to meet the needs of site design and templates.
How to create custom blocks using the WordPress plug-in
By far, the easiest way to create custom blocks is to use plug-ins.
The Genesis Custom Blocks plug-in makes it easy to create and start your own custom blocks. You need to have a basic understanding of HTML and CSS to create blocks and styles according to your needs.
With these basic skills, the plug-in can solve all the difficult setup and configuration work, thus implementing a new block.
Step 1: install the Genesis Block plug-in
First thing to do: go to the WordPress plug-in directory and install the Genesis Custom Block plug-in.
Don’t forget to go to the plug-in tab and activate it.
Step 2: add a new block
After installation and activation, you should see a new option in the left navigation of the WP admin panel.
Click Custom Blocks & gt; Add New.
Step 3: customize the editor field
Now we can start creating custom blocks.
The first step is to set fields and custom options that will appear when you use the block on the site.
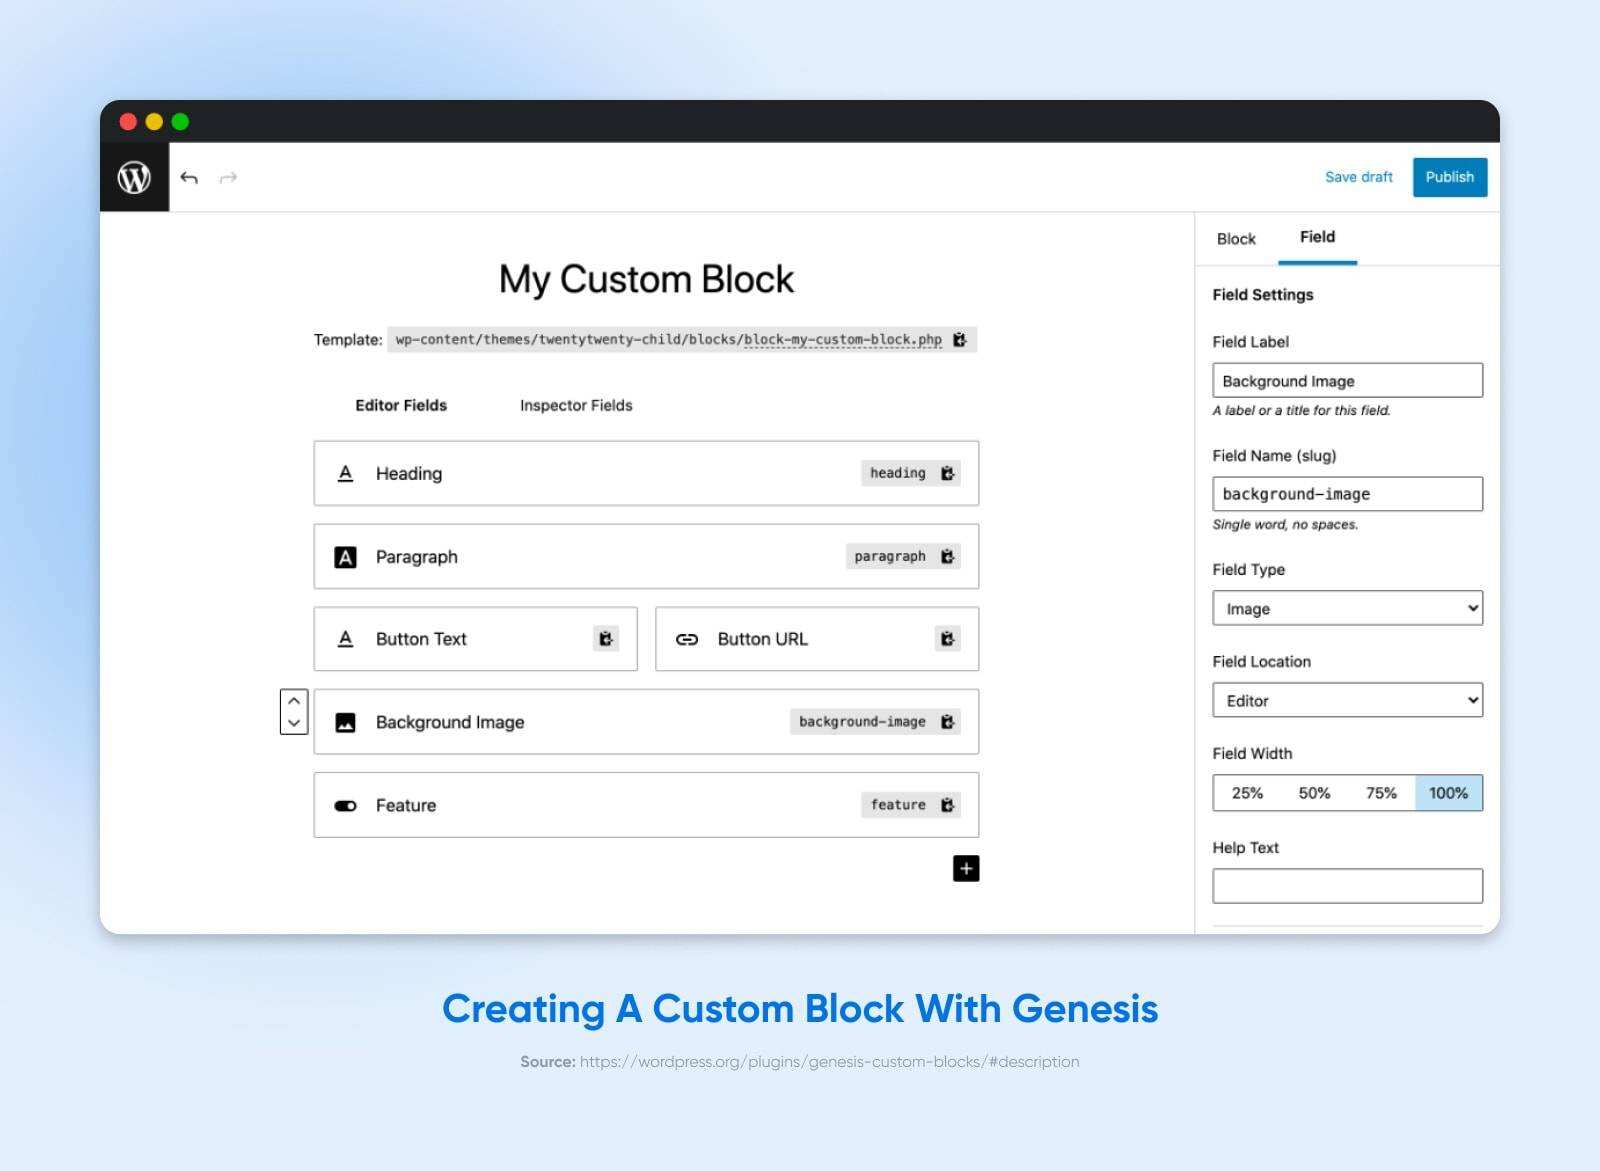
You can think of it as a mini block editor. You will add custom fields and data that will be pre-populated by the block itself or collected by the editor or by the user who added the block to the page or article.
For example, if you want to create a custom call to Action (CTA) block, you can add the following fields
- Title text
- Subtitle text
- Button text
- CTA button URL
Each field has a label, name, and type. You can even customize the width or add help text for other editors or writers to use.
Step 4: customize tags and CSS
Now that we have set up the back end of the block, we need to tell WordPress how to actually display the added content.
Here, your knowledge of HTML or CSS will come in handy.
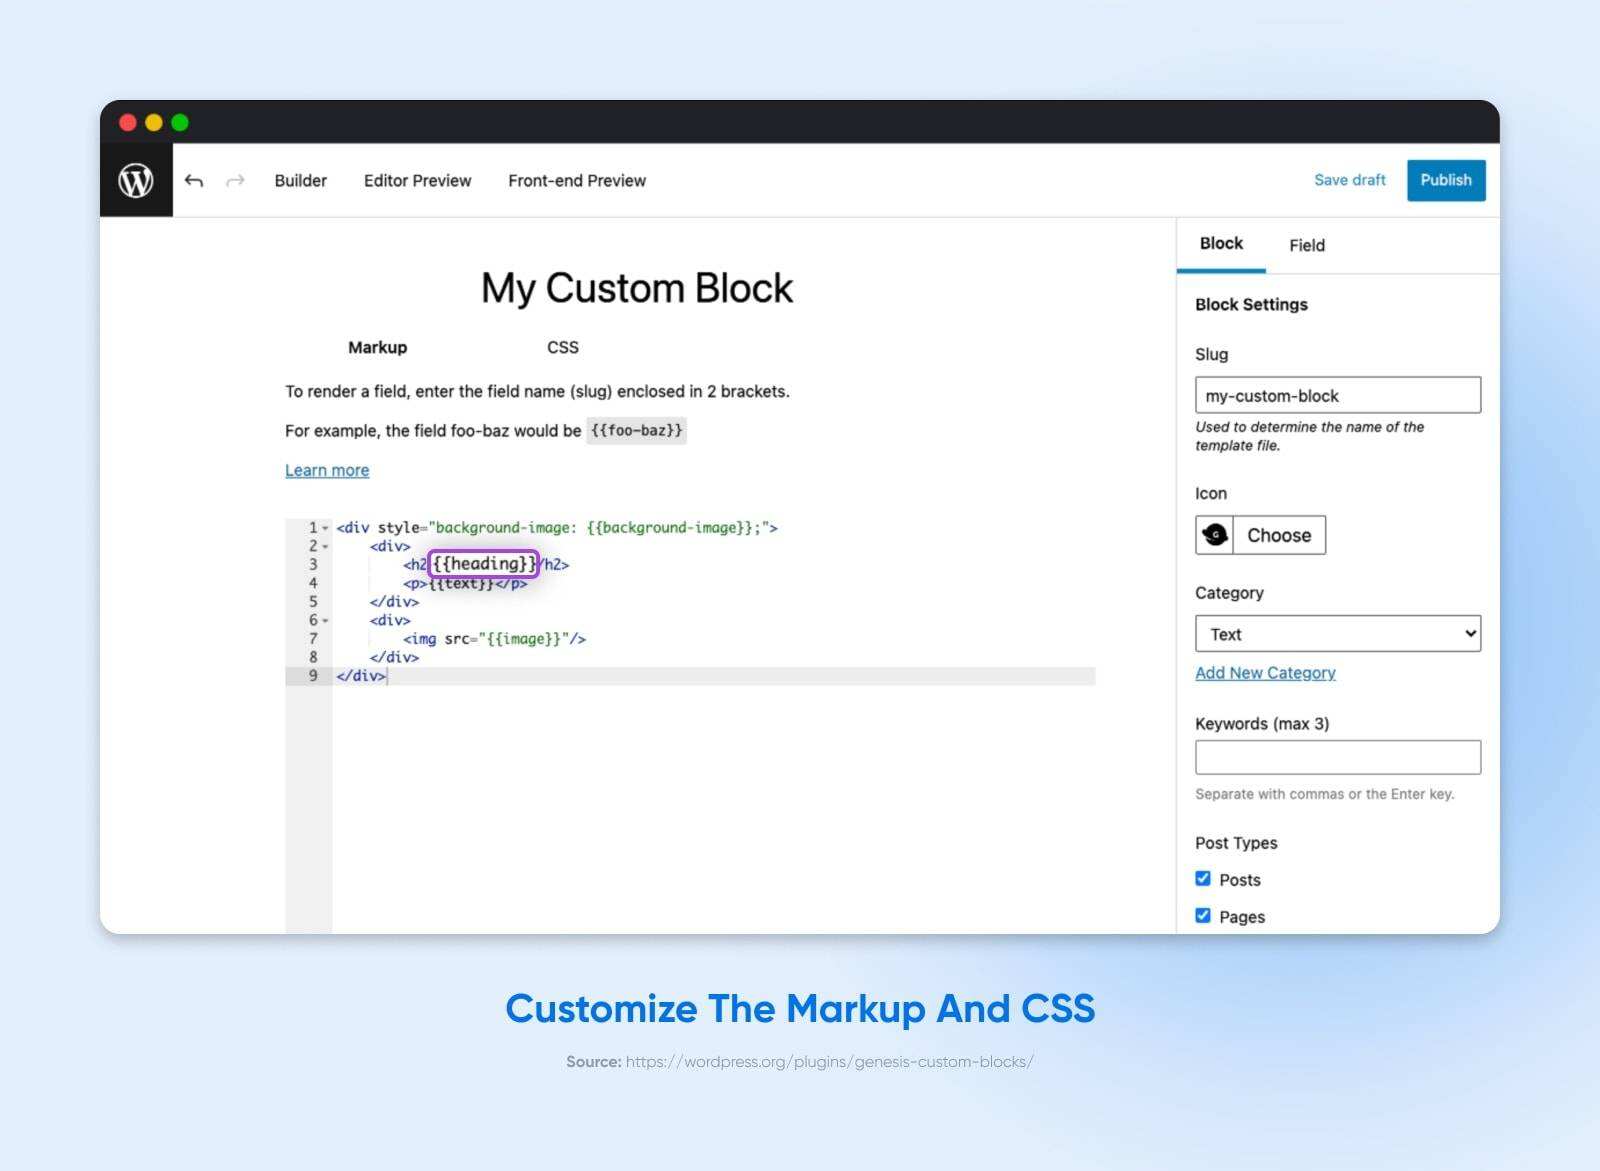
In the next step, you will basically write code blocks that will be generated dynamically from the input configured for the code block editor.
You can write it in plain HTML and CSS.
You can also extract variables from the Block Editor using double parentheses and the field name (slug) in the editor. (for example, “{{button-text}}”).
Step 5: add a block
Once the block is set using the Genesis plug-in, it appears in the list of available blocks in the WordPress Gutenberg editor.
Just click “+” and find the new block based on its name.
After the addition is complete, you should see the Gutenberg Block Editor screen with the fields and options you configured.
okay!
Now you can use custom blocks to add them to pages, posts, sidebars, or wherever you need them.
How to create custom blocks without plug-ins
If you want to learn more about how to create new blocks from scratch, you need to have more advanced knowledge.
In this tutorial, we will walk you through the basic steps of using the create Block tool so that you can create fully customized blocks without using plug-ins.
Warning: this is an advanced workflow: this is an advanced workflow. It requires you to delve into the command line.
You need to know PHP, JavaScript, HTML, and CSS.
Don’t say we didn’t warn you!
Step # 1: set up Node.js, NPM, and local WordPress installation
Before using create-block, we need the correct settings and access rights.
The following are prerequisites:
- Local WordPress installation
- Terminal or command line settings
- Node.js and npm
You may also want to use nvm (Node version Manager) to install or update compatible Node.js versions.
With this setting, we will use the NPM command “npx” to execute the create-block package directly from the managed directory in the cloud.
Step # 2: run the create Block package
Now, take a simple step.
Navigate from the terminal to the / wp-content/plugins directory of the Web site on your local computer.
Then use NPX to run the create-block package:
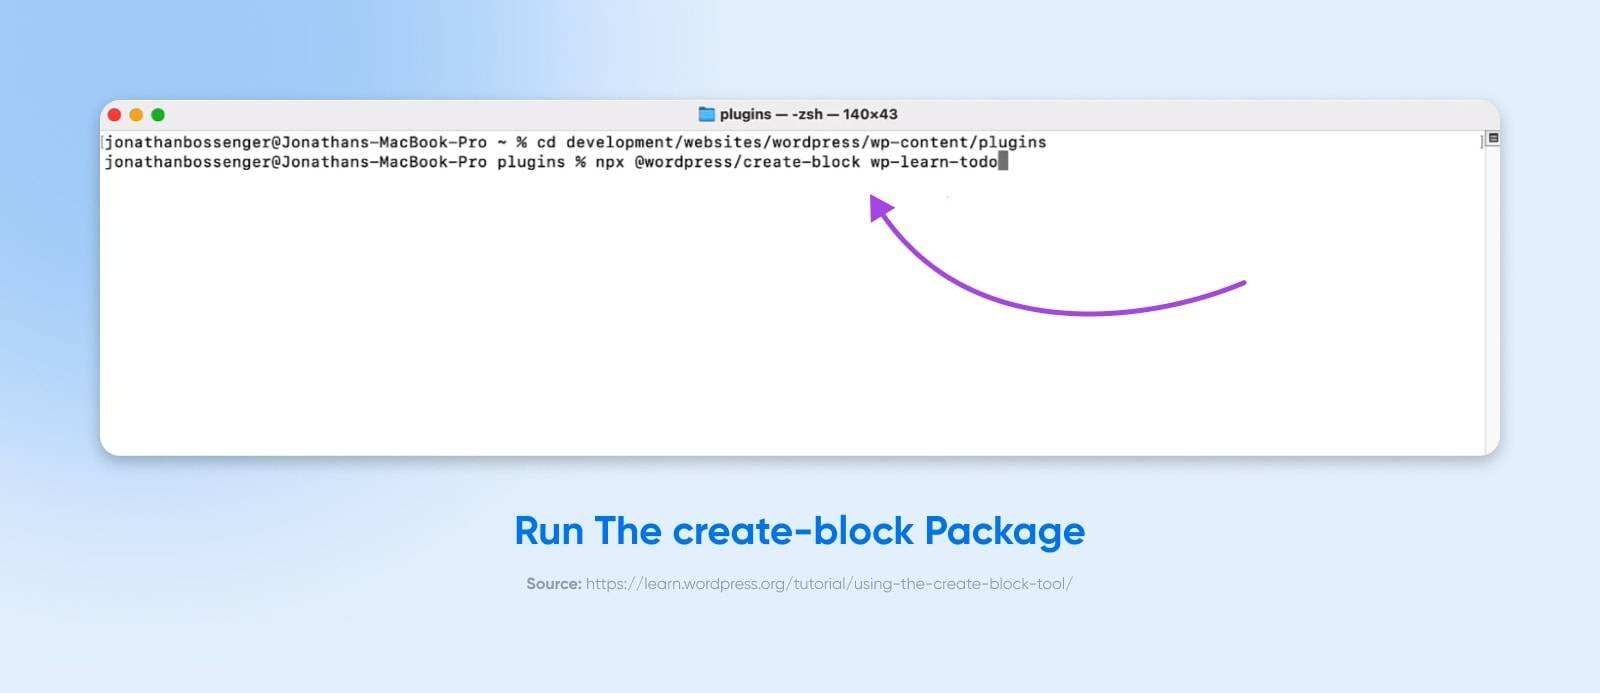
npx @wordpress/create-block {{block-name}}
The package will complete the so-called “block scaffolding” setup process. It registers all relevant elements, generates the correct file and directory structure, and generates editable and available default code for the entire block.
Step # 3: activate the plug-in
The new block itself will appear in the form of a plug-in.
After creating the block package, you need to jump to the WP management page.
Go to the “plug-ins” page and activate the newly created plug-in with the same name as the block you used in the npx command.
Step # 4: customize the block code
You will customize the contents and functionality of the block in the / src/ folder within the plug-in directory.
You will register the block in Index.js and write the main output code:
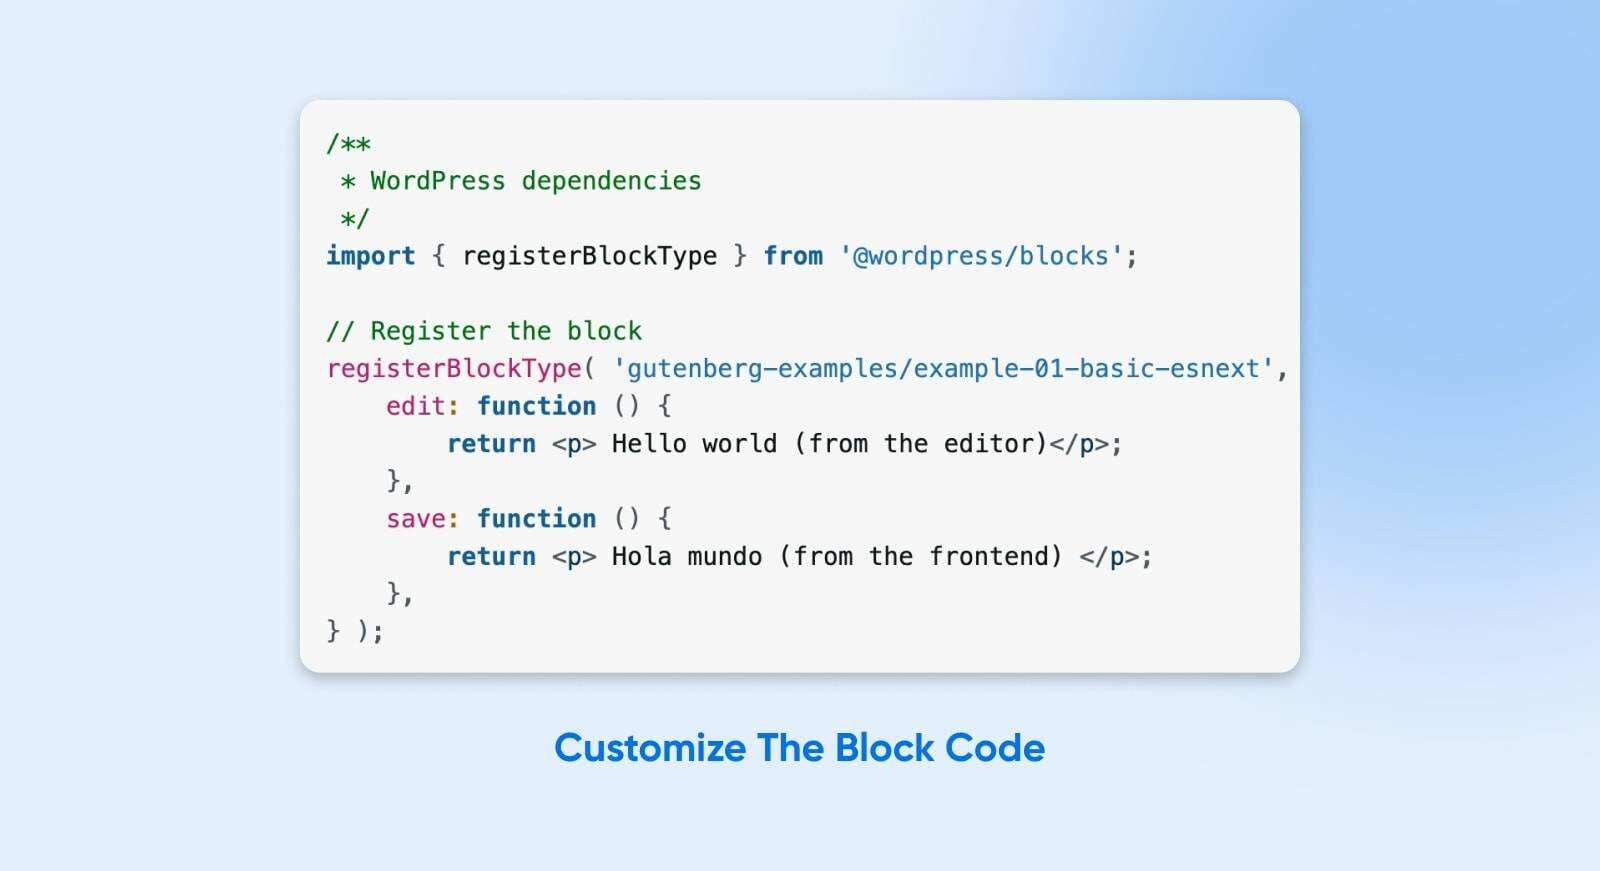
Notice that the registerBlockType function is set to handle both function block editor input (“edit”) and front-end display (“save”).
This is only scratching the surface of building functional blocks.
You may also want to know the complete documentation for writing functional blocks in WordPress Block API.
Once you have the basics, you can pull in additional dependencies, access external data sources, and whatever else you want.
Step # 5: add blocks in the Gutenberg editor
After you activate the plug-in, you can add blocks to any page or article in the Gutenberg editor.
Use the “+” button or the “/” command to access it, just as you would any other block.
Summary
Well, we’ve gone from the basic stage to the advanced stage, but the good news is, now you’re unstoppable.
With the default block options, the Genesis plug-in, and the ability to create your own blocks from scratch, there’s nothing you can’t do!
Because blocks are so powerful and flexible, there’s nothing you can’t create. Now that your WordPress site has almost unlimited functionality, you can create the site, application, or project of your dreams.

