
Google Tag Manager (GTM) is a powerful free tool provided by Google that allows website owners and marketers to manage and deploy marketing tags (code snippets or tracking pixels) on a site (or mobile app) without any coding skills.
In other words, it is a tag management system that allows you to quickly and easily update survey code and related code snippets (collectively referred to as tags) on a website or mobile application.
Why use the Google tag Manager?
By providing a user-friendly interface to implement tracking code, GTM simplifies the process of tracking user interactions without the continuous assistance of developers. Whether you are tracking basic analysis, monitoring specific events such as form submissions or clicks, or implementing more complex remarketing activities, GTM is a valuable asset. It increases flexibility in the area of digital marketing; you can test and deploy tags without having to rely on IT departments to write and release code, making the entire process more efficient.
In addition, GTM supports a variety of tags for different marketing platforms, not just Google’s suite of tools. This compatibility makes GTM a centralized tool for managing a variety of marketing data streams. Marketers have much more control over the data collection and reporting process because tags can be added, edited, and disabled at any time.
In a nutshell, the Google tag Manager is an indispensable tool for anyone who wants to simplify the code of the site and enhance marketing with minimum technical requirements.
Now, let’s take a look at how to install the Google tag manager on a Web site. It only takes four steps and can be completed in about 10 minutes.
Step 1: create an Google tag Manager account
It’s easy to start using Google Tag Manager. The first step is to set up an account. If you already have a Google account for services such as Gmail, Google Drive, or Google Analytics, you can log in to Google Tag Manager using the same account. If not, you need to create a new Google account.
- Enter the Google tag Manager. Open a browser and visit the Google tag Manager website (tagmanager.google.com). Here, you can choose to log in or create an account.
- Log in or register. If you already have a Google account, click the “Sign in” button; if you need to create a new account, select “Create account”. Follow the on-screen prompts to log in or create a new Google account.
- Create a GTM account. After logging in, you will be prompted to create a new GTM account. Click the “Create Account” button in the upper right corner.
- Enter account details. You need to provide a name for your GTM account. Google recommends that each company have only one GTM account, even if you have multiple websites, so this is usually the name of your company or organization. In the same section, you need to select your country.
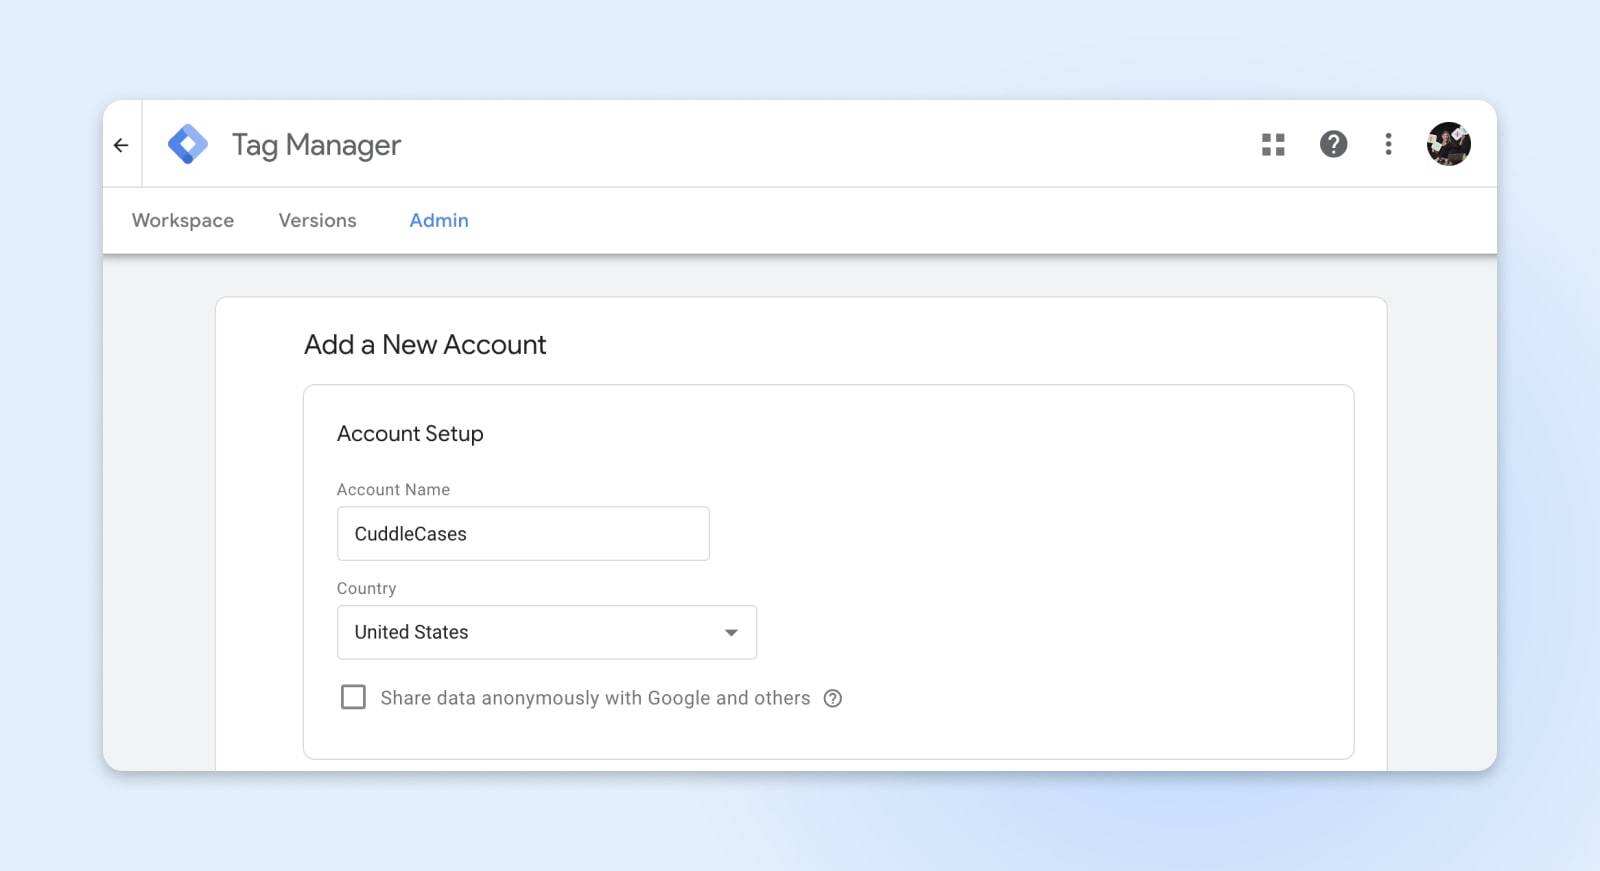
The next step is to set up and install containers and tags on the site. There are several different ways to do this, and here are two simple ways to do this.
Step 2: install the Google tag manager code on the website (2 ways)
Before installing GTM on the website, you need to create a container to complete the account setup. A container is a piece of code that you add to a Web site to make Google Tag Manager work. Typically, you create a unique container for each site where GTM is installed, so when you enter “Container Name” in the next part of the account setup process, you usually choose your site name or URL.
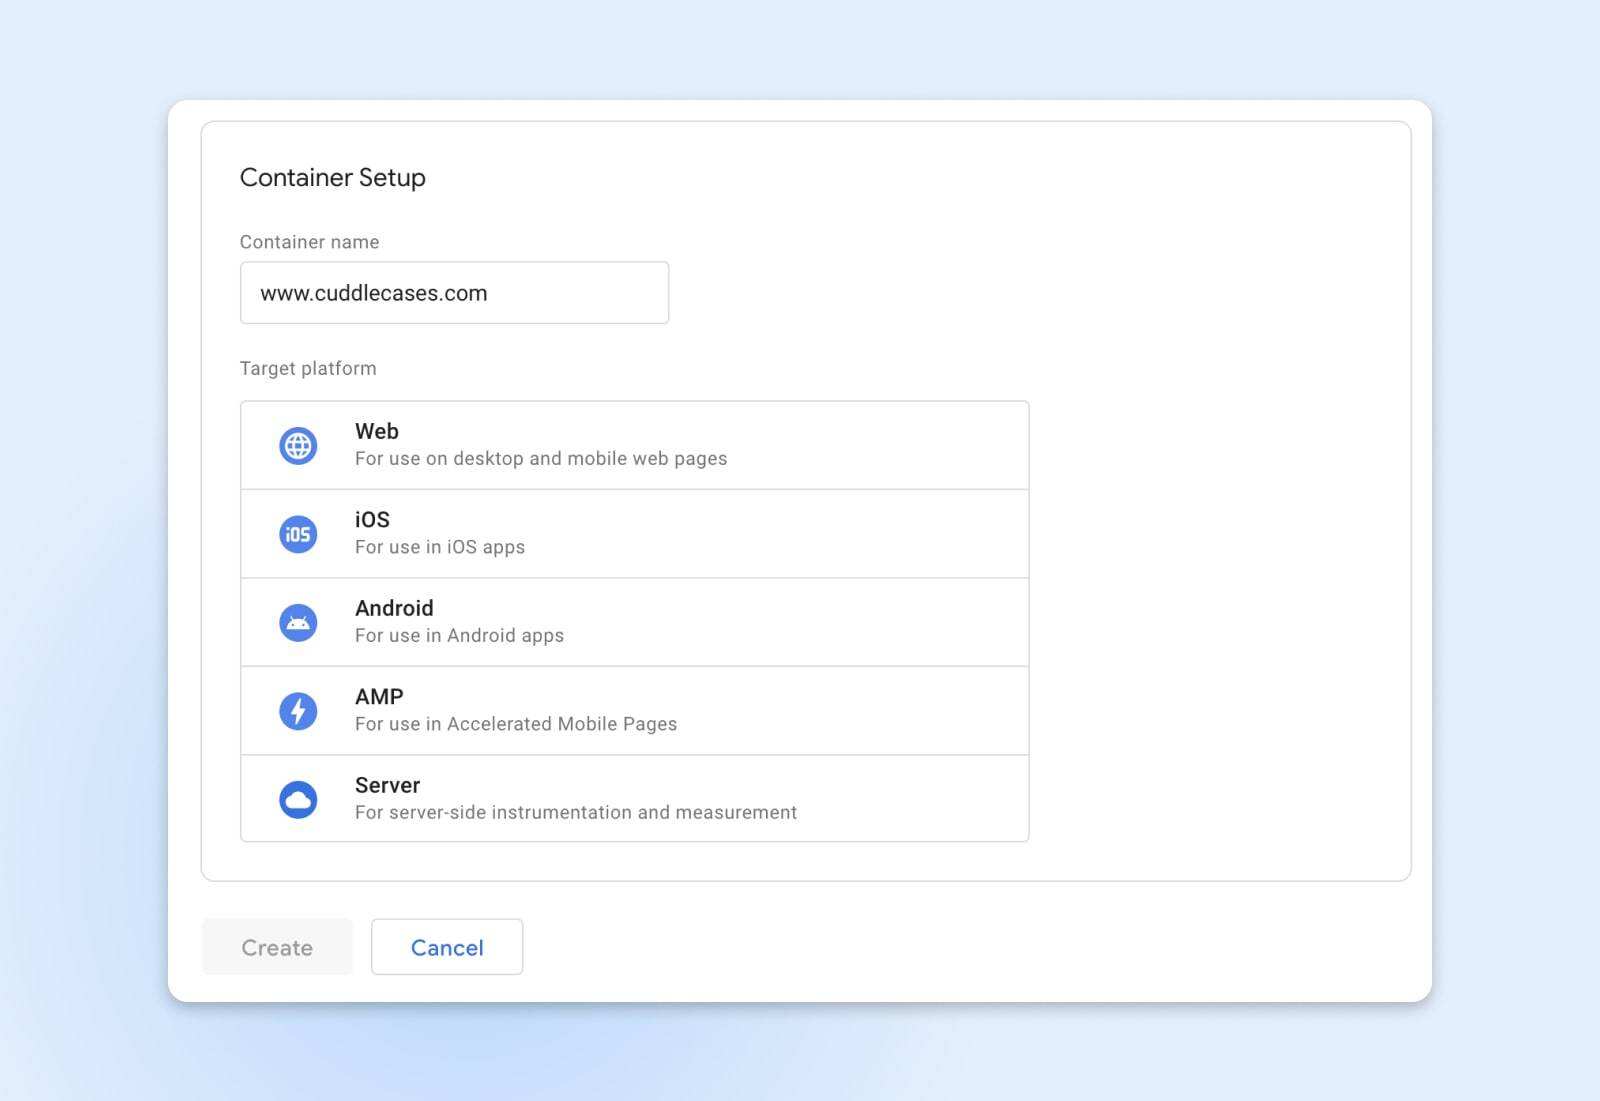
Next, select Target Platform. Select “Web” for the website.
Finally, click “Create”. This will complete the account registration and create the first container. You will see two pop-up windows:
- The first is the Google terms of Service. Select the check box at the bottom of the page and click “Yes” in the upper right corner to accept the terms.
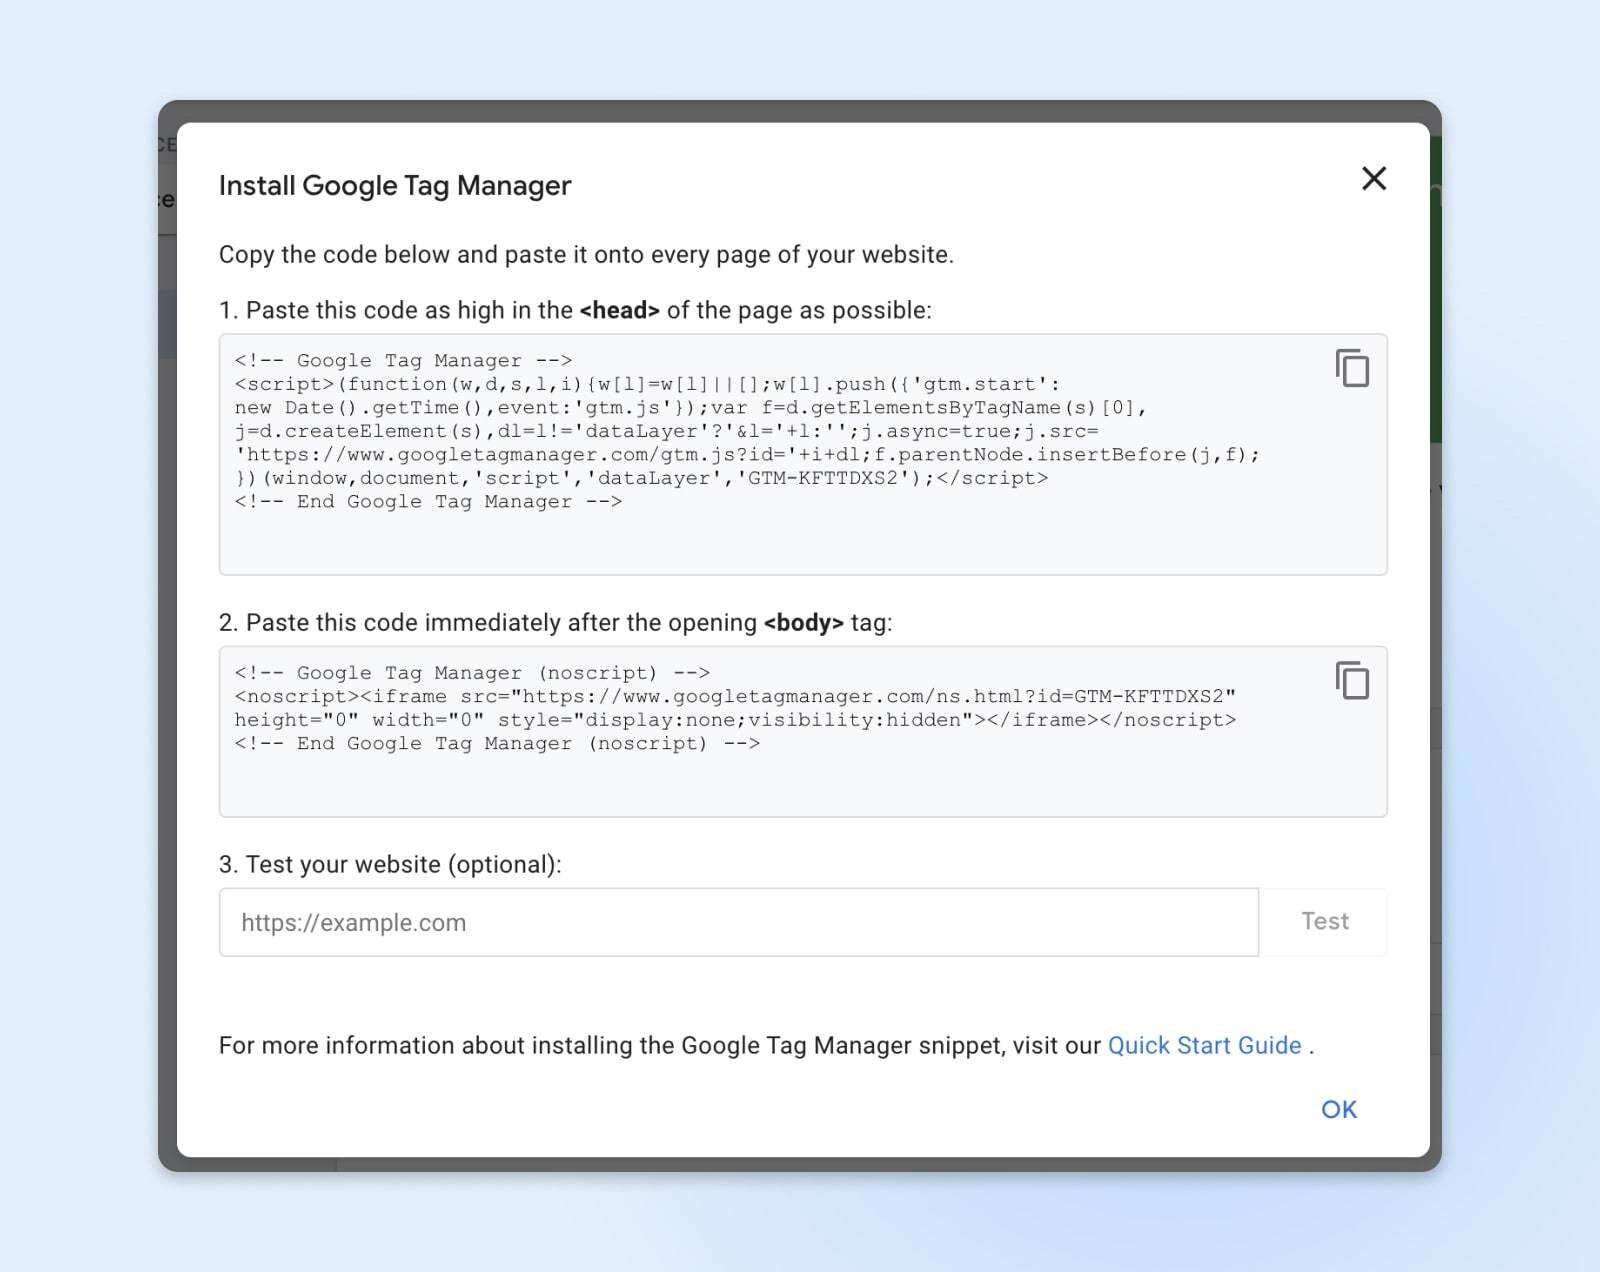
- The second pop-up window is the operation guide, which includes the code snippets required to install the container on the WordPress Web site. It also explains where to copy and paste container code, which is described in more detail below.
# 1: add GTM code manually
To manually add the container to the WordPress site, you need to copy the code from the pop-up window and paste it into the source code of the site.
The specific steps are as follows
Log in to your WordPress account. What you need to do next will vary depending on the WordPress version, hosting company, and theme you use, but you need to find the source code for the theme file.
The navigation bar on the right is a good start. In “appearance”-“theme File Editor”. If you can’t find the source code, skip to scenario 2, which is much easier for beginners.
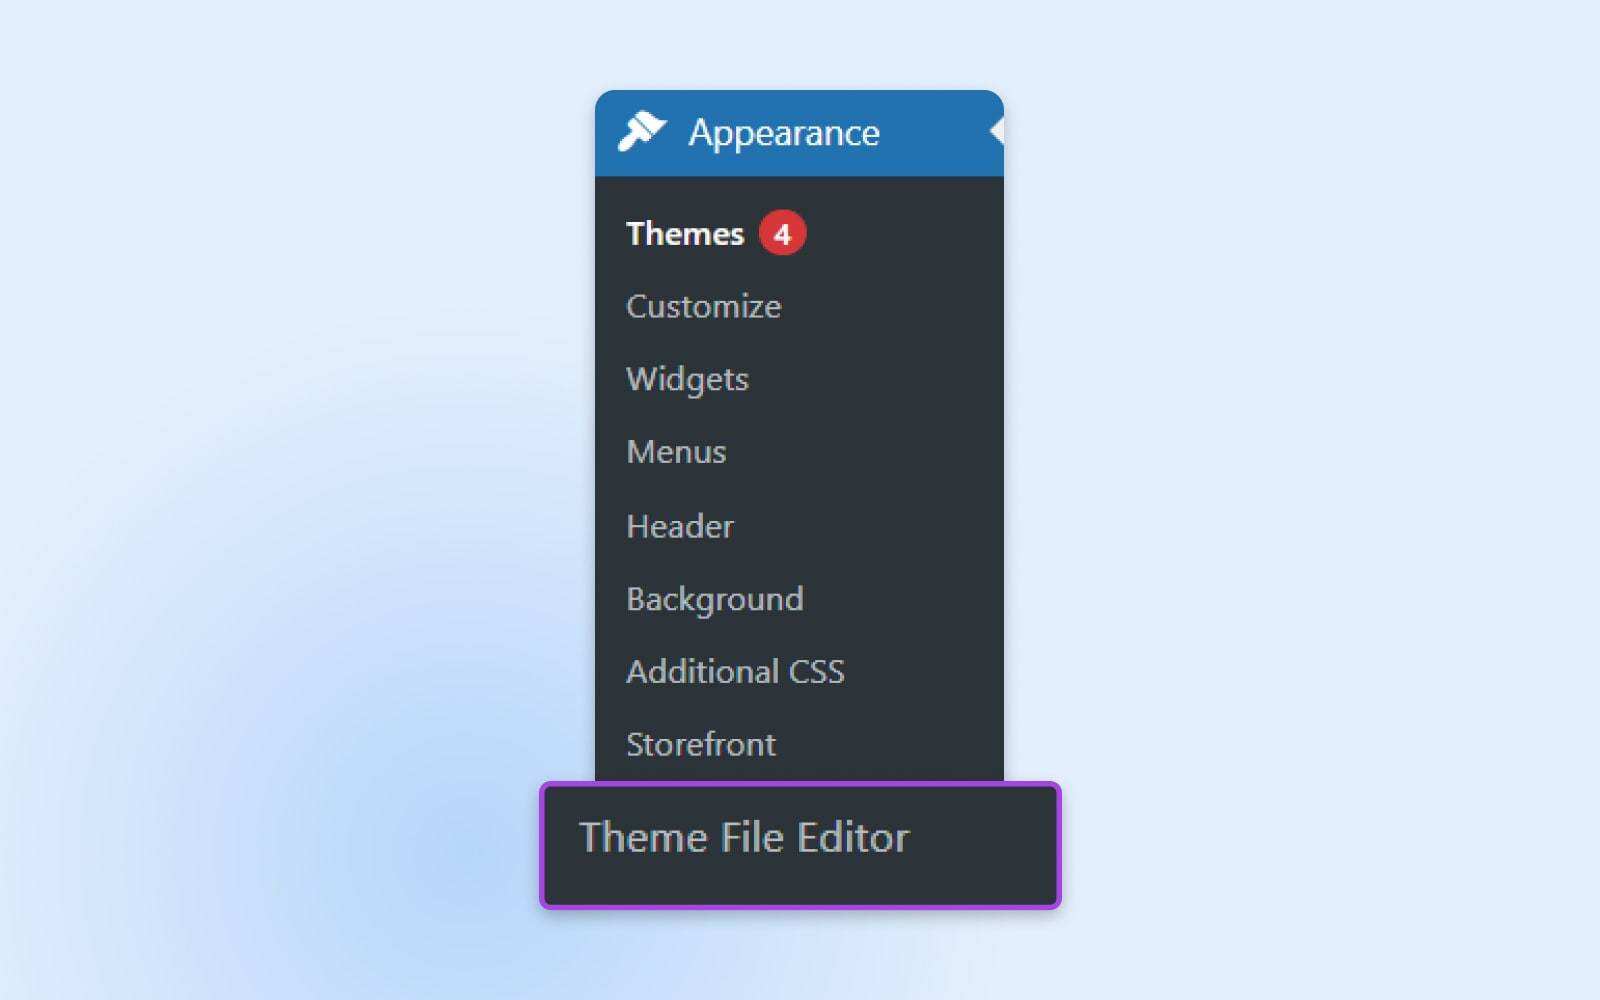
Because the design and functionality of WordPress themes are different, their theme codes may also be different. What you are looking for is the title file. Its common name is header.php. If you can’t find it, contact the theme developer for assistance.
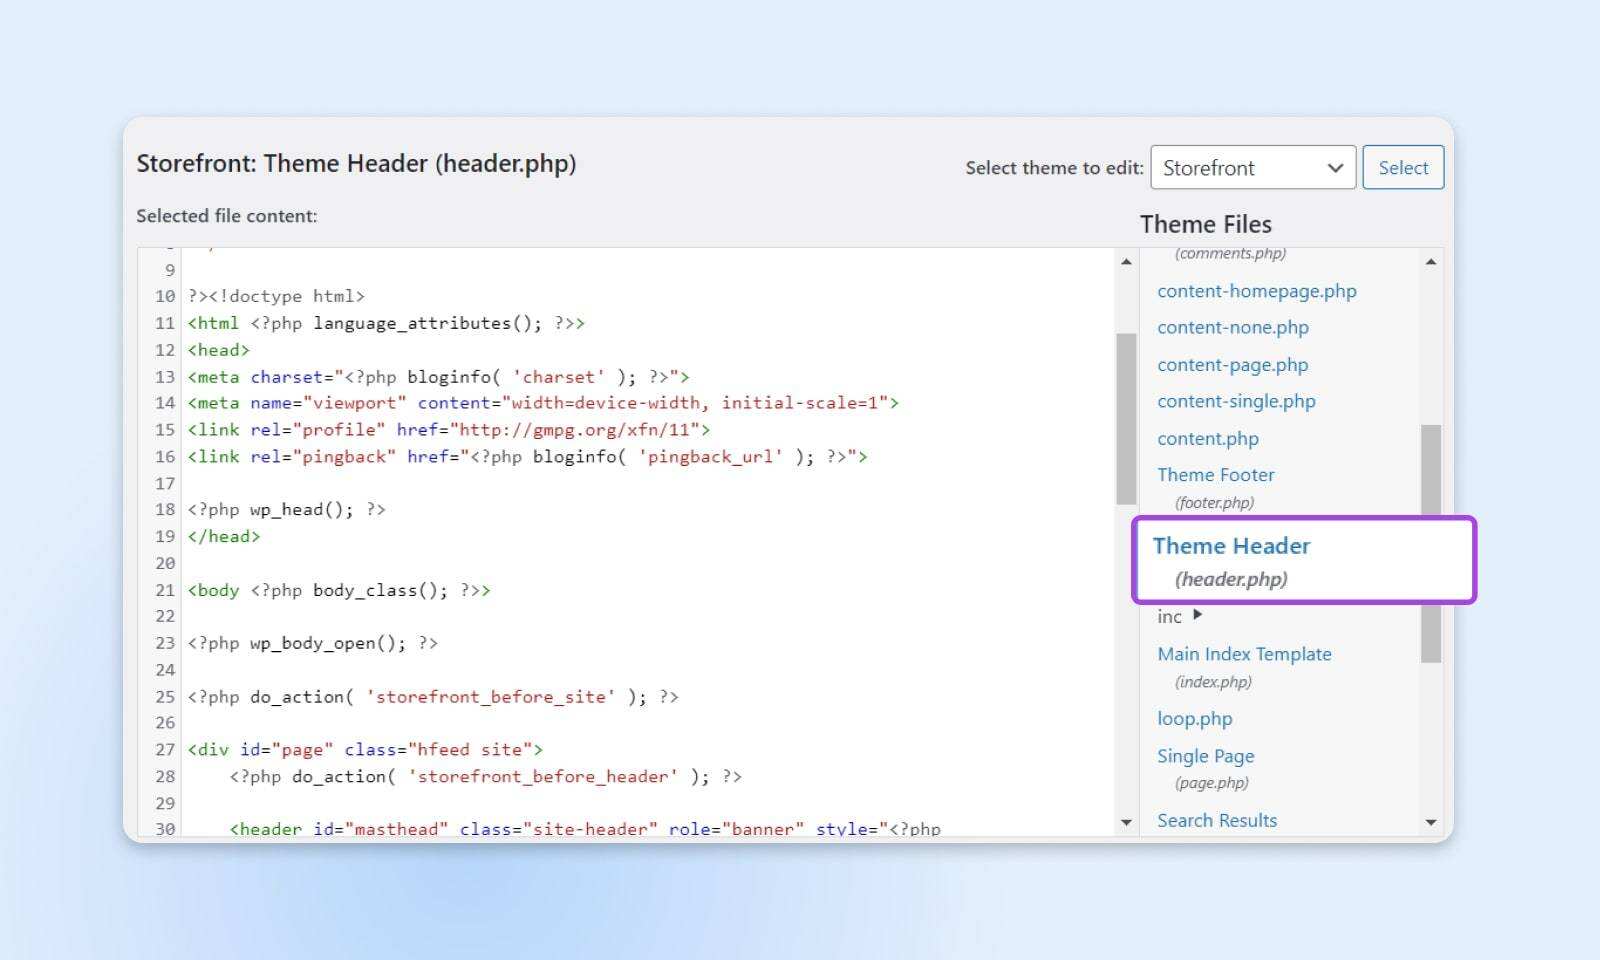
Find it in the header fileAndMark. Copy the first code snippet of the container and paste it into the
The part is as high as possible.
Then, find it.Mark. Copy the second code snippet of the container and paste it in theAfter the beginning of the mark.
Click Update File to save your changes.
Return to GTM and click “Preview”. This will open a new window that connects Google Tag Assistant to your website. Enter the website URL and click “Connect”.
Your website will open a new window and Google Tag Assistant will notify you if the connection is successful. After the connection is successful, click “Finish”, return to the previous window, and click “Continue”. You should see “Google Container Found” at the top of the screen (find the Google container), which indicates that the GTM installation on the WordPress site is complete.
Click the Submit button. Enter the version name and click “Publish”.
# 2: install GTM using plug-ins
The second way to install GTM on the WordPress Web site is to use plug-ins. This method does not need to edit the source code of the website, so it is more suitable for beginners.
Insert Headers And Footers is a simple, free plug-in. After creating the GTM account and setting up the container, here are the things to do:
Go to the WordPress management page. Navigate to plug-ins, then select add New plug-ins and search for “Insert Headers And Footers”. When found, click “install now”.

Go to “Settings” and then to “Insert Headers and Footers”.
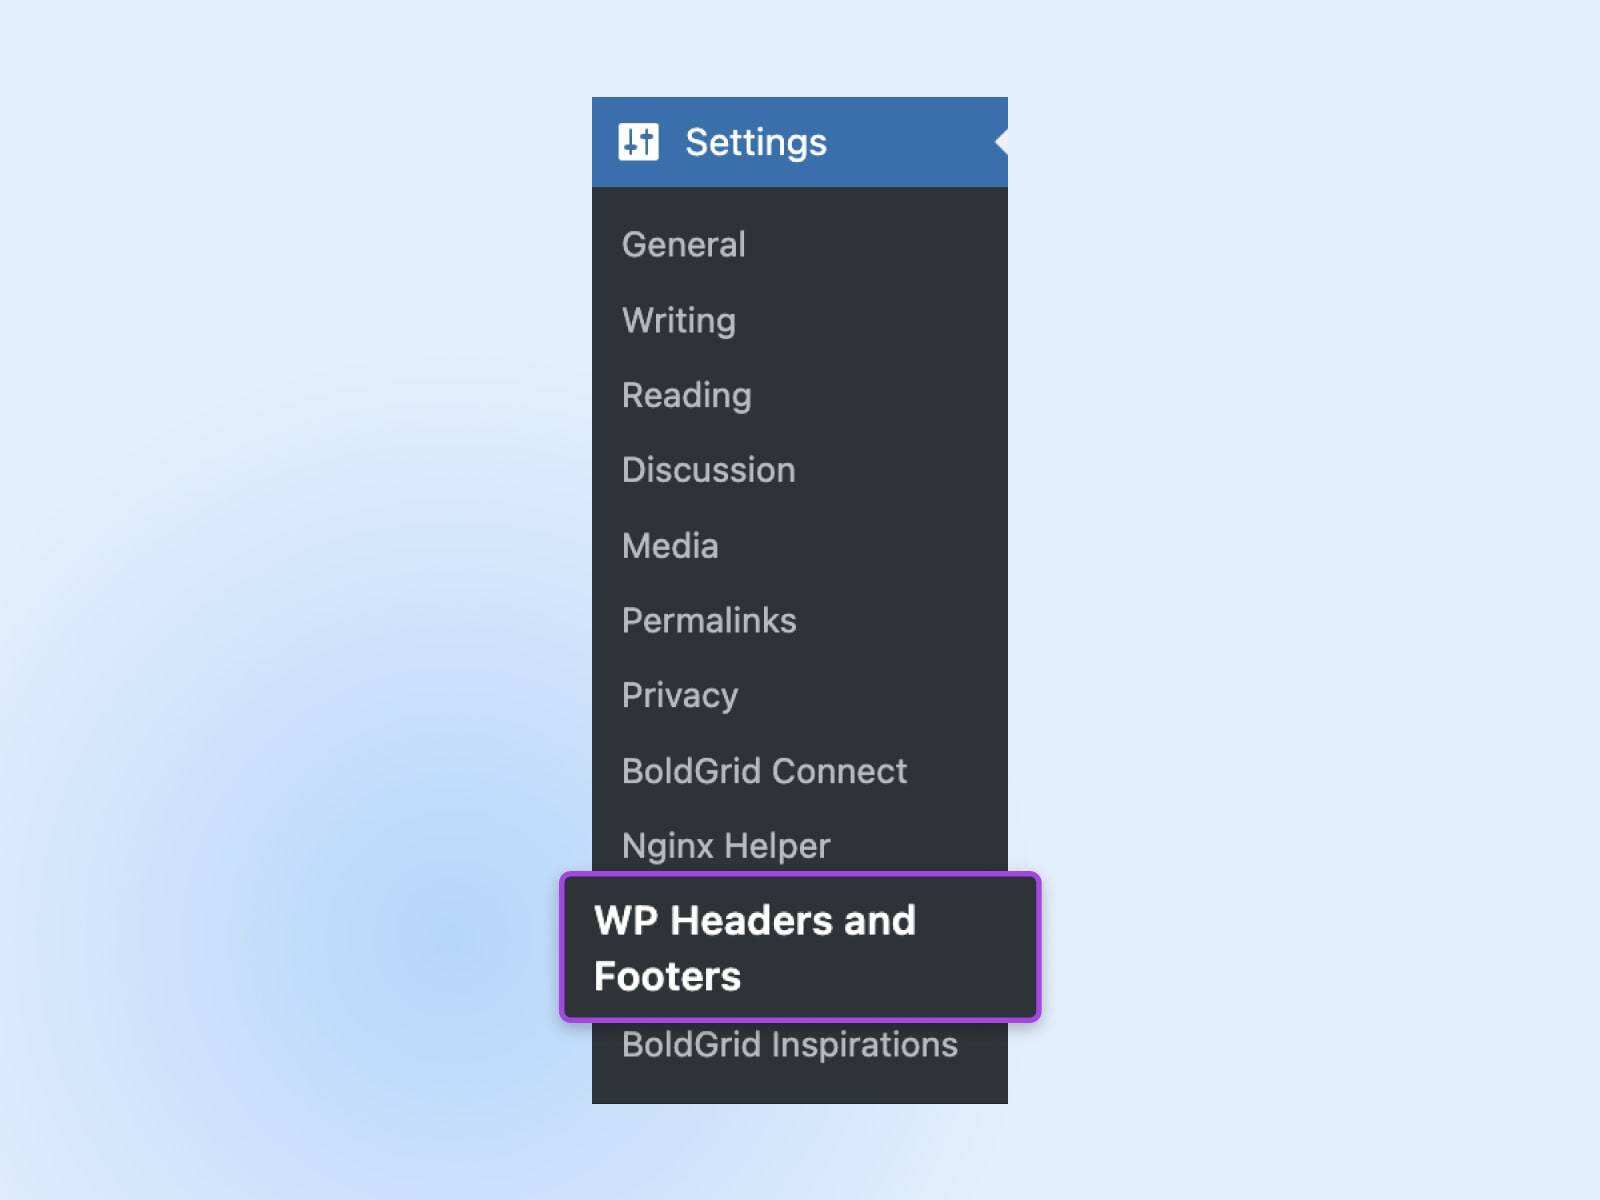
Copy the code snippet from the box of the GTM account and paste it into the appropriate box of “Insert Headers and Footers”.
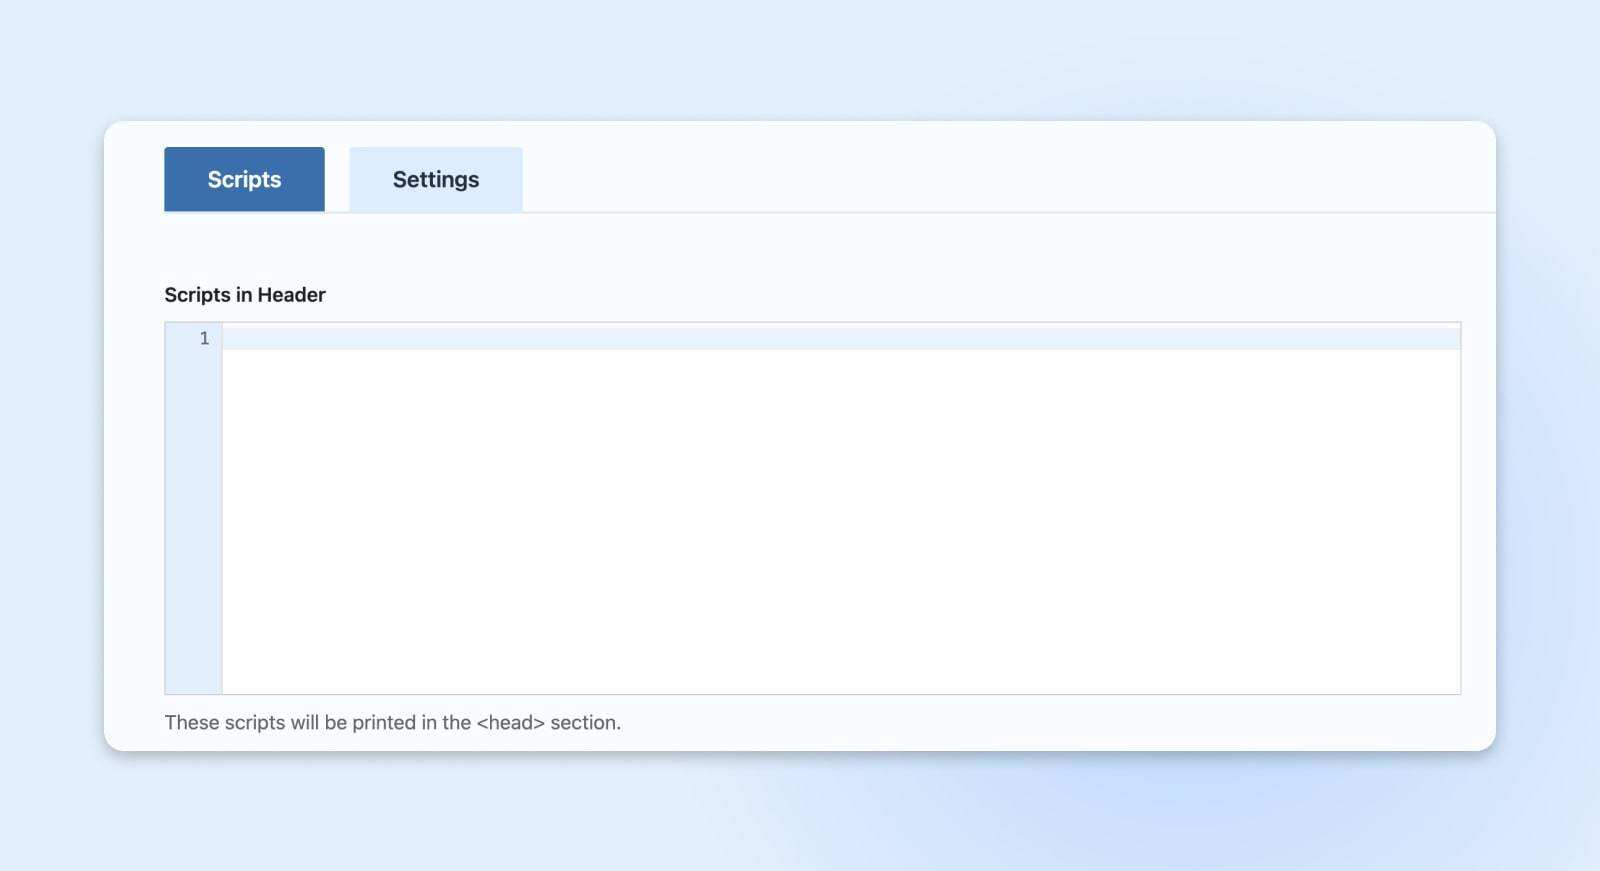
Click “Save”.
Note: of course, if you have installed some themes or plug-ins that provide custom code features, you can directly add GTM code to the plug-in or the functional module implementation of the theme. For example, the theme of development provides such a function.
Step 3: add tags
After you have installed the Google tag manager code on your Web site, you are now ready to add tags. Tags can be used for a variety of purposes, from tracking website analysis to re-marketing and conversion tracking. Here’s how to add the first tag:
Go to the Google tag Manager dashboard (https://tagmanager.google.com/) and select the name of the container you just created.
Click the Add a new tag button.
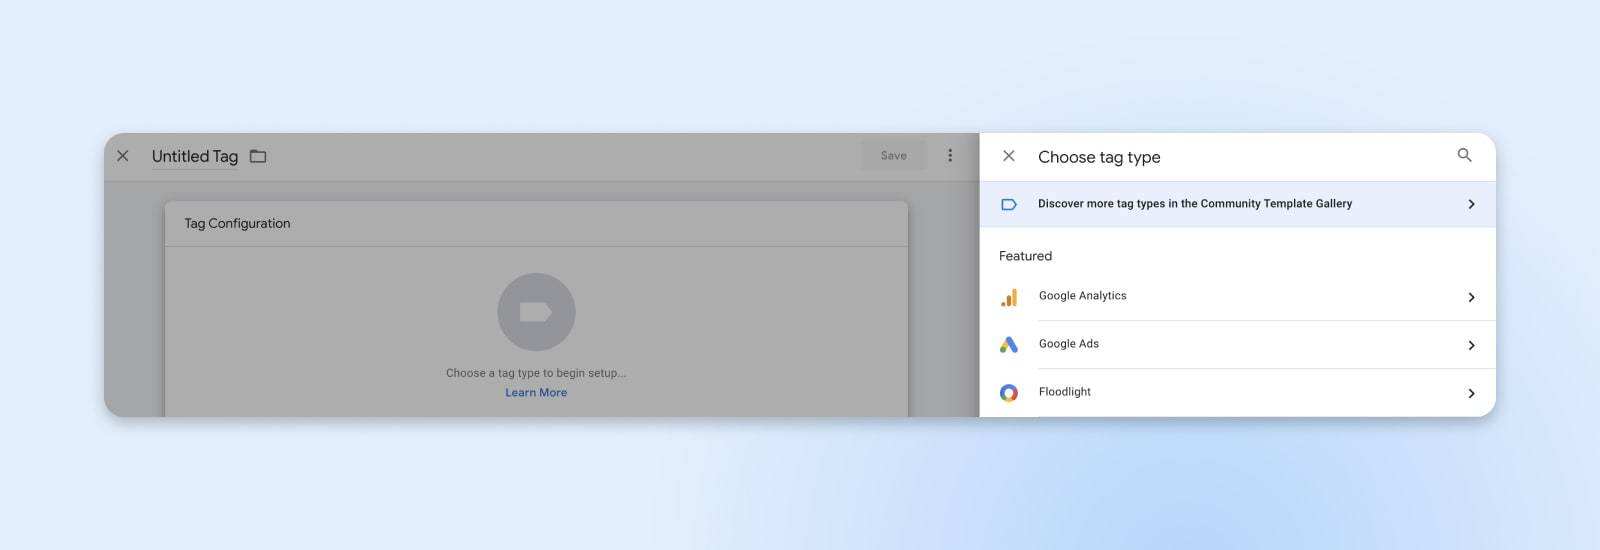
If you are just getting started, you may need to create a Google Analytics tracking tag. This is one of the most common ways to use GTM, and GA4 provides a lot of ways to use tags to track real-time site data and metrics. For GA4 tags, name them descriptive names such as “GA4” or “GA4 configuration”.
In the label configuration box, select Google Tag. In the “Tag ID” field, enter your Google label ID. Click “Save”.
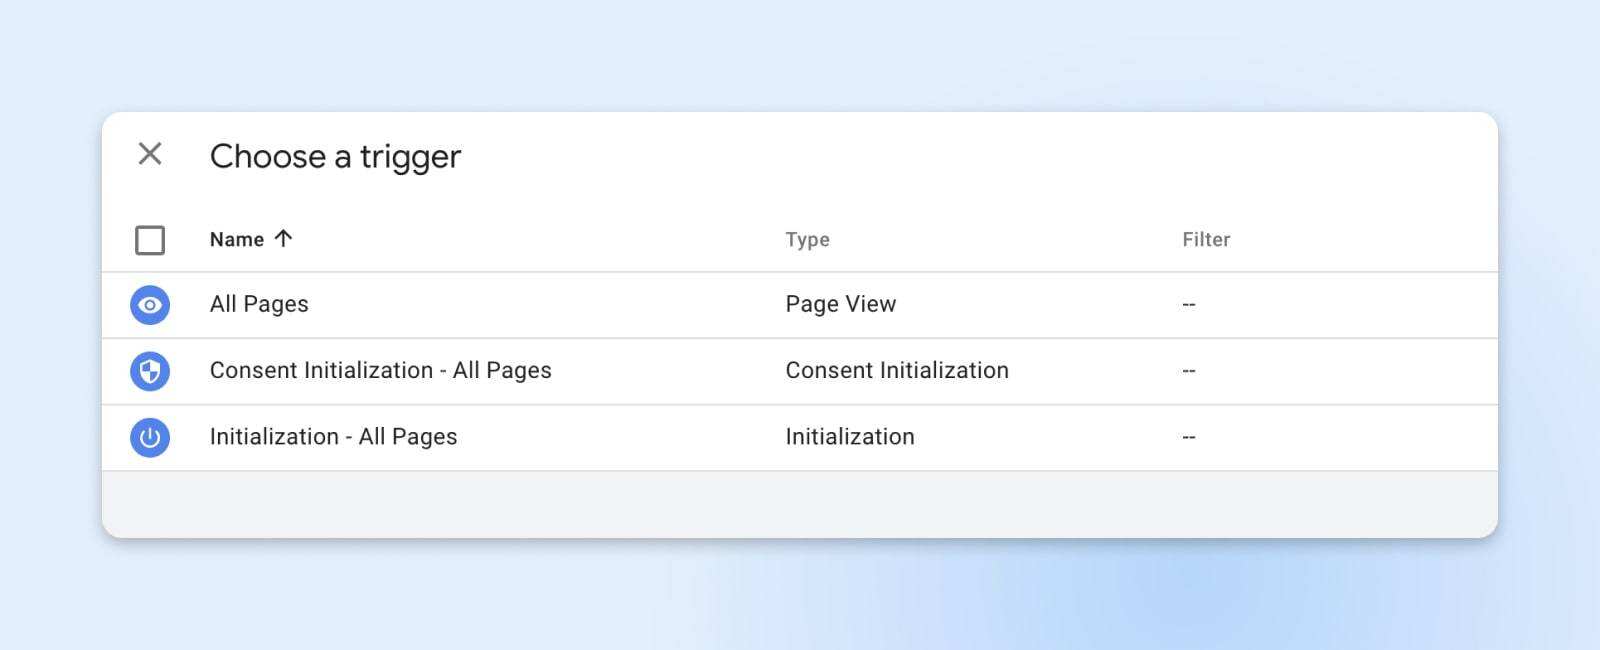
Once the label is configured, you need to define when to trigger it. Click the “Triggering” section and select a trigger. For example, to track the number of views on all pages, you need to select the “All Pages” trigger. Triggers can be wide-ranging or specific-GTM gives you a lot of control.
Step 4: verify that GTM is installed and send data
It is important to ensure that everything works properly before you save and publish the label. Here is how to verify that GTM is installed correctly and that the label is sending data:
GTM provides a built-in preview mode that allows you to see which tags are launched on your site. Click “Preview” on the GTM panel of the site, enter the URL of the site, and navigate to the site. You will see a debug window at the bottom of the site that shows which tags are starting and which are not.

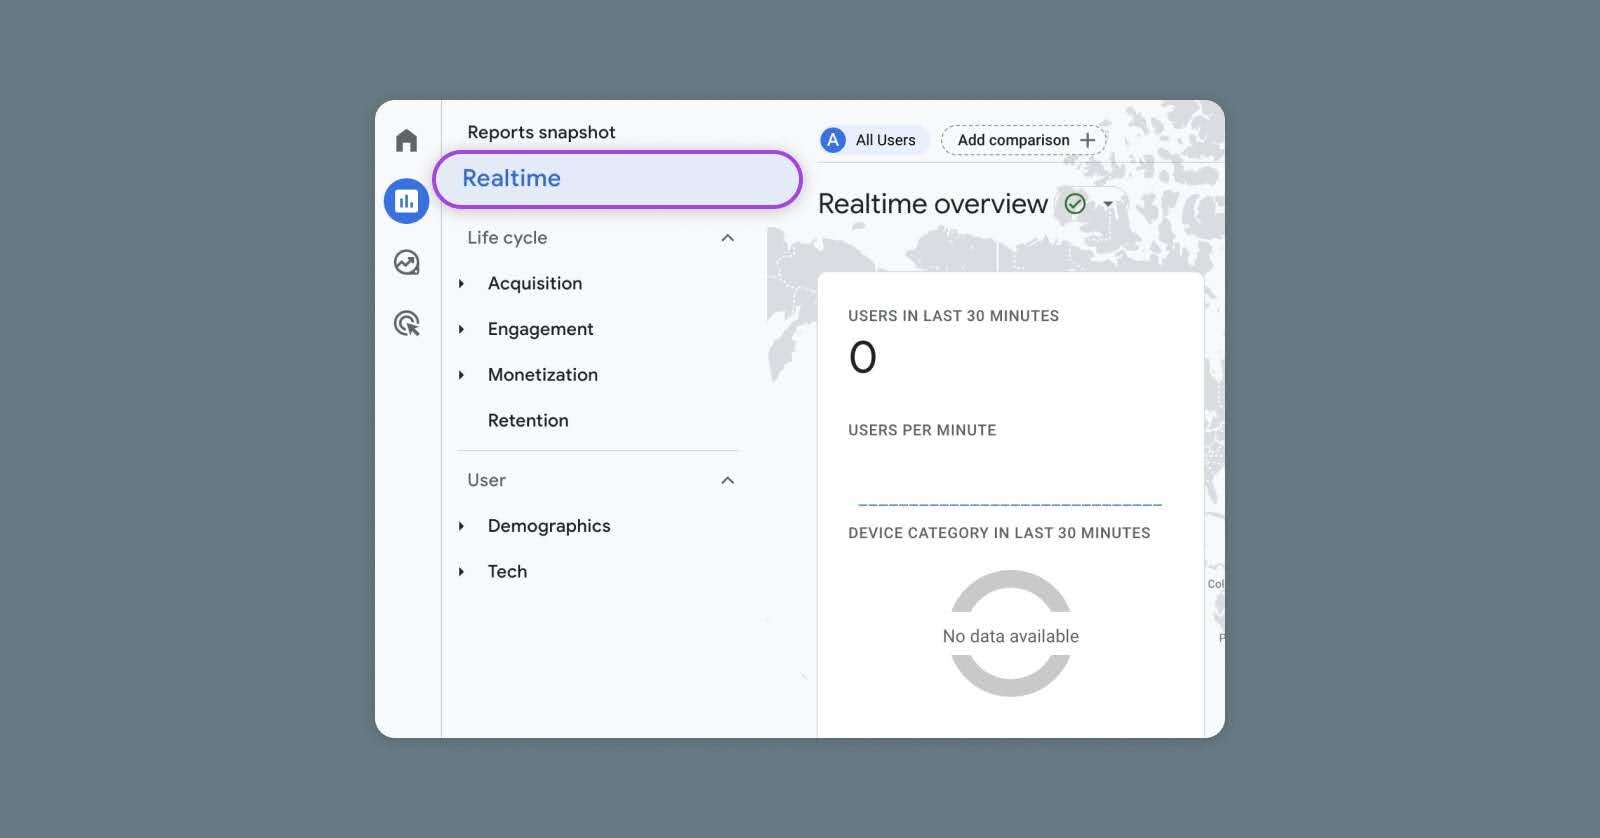
Next, you can find real-time data in Google Analytics. If you have set the Google Analytics tag in GTM, please enter your Google Analytics account and navigate to the real-time report. If you see active users on the site (you may need to browse on the site to generate data), this indicates that GTM is sending data correctly to Google Analytics.
For more technical checks, you can use the browser’s development tools to check the web requests made when the pages of the site are loaded. Look for network calls to “google-analytics.com” or other related domains, which confirms that the label has been started.
After taking these steps, you can be sure that the Google tag Manager is installed correctly and that your tags are collecting and sending data as expected. If there are any problems, the information provided by these verification methods can also help you troubleshoot.
common problem
Can I install Google Tag Manager on different types of websites?
Yes, Google Tag Manager can be installed on all types of websites, including those built using HTML, PHP, WordPress, Shopify, and other content management systems or e-commerce platforms.
Can I use the CMS plug-in to install the Google tag Manager?
Yes, of course. Many content management systems, such as WordPress, have plug-ins that make it easier to integrate Google tag managers. Just search the CMS plug-in library for the GTM plug-in.
Where is the Google tag manager code placed on the site?
The Google tag manager code snippet consists of two parts. The first part should be as close to the beginning of each page as possible.Mark, the second part should be immediately at the beginningAfter the mark.
What’s the difference between Google Analytics and Google Tag Manager?
Google Analytics is a tool for collecting and reporting data on website traffic and user interactions. Google Tag Manager, on the other hand, is a tag management system that allows you to easily update and manage marketing tags (including Google Analytics tracking code) without changing the site code. Basically, Google Analytics can measure the performance of a Web site, while Google Tag Manager can help you simplify the process of deploying and managing tags that collect data.

