
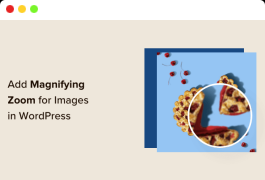
Do you want to add Amazon-like magnification to the images in WordPress? The addition of zooming to
will enable users to see details that they cannot see in normal-size images.
in this article, we will show you how to easily add magnification and scaling to an image in WordPress.

add magnification to an image?
adding zooming in to your WordPress site will allow visitors to clearly view the complex details of the image.
if you have a photography website, adding magnification will allow users to zoom in on your photos to see more detailed details.
similarly, if you run an online store, your customers will be able to enlarge product images. Many large
e-commerce sites have used magnification for product images. It allows customers to check products and create a better shopping experience in your store. Having said that,
, let’s see how you can easily add magnification and scaling to an image in WordPress. How
adds magnification and scaling
to images in WordPress first, you need to install and activate the WP Image Zoom plug-in. For more details, see our step-by-step guide on how to install the WordPress plug-in. After
is activated, you need to go from the WordPress management sidebar to the WP Image Zoom »Zoom Settings page.
next, you need to configure the zoom settings by switching to the Zoom Settings tab and select the lens shape you want to use.

you can choose round, square and zoom window lens shapes. If you don’t want to use shapes to magnify the effect, you can even select the No Lens option. After
selects your favorite lens, you need to scroll down to the next step, where you can preview the image of the selected lens to see how it works. The plug-in has a preview image that you can use to test your changes.

next, you need to switch to the General tab.
here, you can select the cursor type, animate the effect, enable zooming when you hover or click, and define the zoom level.
if you want more options, some features are only available for the professional version of the WP Image Zoom plug-in. After

makes the selection accordingly, just go to the Lens tab at the top.
if you selected a “round” or “square” lens in step 1, you can now configure settings such as lens size, lens color, lens frame options, and so on.

if you selected the zoom window lens, you need to switch to the Zoom window configuration tab.
here, you can change the width and height of the zoom window, position, distance from the main image, border color, and so on.

next, you can simply click Save changes to save your settings. After
, all you have to do is configure some general settings.

Configure general plug-in settings
next, you need to switch to the General Settings tab under plug-in settings.
from here, you can now enable the ability to zoom WooCommerce product images, thumbnails, mobile devices, accessories pages, product category pages, and so on.
all you need to do is check the box next to these options.

you can also delete the light box effect so that the user can zoom the image smoothly.
, however, you need a Pro version of the plug-in to use this feature.

if you are not going to delete the light box of the picture, you need to scroll down to the “enable in the light box” option and check the box next to it.
Note: you can view the supported light boxes to ensure that zooming works properly in the light boxes on your website. After

has finished adjusting your settings, don’t forget to click the Save changes button to save your settings.
will now enable zooming in for WooCommerce products.
you can go to your online store to check out our zoom function.

however, if you want to enable zooming for images on WordPress posts and pages, you need to follow these steps.
Step 3. Enable zooming in for the image in the Block Editor
by default, images on your posts and pages are not zoomed in. You need to do this manually after you add the image to your content.
first, you need to open the post you want to edit in the block editor.
next, you need to upload the image to the post from the library or your computer. After
does this, simply click the image to open its Block Settings panel in the upper right corner of the screen.
from here, simply go to the Styles tab and click the use Zoom button to apply magnification to the image. After

, simply click the Update or publish button at the top to save your settings. The
zoom feature will look like this on your website:

Note: repeat this step every time you want to add a zoom effect to a single image.
We recommend using high-quality images to make zooming look great. High-quality images usually have large files and take a long time to load, which can affect the speed and performance of your site.
to solve this problem, you need to optimize the image for the network before uploading the image to WordPress.