
In this tutorial, we will show you how to complete WordPress Amazon S3 integration and optionally use a content delivery network (CDN). This can greatly save your bandwidth costs, act as backups, and help speed up your site.
Amazon S3 is a storage solution that is part of many Amazon Web Services products. Typically, this is used for sites that need additional backups using solutions such as our external backup plug-ins, or sites that are providing large files (downloads, software, video, games, audio files, PDF, etc.).
Amazon has a very reliable record, and because of its huge infrastructure, they can provide very low storage costs. Some customers of S3 include Netflix, Airbnb, SmugMug, Nasdaq, etc.

Because Amazon S3 fully handles mass storage, you can almost guarantee that the pricing will be cheaper than your WordPress host. Migrating media to AWS is a great way to save money and is free in your first year (up to 5GB storage). In addition, because your media requests are provided directly from Amazon, your WordPress site has less load, which means faster loading times.
Do not confuse Amazon S3 with Amazon CloudFront. CloudFront is a CDN solution, while S3 is a storage solution. However, they are all interchangeable, as we will cover more below.
- WordPress website Amazon S3 Settings
- WordPress Amazon S3 and CDN
WordPress website Amazon S3 Settings
For this integration, we recommend using the WP Offload S3 Lite plug-in, developed by Delicious Brains’s excellent team. The basic version is free. When a file is uploaded to the library, the plug-in automatically copies the file from your WordPress site to Amazon S3. Then there is an optional configuration for adding CDN, such as Amazon CloudFront, KeyCDN, or MaxCDN.

WP Offload S3 Lite
This plug-in is very lightweight, only 204 KB to be exact. At the time of this writing, it currently has more than 30000 active installations and has a 4-star rating (out of 5 stars). Please follow these steps.
Step 1
Next, install the free WP Offload S3 Lite plug-in. You can download it from the WordPress plug-in library, or you can search for “wp offload S3” under “install plug-ins” in the WordPress dashboard. Click install now and enable it.
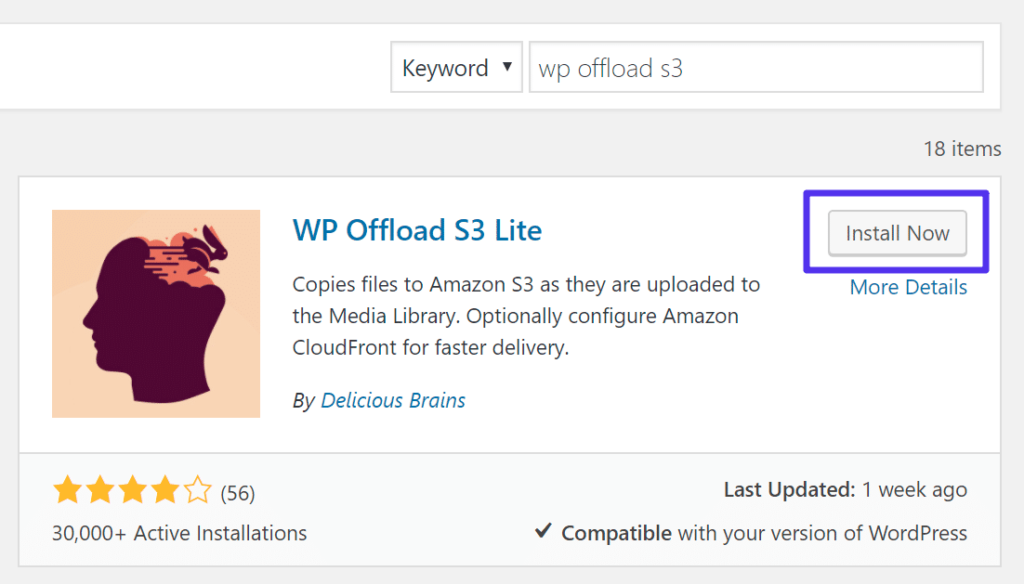
Install WP Offload S3 Lite
Step 2
You can follow Delicious Brains’s WordPress Amazon S3 documentation, or we will guide you through the rest. Log in to your Amazon Web Services account. If you don’t, you can register for free. Then you need to create a new user. Select a user name and make sure “Programmatic access” is selected.
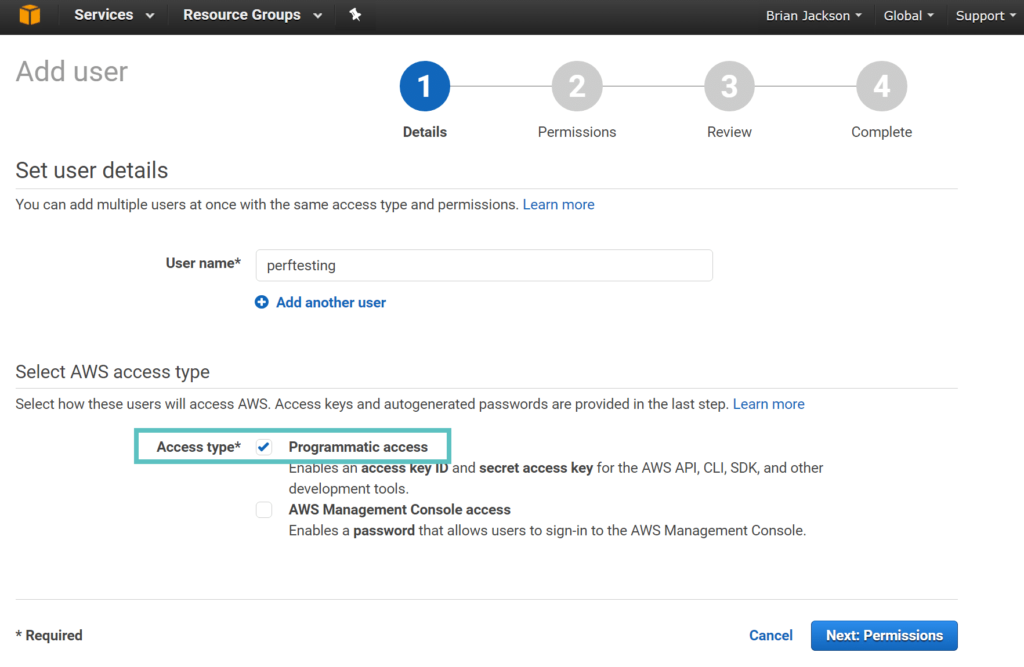
Amazon Web Services-add users
Step 3
Now you need to set permissions for users to manage files in S3, so select “Attach existing policies directly” and click “Create policy”. This opens in a new window. Once you’re done, you’ll need to go back to this.
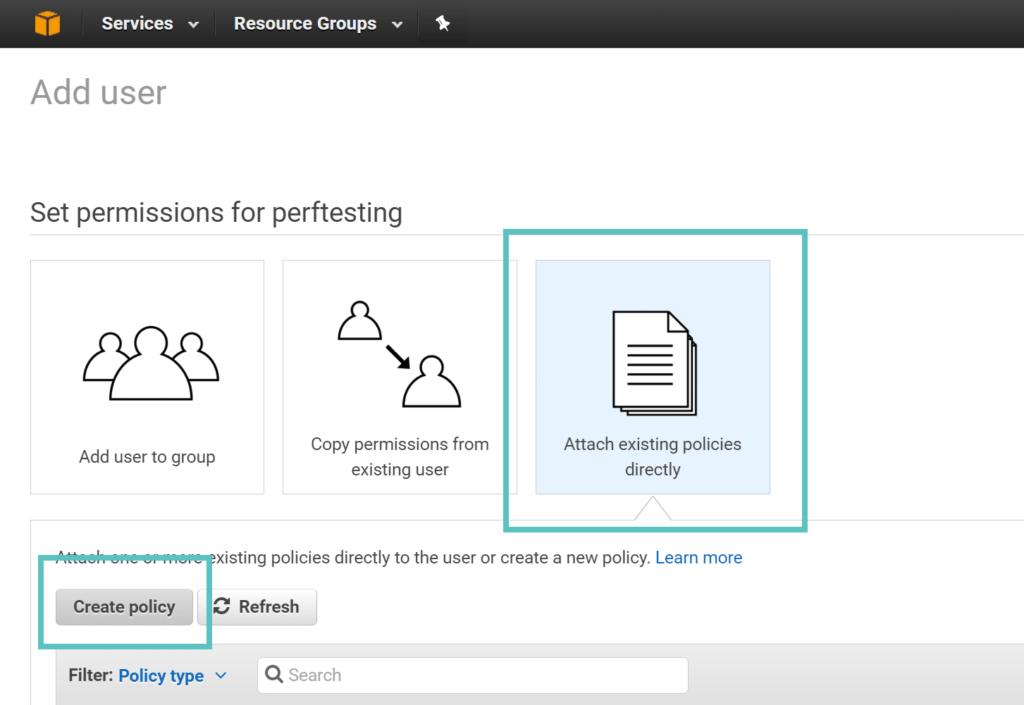
Permissions in AWS
Step 4
Click “Select” next to create your own policy options.
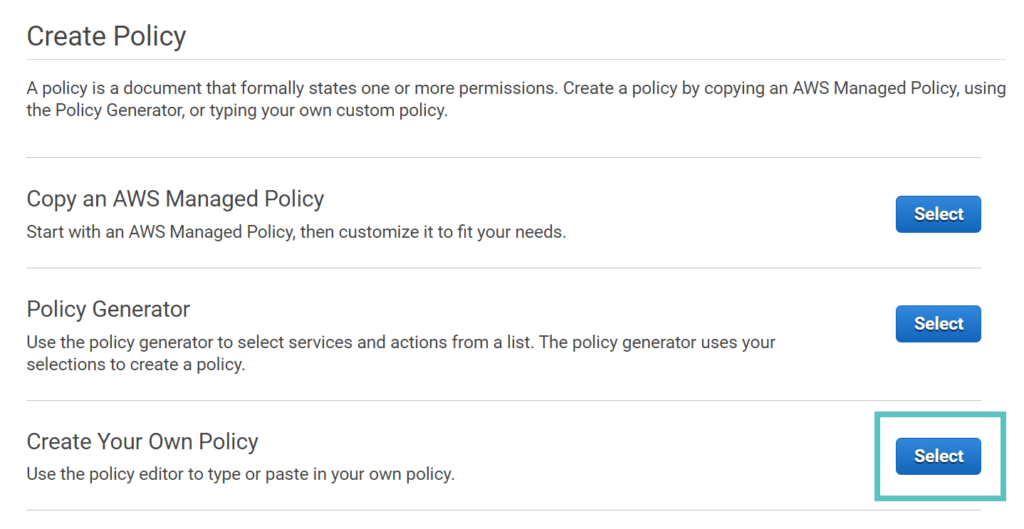
Create a policy in AWS
Step 5
Next, you need to name and describe your policy. It can be anything you want. Then copy the following code to the “Policy Document” section.
{ "Version": "2012-10-17", "Statement": [ { "Effect": "Allow", "Action": [ "s3:CreateBucket", "s3:DeleteObject", "s3:Put*", "s3:Get*", "s3:List*" ], "Resource": [ "arn:aws:s3:::*" ] } ] }
This policy allows users to create buckets, delete only files (not buckets), upload files, download files, and list files and buckets. This is the basic permission level required for the plug-in to run.
However, we recommend that you check Delicious Brain’s documentation for additional bucket restrictions. For example, modify the resource section above and add your bucket name to lock it (perftesting is the name of our buck down in step 11).
"Resource": [ "arn:aws:s3:::perftesting/*", ]
Then click Create Policy.

View policies in AWS
Step 6
Returning to the window from step 4, you now need to add the policy to the user you are creating. Click “Refresh” and you should see the new policy you just created at the top. Select it and click Next.
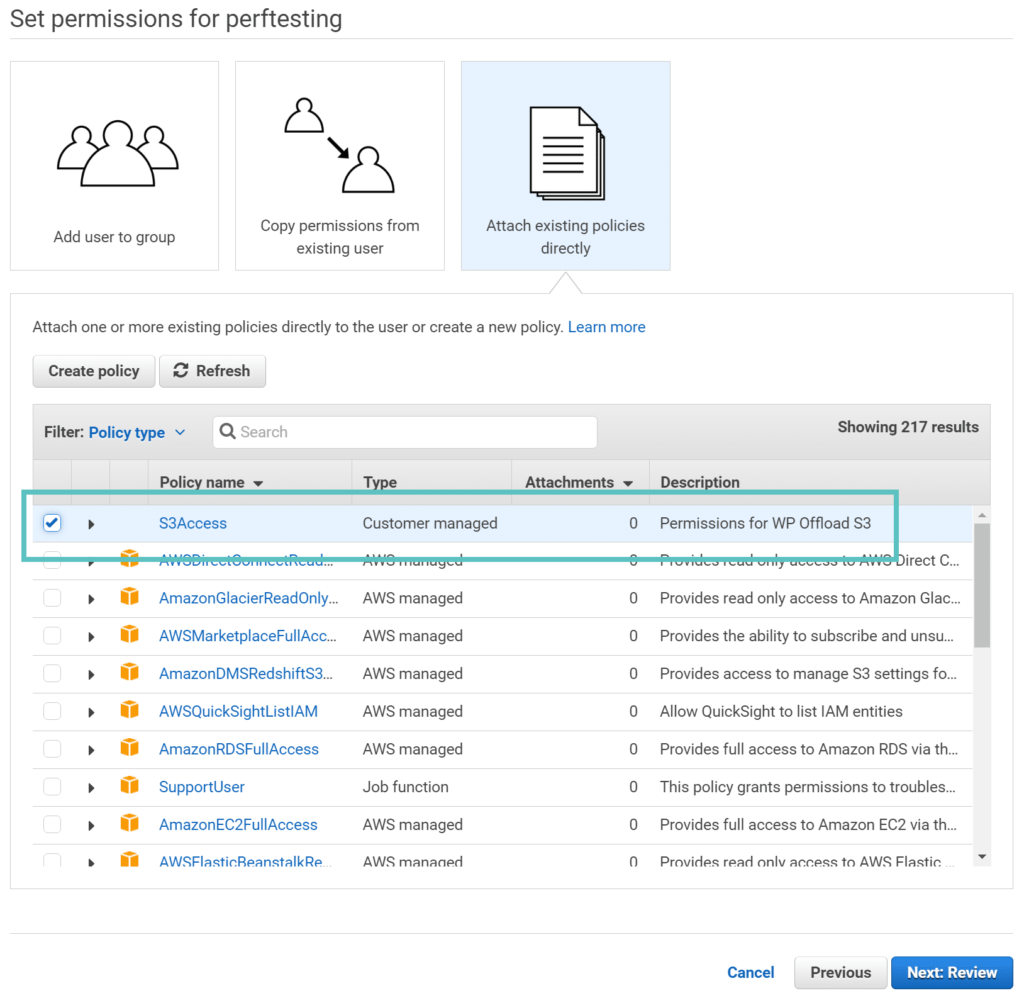
AWS permissions of the user
Step 7
Then click “Create use”.
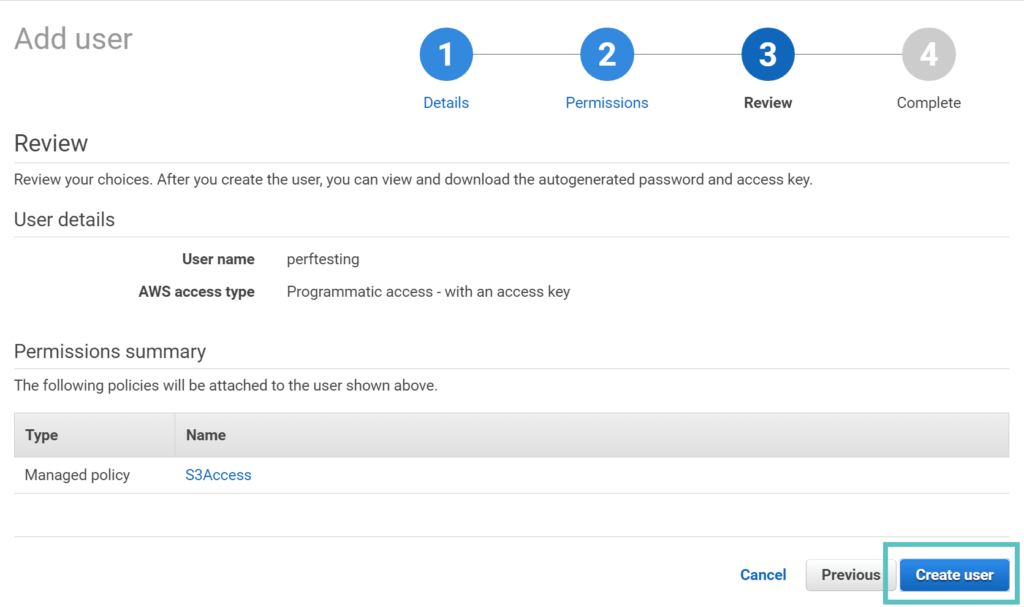
AWS create user
Step 8
On the last screen, you need to copy your access key ID and private access key to a secure place because you need to return it to your WordPress dashboard.
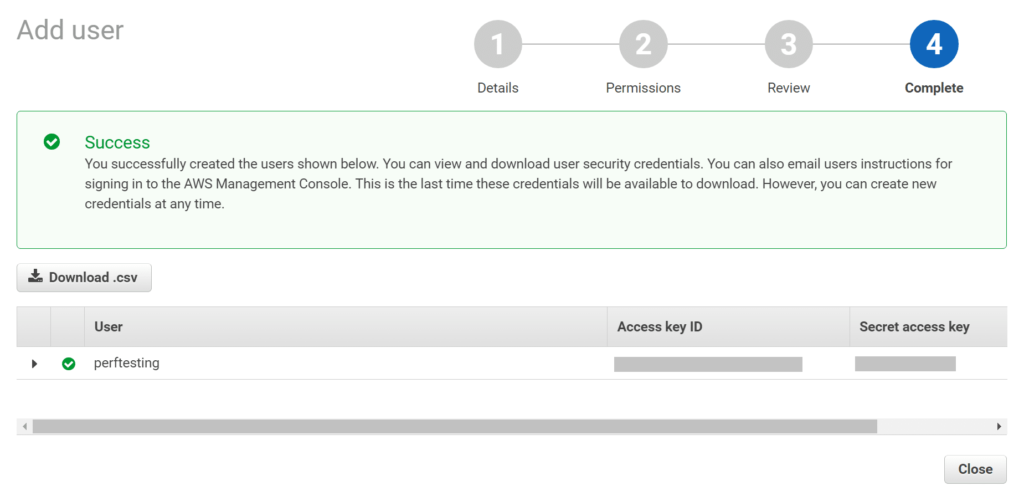
AWS access key
Step 9
Then go back to WordPress, click “Access Keys” under AWS and enter the credential you just created. Or, as Delicious Brains suggests, it’s best to define them in the wp-config.php file. Simply copy the following code snippet and replace the asterisk with the key.
define( 'DBI_AWS_ACCESS_KEY_ID', '********************' ); define( 'DBI_AWS_SECRET_ACCESS_KEY', '****************************************' );
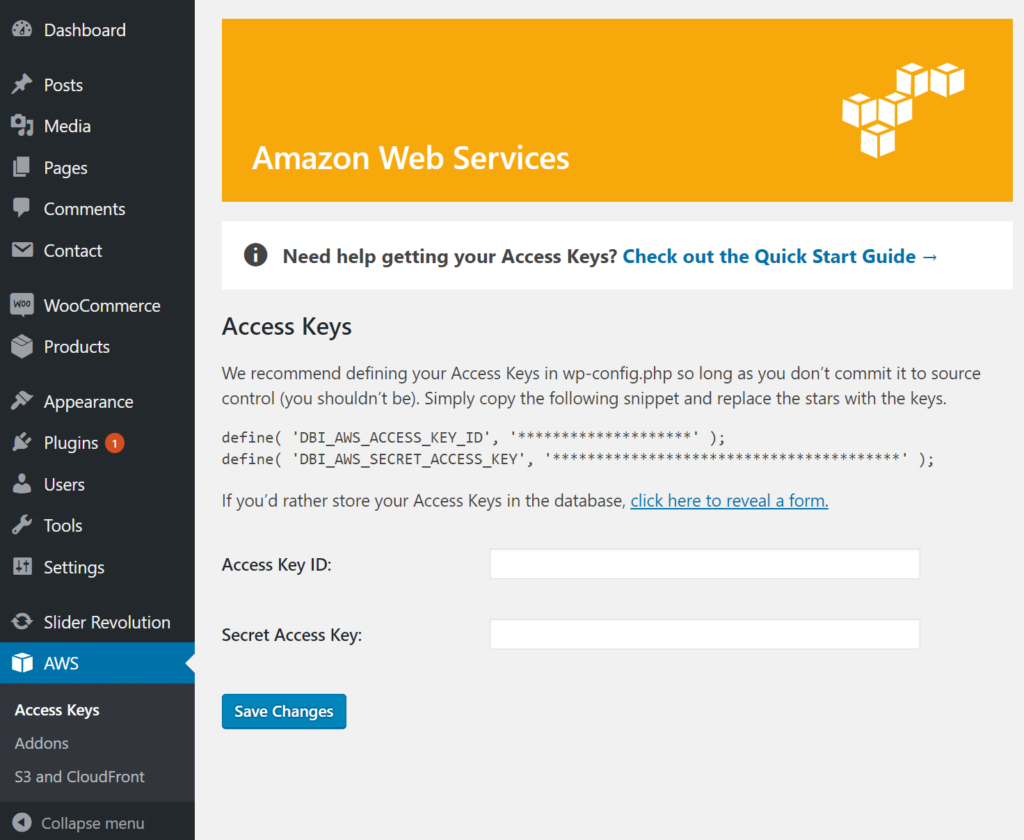
Connect Amazon Web Services in WordPress
Step 10
Then you must create a Bucket to use. If you have not registered with Amazon S3, you can register here. They have a free trial version that you can start using. Click S3 and CloudFront under the AWS plug-in settings, and then click Create bucket. You can then select a region. Click Create New Bucket. Keep in mind that storage costs vary from region to region. Check the price.
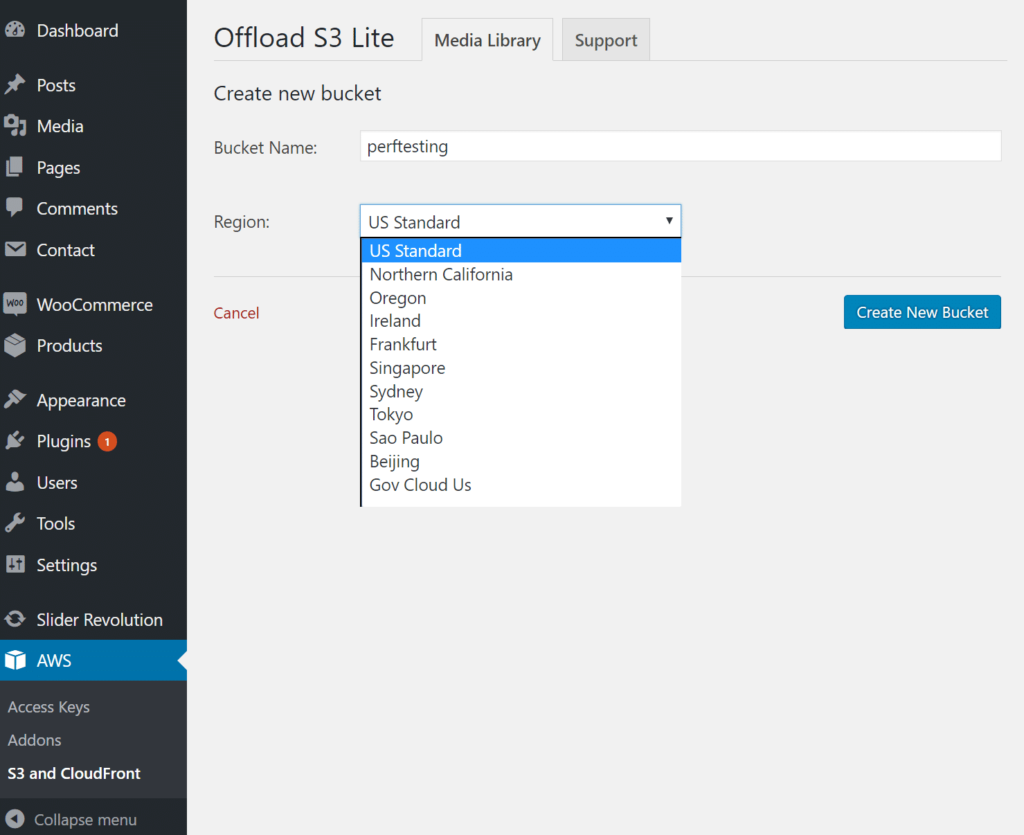
Create Amazon S3 Bucket
Step 11
To use WP Offload S3 with some third-party plug-ins, such as WooCommerce, you may need to install and activate some of their compatibility plug-ins. This sometimes requires the payment of their advanced license. However, you can also use the free version in many cases. By default, the option under shown below is selected. If you are running through HTTPS, you need to enable it.
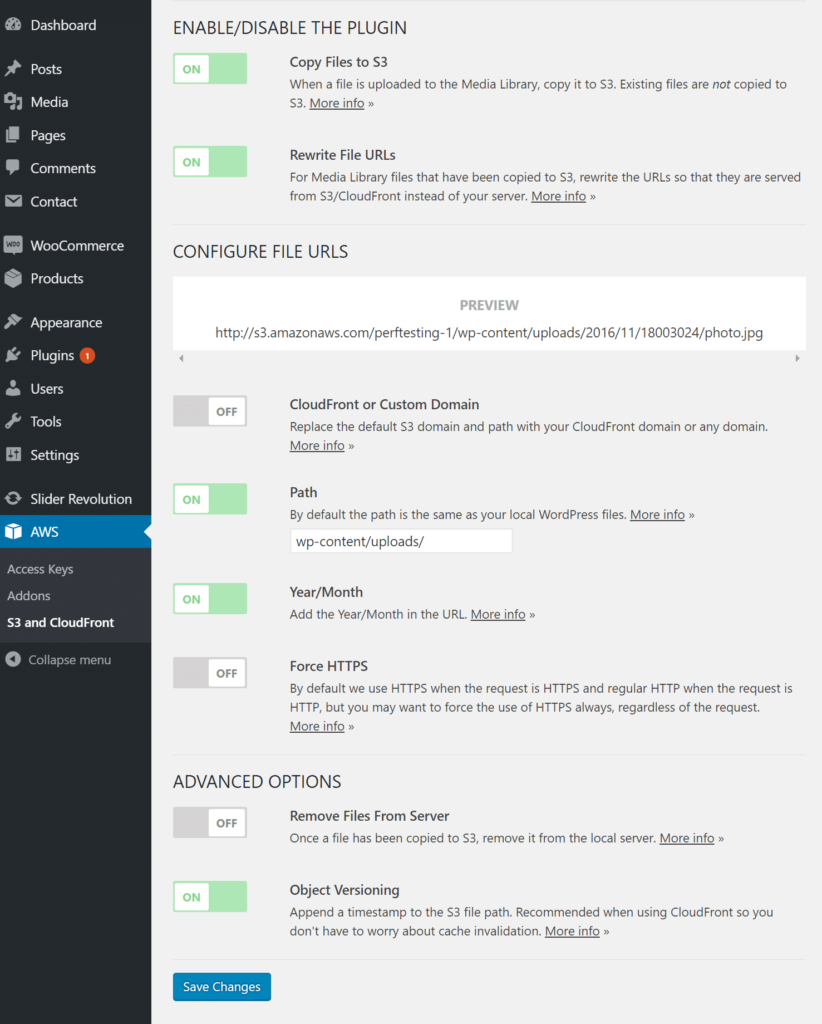
AWS plug-in Settings
Your WordPress Amazon S3 setup is now complete! When your images are uploaded to your WordPress library, they will now be copied to Amazon S3 storage. You can also implement the same technology for your assets (CSS, JS, fonts, etc.), but it requires an advanced license to obtain the resource pull plug-in.
Note: files uploaded manually via SFTP will not be copied to Amazon S3. WP Offload Media migrates only projects that are uploaded to your WordPress library for the first time.
Another important setting above is the option to delete files from the local server after migrating files to S3. This helps to significantly reduce the disk space requirements of WordPress hosts. If you enable this feature, be sure to check for compatibility with other plug-ins. You can also view tutorials on uploading files from a browser to Amazon S3.
WordPress Amazon S3 and CDN
If you use CDN to speed up resource delivery, you can enable this feature in the CloudFront or custom domain section. Check out these tutorials to get you started.
- Set up CloudFront for Amazon S3
- Set up KeyCDN for Amazon S3
- Set up MaxCDN for Amazon S3
Once you have set up the CDN URL, you can enter it into the custom field, as shown below.
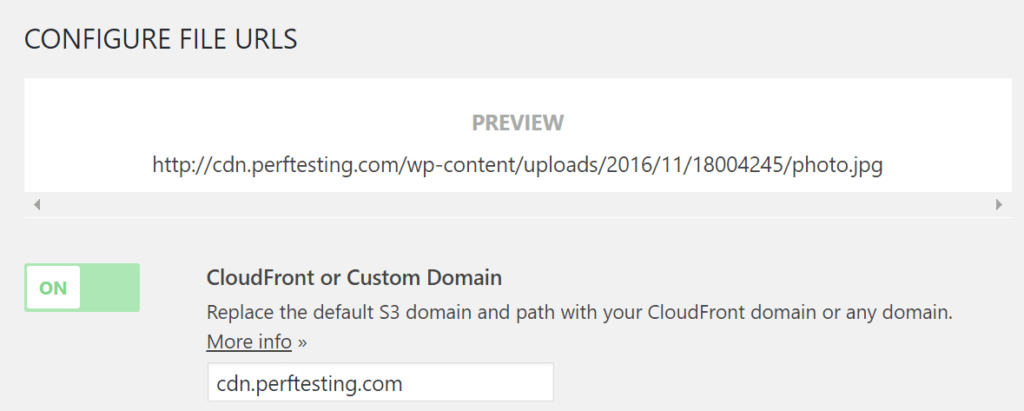
CDN Amazon S3
Be sure to check out our tutorials to learn how to migrate media to Google Cloud Storage.

