WordPress Autosave is one of my favorite features. It gives us peace of mind when editing articles or pages on many of our websites.
If you have used other CMS without auto-save, you may have experienced that terrible moment when your login timed out and you will lose everything when you press Save.
WordPress auto-save can prevent such tragic stories, which happen to many people again and again.
By default, WP automatically saves your article, page, or custom article type every 60 seconds after you update the content.
This makes it very convenient to keep a copy of the unsaved content, otherwise you may lose it due to different reasons, such as expired cookie, browser crash, lost Internet connection, unintentional navigation, WP core or plug-in error / crash, etc.
In addition to automatically saving content to the database, starting with the recent version of WP, this feature now takes advantage of the browser’s local storage feature to prevent your content from being lost if you go offline unexpectedly quickly, such as a sudden power outage.
While the WordPress auto-save feature can be a lifesaver for those who edit content frequently in WP administrators, it is up to the user to decide whether it needs to be enabled. The good news is that you can disable this feature or custom save intervals as you like. On the web blog we designed, we tend to keep it as it is or shorten it a little bit.
In this article, let’s take a closer look at the auto-save feature.
What is WordPress autosave
When you write or edit content, your changes to the article are automatically saved every 60 seconds.
When an article is updated or automatically saved, it will be treated as a notification in the lower-right corner of your article editor.
Please refer to the screenshot below.

After automatic save, if your article is updated, the next save will overwrite the old one. This means that your table will not grow more than once every 60 seconds. Only one (up-to-date) automatic save is stored for each article.
This is completely different from when you press the update button, each time a new WordPress article “revision” is created.
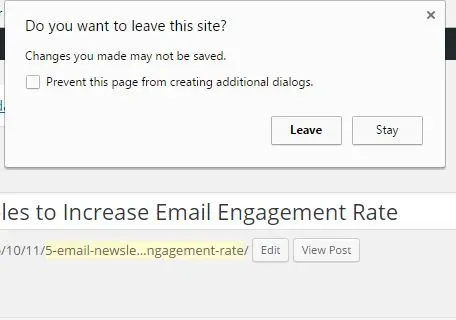
You may have noticed this by now-when you try to close the browser tab without saving your article, you will see a warning pop up informing you that the article has not been saved.

The advantage of using auto-save is that even if you leave the tab without saving, the first thing you see in the article editor the next time you log in is the auto-saved version of the article.
Best of all, these auto-saves will not overwrite your published articles or saved revisions. As a result, you can easily start editing automatically saved articles the next time you log in.
Temporarily save WordPress articles on the browser
In addition to saving your content in the database, WP now takes advantage of the browser’s local storage capabilities if you are offline. When you return online, it informs you whether any differences are found.

This feature enables you to continue writing exactly from where you left.
Auto-save makes WordPress a better content editing tool
While WP is arguably the best CMS available, it still lacks many of the content authoring, content editing, and collaboration capabilities of MS Word and Google documents.
Because of this fact, there are still many bloggers who prefer to create articles offline or use Google documents for collaborative editing. Such users use the WP administrator only after the article has been written.
This creates more work for site editors and authors-it takes a lot of time to migrate content from the document to your back end, as most formats are lost in the process.
However, this enhanced WordPress auto-save capability makes the CMS a step forward as a more reliable content editing tool.
If you are still using third-party applications for content creation and collaboration, in addition to this feature, here are several reasons why WordPress administrators may be your best choice.
WordPress article revision
WordPress article revisions allow you to compare different versions of saved articles. This can be a lifesaver if you need to view a previous version of the article (perhaps if you made a mistake). So far, no other offline word processor provides this amazing feature.

Lock article editing
Since version 3.6, WordPress has released a new editing control feature called post lock. This allows the author of the article to lock the article until it is finished editing. This can be a useful feature for multi-author blogs, where authors collaborate to contribute to each article.
A better grammar checker
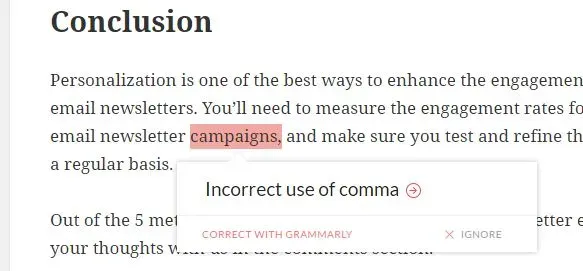
Although WordPress provides a large number of article editor functions, it still lags behind reliable grammar checking tools such as MS Word. If that’s why you’re still using offline word processing applications, all you need to do is install the Grammarly browser plug-in.

Grammarly is a free online grammar checker that is much better than MS Word in proofreading and grammar checking.
There is no doubt that all these features will make WordPress a reliable content creation and editing tool.
How to change the auto-save interval
Now that we know the benefits of the WordPress auto-save feature, let’s see how to change the save interval according to your preference.
For example, if you use a slow Internet connection to write a blog, you may need to increase the automatic save interval to ensure that your browser does not hang frequently when WordPress forces a save every minute.
Or, if you want to minimize the possibility of losing content due to operating system crashes or power outages, you may need to shorten the interval to save content more frequently.
Changing the WordPress auto-save settings requires only a few adjustments.
If you want to change the auto-save interval, simply find the wp-config.php file on your website, insert the following code snippet on it, and save it.
define('AUTOSAVE_INTERVAL', 120 );
The above code changes the automatic save interval to 120 seconds. Before saving, please edit the numbers in the above code (in seconds) according to your preference.
Be sure to add the above code snippet before the following lines in the wp-config.php file, otherwise the settings will not work.
require_once(ABSPATH . 'wp-settings.php');
How to disable the auto save feature
The beauty of WP is that you can easily customize or disable almost all the features it provides.
In rare cases, if you do not want to use autosave for your site, you can easily disable it by following the guidelines below.
In this section, you will find that automatic saving is disabled in two ways– editing wp-config.php files and editing functions.php files.
You can use any of the following methods to disable the WordPress auto-save feature.
Edit the wp-config.php file to disable WordPress auto-save
Editing the wp-config.php file is probably the easiest way to disable WordPress auto-save.
Although you can disable WP_POST_REVISIONS by disabling it, the problem with this approach is that it also disables later revisions.
So the right thing to do is to increase the auto-save interval in the wp-config.php file so that it never automatically saves anything.
define('AUTOSAVE_INTERVAL', 86400);
The code snippet above ensures that your article will be saved in 86400 seconds; that’s a day later.
Disable WordPress automatic save by editing the functions.php file
But really, why did you disable it?
The smartest way to disable this feature is to add a few lines of code to your functions.php file-this is the action hook for your WordPress. After you add the code, you can save the file.
Add_action ('admin_init',' disable_autosave'); function disable_autosave () {wp_deregister_script ('autosave');}
Its purpose is to simply unregister the auto-save script, which you can find in the wp-admin/post.php file and the wp-admin/post-new.php file.
common problem
What is WordPress auto-save?
WordPress auto-save is a feature of the WordPress editor that automatically saves the contents of the editor on a regular basis so that you don’t have to press the update button manually.
How do I turn off autosave in WordPress?
To turn off autosave in WordPress, you need to make small adjustments to WordPress’s functions.php file. Add the following code and save, and your auto-save will be disabled:
Add_action ('admin_init',' disable_autosave'); function disable_autosave () {wp_deregister_script ('autosave');}
How do I return to a previous version of WordPress?
If you want to return to the previous version of the article in WordPress, find the revision link, click Browse and click restore this revision to replace the current version with one of the previous versions of the article.
Where can I find the revised version of WordPress?
You can find the revision in the WordPress on the right side of the screen in the publish tab. If you do not see the Revisions option, click Screen Options in the upper right corner and enable the Revisions check box
How do I save changes on WordPress?
To save your changes on the WordPress, click the Update button on the publish tab. Note that WordPress also automatically saves the contents of the editor on a regular basis as defined in the autosave_interval settings described here.

