Add a contact form to your WordPress site to enable users to contact queries and business suggestions. However, if you do not use a customer relationship management (CRM) solution, you may lose these prospects. Fortunately, you can easily pair your contact form with CRM using Contact Form 7 and Zoho.
in this article, we will introduce the benefits and practical step-by-step tutorials of connecting Contact Form 7 to Zoho.
integrates Contact Form 7 with Zoho CRM benefits
Contact Form 7 is one of the most popular WordPress contact form plug-ins. It enables you to build various custom forms for your site:
uses Contact Form 7, where you can enter your corporate email address as the sender and reply to your messages using your favorite email client. This setting will help you establish a more professional image for your company. For
to take full advantage of Contact Form 7, you can consider using it with Zoho. This is a powerful CRM tool that can help you generate prospects and manage your contacts more effectively: after
integrates Contact Form 7 with Zoho, you can use the CRM tool to synchronize your user data and organize your prospects. For example, you can classify contacts as recently created prospects, converted prospects, and so on.
this integration may be helpful if you are running a remote team. After you receive a message through your contact form, you can assign the lead to the appropriate employee or department. Zoho facilitates teamwork, so your company can provide better customer service and drive more transformations. How
connects Contact Form 7 to Zoho CRM
Unfortunately, Contact Form 7 itself does not support integration with Zoho CRM. However, you can use plug-ins such as Integration for Contact Form 7 and Zoho CRM to connect the two tools:

this plug-in allows you to send messages submitted through Contact Form 7 to your Zoho account. Fortunately, it is also easy to set up.
for this tutorial, you need to install and enable Contact Form 7 and Integration for Contact Form 7 and Zoho CRM on your site. You also need to create a Zoho account (you can start using it for free). After logging in to
, you will be asked to select a product. Make sure CRM is selected.
step 1: add your Zoho account
to WordPress after you add Integration for Contact Form 7 and Zoho CRM to your site, you will see a new menu item called Zoho in the dashboard. Click it and navigate to the Zoho Accounts tab:
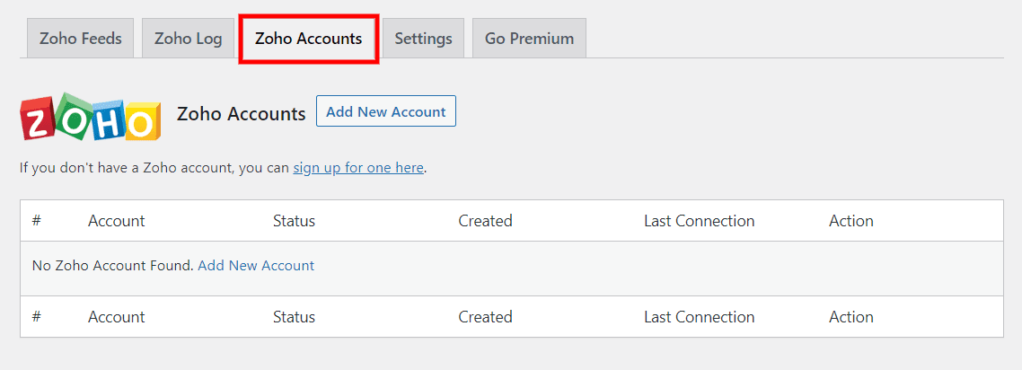
, then select Add New Account. You will be asked to provide some information about your Zoho account, including the account name, data center and Zoho service type (we are using Zoho CRM):
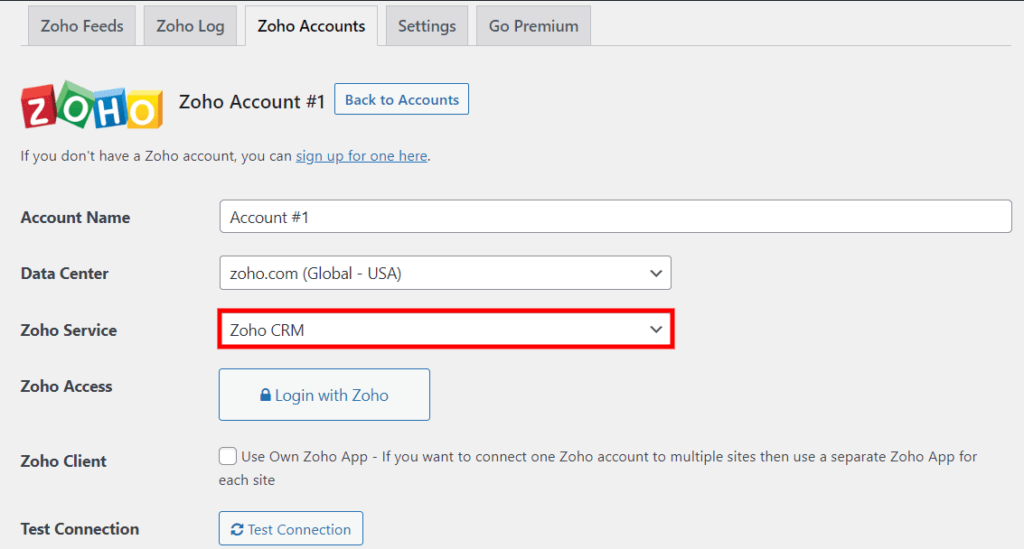
if you click the use Zoho login button, you can simply log in to your account:

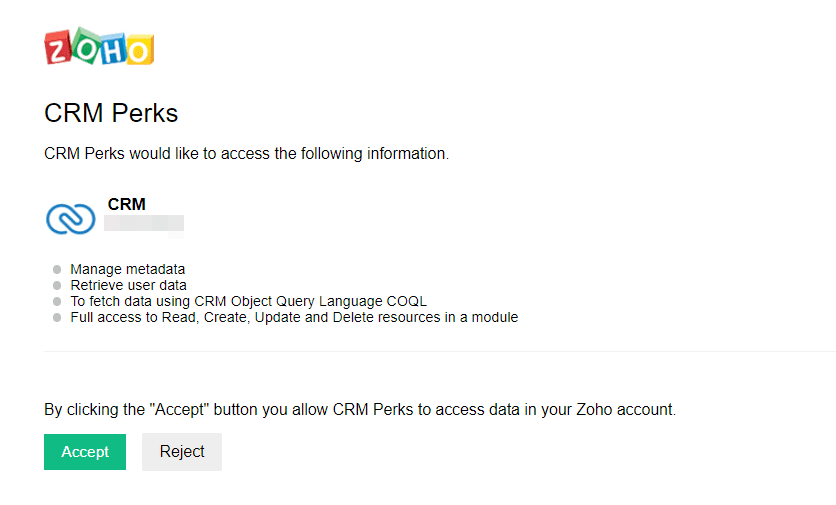
and then Zoho CRM will require access to your user data. Continue and click Accrpt:
and you will be redirected to your WordPress dashboard, where you will see a success message:
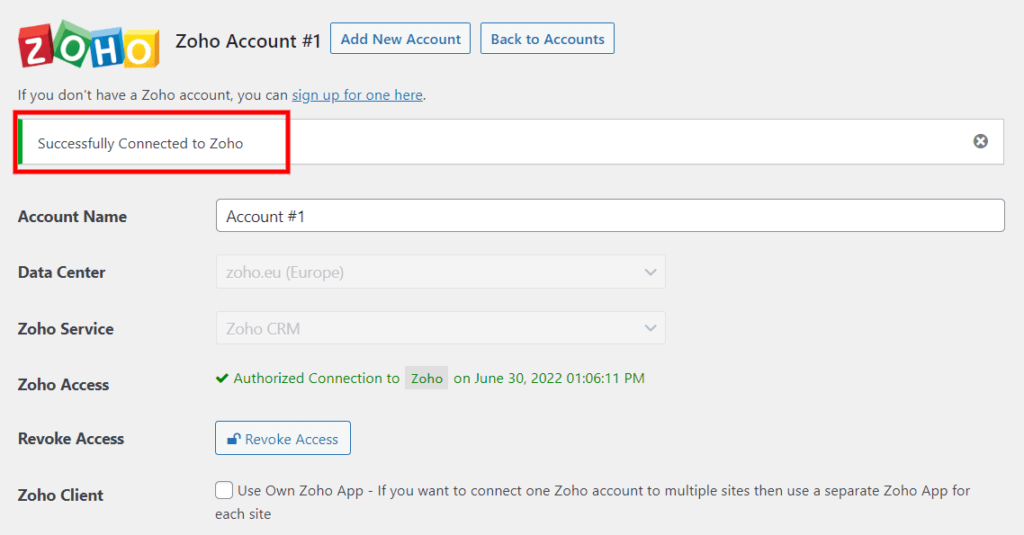
if you receive an invalid_code error, make sure you have chosen the correct datacenter. For example, if you are in Europe, you need to select zoho.eu. Then, save your changes and try again.
step 2: create a Zoho Feed
next, you need to create an Zoho feed. In other words, you will use the contact form to connect to your Zoho account.
in your WordPress dashboard, navigate to Zoho & gt; Zoho Feeds and select Add New:

. Next, you need to enter the name of the feed and select the Zoho account. You must also select a contact form: after
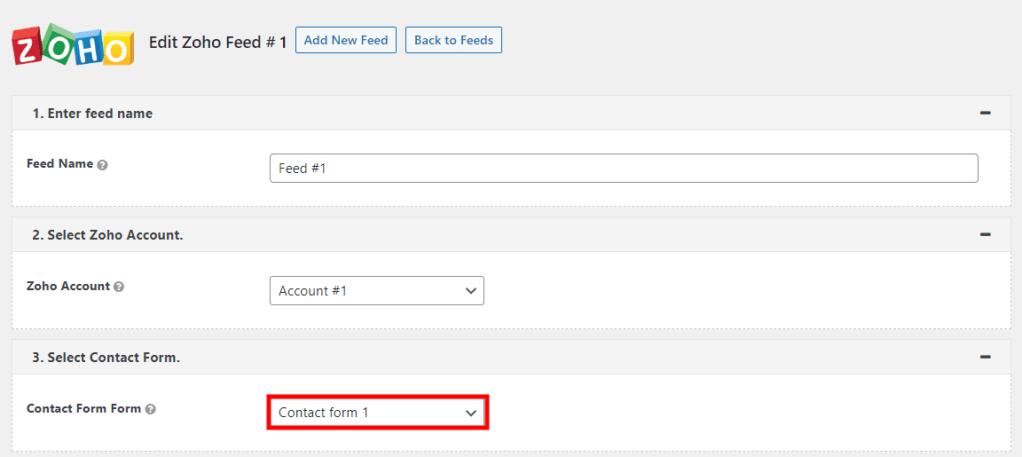
selects the form, the plug-in will ask you to select the Zoho object from the menu. The object is a specific area of CRM, including meetings, accounts, phone calls, projects, and so on. For this tutorial, you can select Leads:

and then you need to link your form fields to the fields corresponding to your Zoho prospects. This connection will enable the plug-in to synchronize your data.
for example, your prospect page in your Zoho account might look like this:
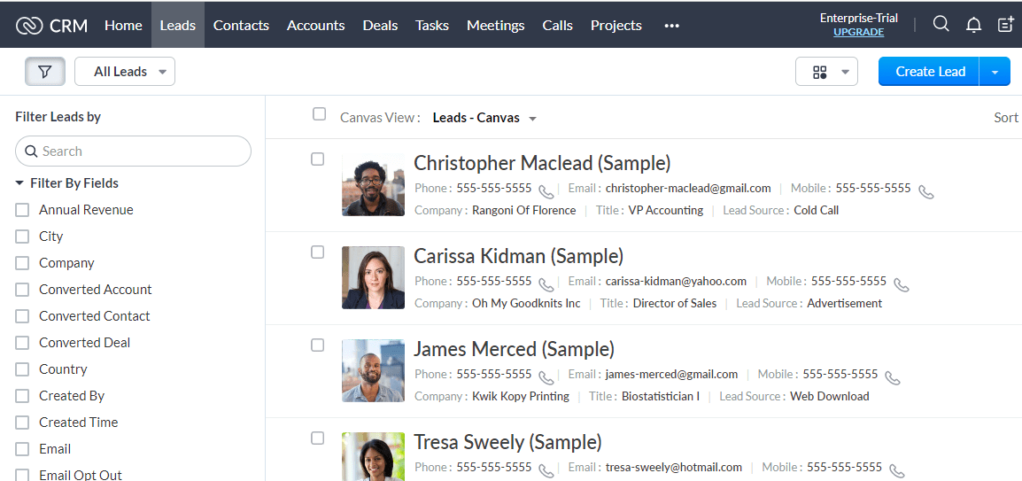
is on the left side of the screen, and you will see a list of fields that can be used to filter prospects. You can connect some of these fields to fields in your site’s contact form.
for example, you can select the email field in your Zoho account and match it with your email field in the contact form:
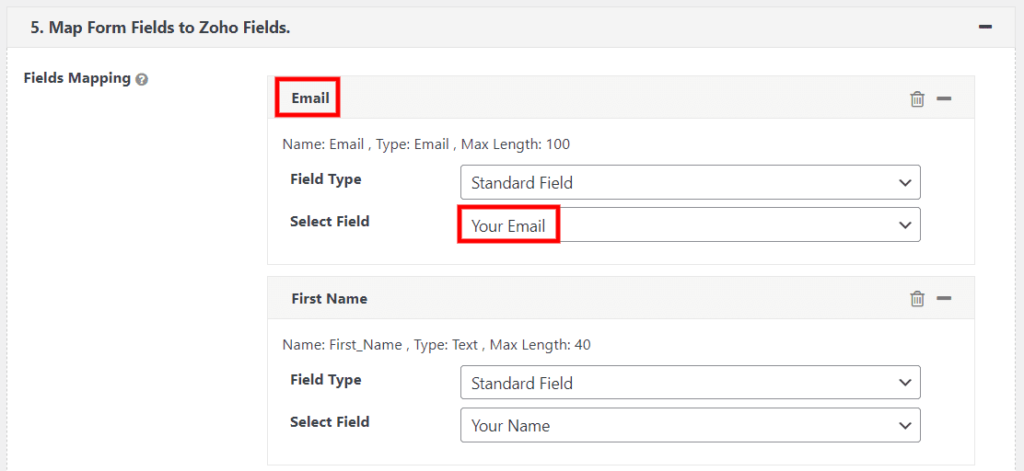
so that when users enter their email address in the contact form on your website, the information will be displayed in the appropriate field on your Zoho Leads page. You can map as many fields as you want.
you can also choose to export only manually approved entries to Zoho. In addition, you can set the opt-in criteria to export only items that meet certain criteria:

finally, you can configure some additional settings, such as setting a primary key: when
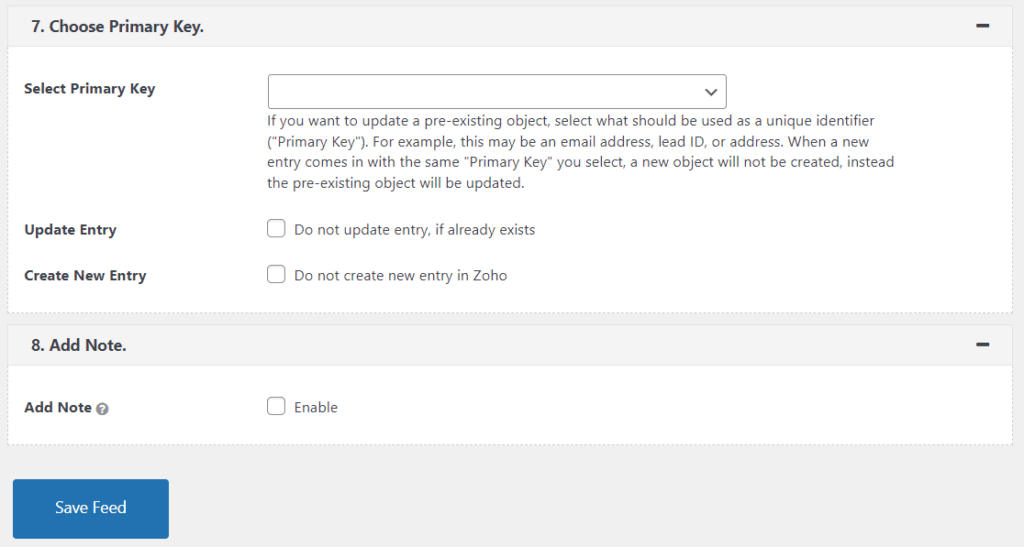
is ready, click Save Feed. Contact Form 7 is now fully integrated with Zoho.
step 3: test your Contact Form 7 and Zoho integration
finally, it’s time for a quick test to make sure everything is all right. First, you need to navigate to the front-end contact sheet and submit the entry.
then, in your WordPress dashboard, go to Zoho & gt; Zoho Log to see if your entry is registered with CRM:
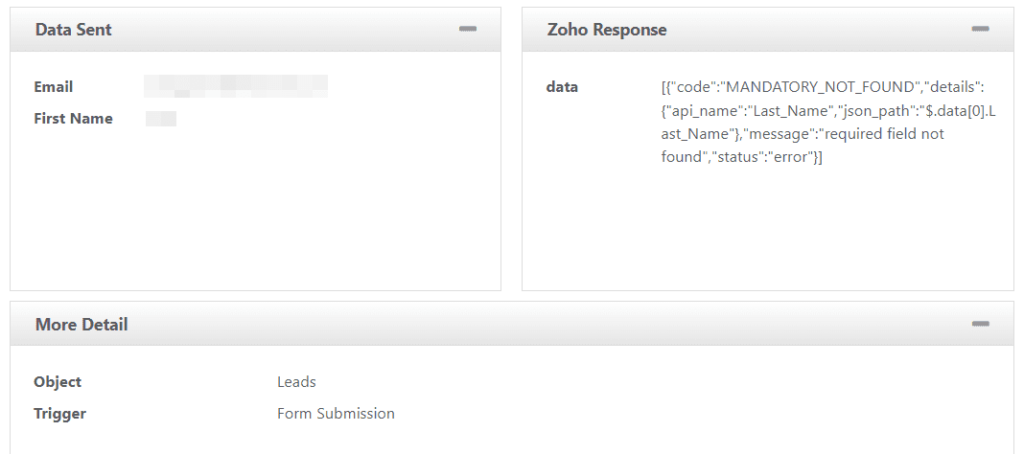
Here, you will be able to view the fields you mapped in the previous step. That’s it-you can now start using Contact Form 7 and Zoho CRM to generate prospects!
Summary CRM tools such as
Zoho enable you to manage any prospects you acquire through your WordPress website. If you use contact form 7, you can integrate your form with Zoho using the integration of the Integration for Contact Form 7 and Zoho CRM plug-in. In this article,
, we show you how to integrate these two powerful tools:
- adds your Zoho account to WordPress.
- creates a Zoho feed.
- tests your integration.

