
WP Rocket is one of the simplest and most effective caching plug-ins for WordPress websites. It provides one-click functionality for removing unused CSS, delaying JavaScript, and optimizing caching to speed up your website. Cloudflare, on the other hand, is a free CDN service that provides content to user visitors from the nearest location. It’s a good idea to combine the power of WP Rocket caching with Cloudflare CDN to improve the performance of your site.
Rocket CDN and Cloudflare
WP Rocket also provide their own RocketCDN, you can integrate CDN into WP Rocket settings. RocketCDN is from StackPath, and you need $7.99 a month to start using this premium-only service. To use RocketCDN, you need to create a CDN redirection by setting up CNAME in your DNS area and add CNAME to the CDN settings page. However, Cloudflare is a free CDN, and you don’t need to create a CNAME record to use Cloudflare in WordPress.
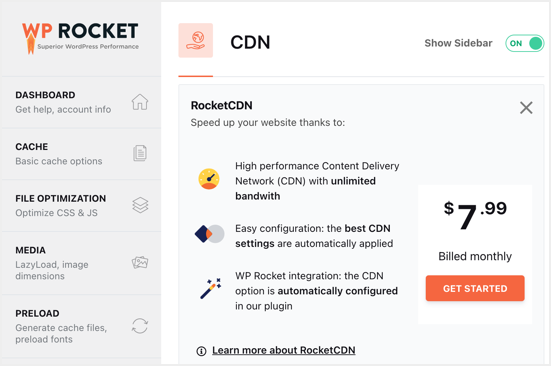
RocketCDN
from WP Rocket you need to change the name servers that point to the domain of the Cloudflare server and route the entire traffic through them. This helps protect your site and improve content delivery to users. To use Cloudflare with WP Rocket, you need to enable add-ons and do not need to use the CDN section.
WP Rocket Cloudflare add-on
to use WP Rocket with Cloudflare, you must enable the add-on that is provided with the WP Rocket plug-in by default. When using Cloudflare CDN with WP Rocket, you do not have to use this plug-in. However, the plug-in helps optimize the settings in your Cloudflare account so that the CDN settings are used correctly through caching.
enables the Cloudflare plug-in
to log in to your WordPress administration panel and navigate to the “Setting & gt; WP Rocket” section. Navigate to the add-ons menu and scroll down to the Rocket Add-ons section. At this point, WP Rocket provides two add-ons-Cloudflare and Sucuri. By default, all add-ons are set to off. Open the Cloudflare add-in by clicking the “Add-ons status” button, as shown below. After the Cloudflare plug-in in the
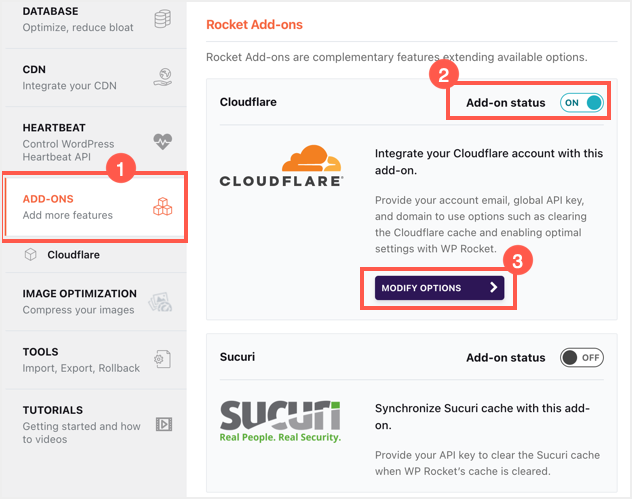
WP Rocket plug-in
uses WP Rocket settings Cloudflare
to enable the plug-in, click the Modify Options button to view the configuration settings. There are three parts that can be used to optimize the settings of Cloudflare.
- Cloudflare credentials
- Cloudflare Settings
- Cloudflare Cache
Related articles:
- uses the W3 Total Cache plug-in to set up Cloudflare for the Cloudflare
- WordPress website beginner’s Guide
Cloudflare credentials
to use WP Rocket with Cloudflare, you need to allow the plug-in to access your Cloudflare account. This can be done by adding the Cloudflare global API key, the zone ID, and your login email address.
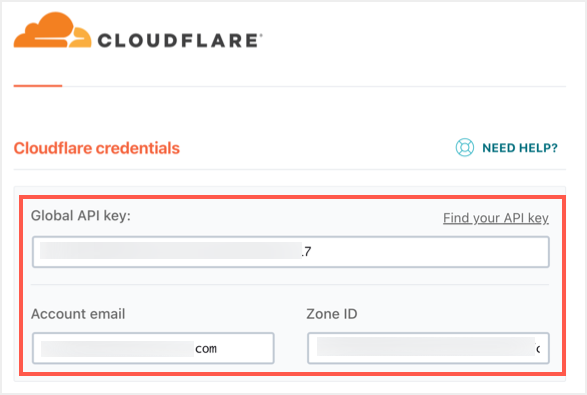
connects Cloudflare and WP Rocket
to your Cloudflare account and select your site to view the dashboard. You will log in to the “Overview” section and scroll down to see the “API” section (this will appear on the right sidebar). You can find Zone ID here, copy and paste it into your WP Rocket Zone ID text box. Then click the “Get your API token” link that appears under your account ID.
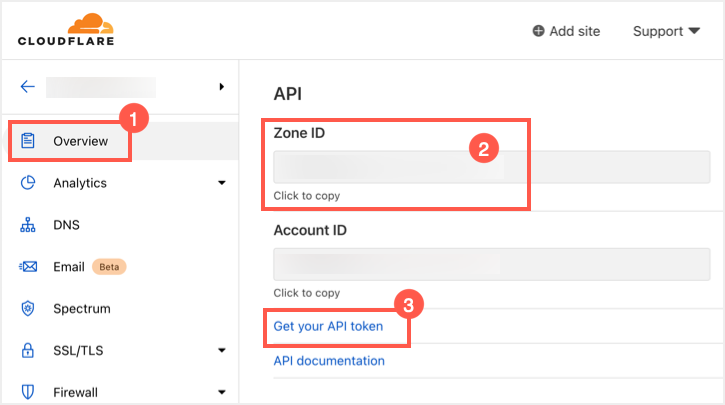
gets the Cloudflare area ID
, which will take you to the “API Tokens” section of the account profile. You can see “Global API Key” and “Origin CA Key” in the “API Keys” section. Click the View button for the Global API Key option.
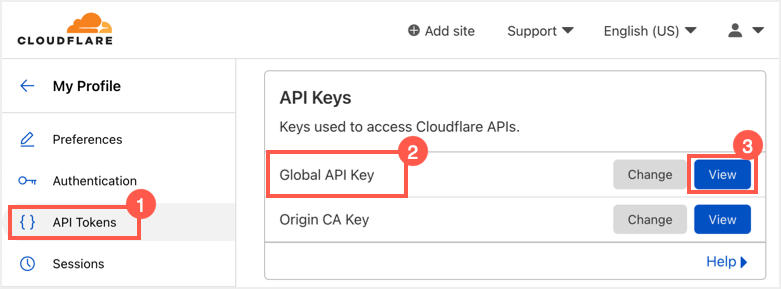
gets Global API Key
in Cloudflare. You need to enter your Cloudflare account password to view Global API Key. So enter your password and click the “View” button in the pop-up window.

enter the Cloudflare password
, you will now have your global API key, which you can copy and paste into the “Global API Key” text box of WP Rocket.
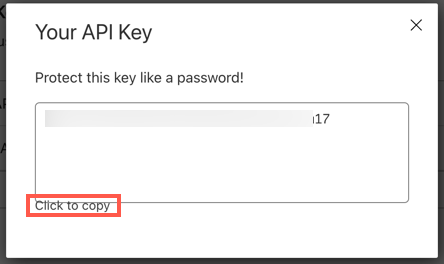
replicates the global API key
Note: for account email, be sure to provide you with the Cloudflare account email, not the WP Rocket or WordPress administrator email address.
Cloudflare sets up the next section of
, and you will have three options as shown below. Turn off developer mode and related protocol options and enable the “Optimal settings” option.
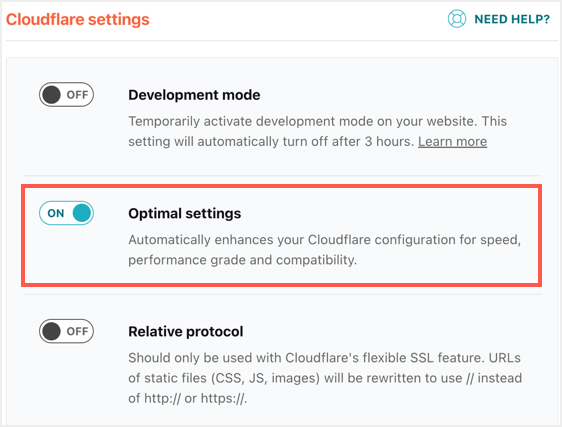
Optimal Cloudflare setting
development mode opens development mode and disables caching / zooming settings in your Cloudflare account. You can use development mode to test the changes immediately without interfering with the Cloudflare cache. Otherwise, simply disable this option. Enable the best settings to automatically turn on the following features in Cloudflare:
- Auto Zoom-enable the CSS, JSS, and HTML minimization options.
- changes the browser cache TTL from the default value of 4 hours to 1 year.
- disables the WP Rocket feature.
- brings the cache level up to standard. The
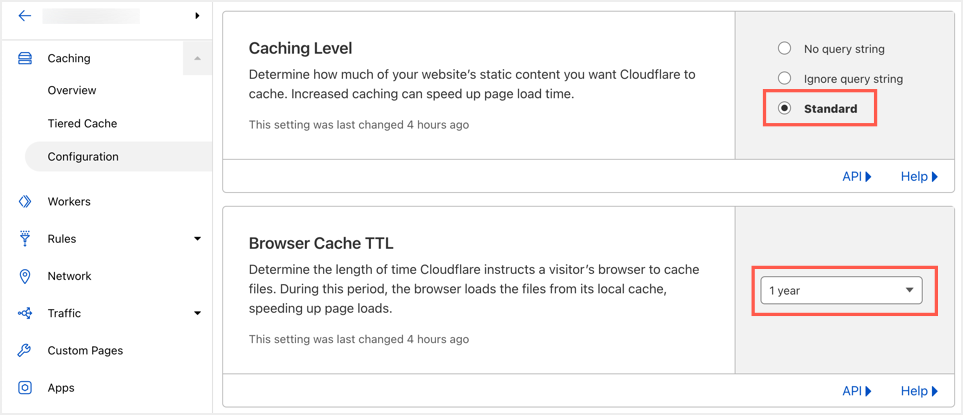
Cloudflare best setting
relative protocol option changes the URL of all static files, such as images, to use / / instead of http:// or https://. WP Rocket recommends that you use this option only if the SSL status in Cloudflare is set to flexible. You can view SSL/TLS status under the “SSL/TLS & gt; Overview” section of the Cloudflare account dashboard.
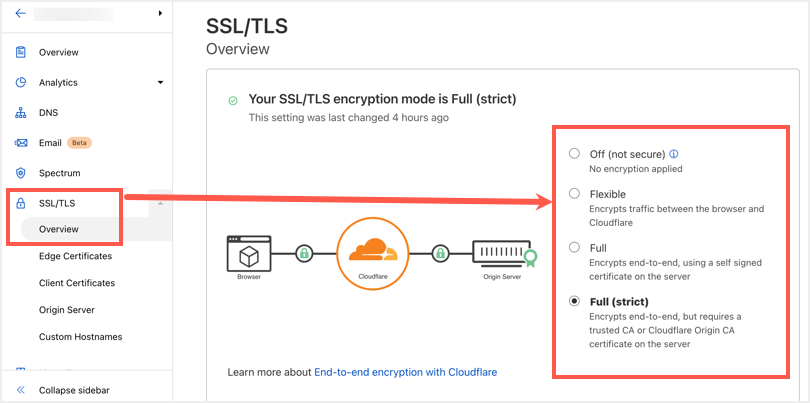
checks SSL status in Cloudflare
if you are using full or strict mode, disable the relevant protocol options.
Cloudflare cache
this is the final setting, and you can click CLEAR ALL Cloudflare CACHE FILES only if you want to delete the contents of the Cloudflare cache. This is the same as the Purge Everything option under the “Caching & gt; Configuration” section of the Cloudflare account.
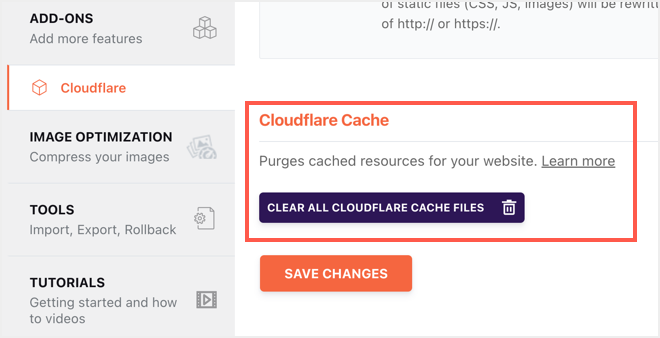
After clearing all Cloudflare cache
from WP Rocket, click the “Save Changes” button to connect WP Rocket and Cloudflare. You will see a summary of the best settings for the changes in your Cloudflare account, and WP Rocket will start preloading the page.
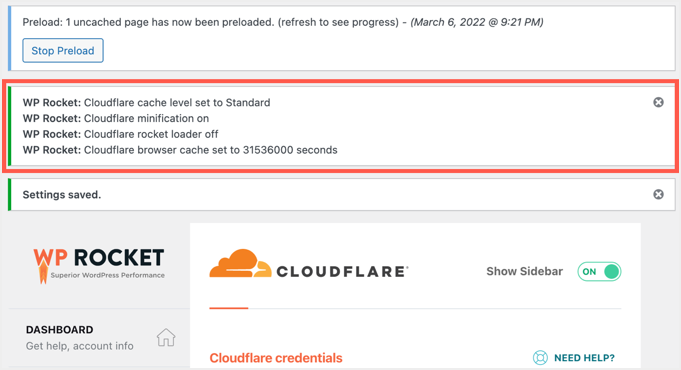
Cloudflare setting status
Summary
as you can see, WP Rocket simplifies Cloudflare settings with add-ons. You just need to connect to your Cloudflare account and enable the best settings to seamlessly use CDN. If there is a problem with your website, you can disable the plug-in and make changes directly in your Cloudflare account.

