WordPress 5.0introduced Gutenberg as its default editor. It provides a new interface and experience for creating content using blocks.
WP developers have taken the concept of block editing to a new level by introducing full site editing in WordPress 5.9. In essence, the Block Editor now replaces the WordPress customizer as the primary tool for editing themes and site appearances. This
article will show you how to use the new WordPress Block Editor (Gutenberg Editor) for complete site editing.
- what is the Gutenberg editor? How does the
- Gutenberg editor work? What does
- think of the Gutenberg editor when using the Gutenberg Block Editor
- ?
Hidden
what is the Gutenberg editor? The
Gutenberg (Gutenberg) editor is a new WordPress editor pre-installed with WordPress 5.0 and later. It introduces a new approach to the content creation process, giving you more control over the visual aspects of the content. How does the
Gutenberg editor work? The
Gutenberg editor uses the concept of content blocks to add and edit various elements in articles and pages, such as text, images, files, and links. The previous default WordPress editor, TinyMCE, focused on text editing.
Tip: although the new Block Editor is pre-installed with WordPress 5.0 and later, users of older versions of WordPress can also use the Block Editor by installing the Gutenberg plug-in. However, we strongly recommend that the core WordPress software be updated to the latest version. After the update of
on WordPress 5.9, the Gutenberg editor is more than just a content editor. It includes all aspects of site customization, including theme editing and page or article creation. The new
editor also provides a better visual representation of the page, making it more like a page builder than the previous WordPress editor.
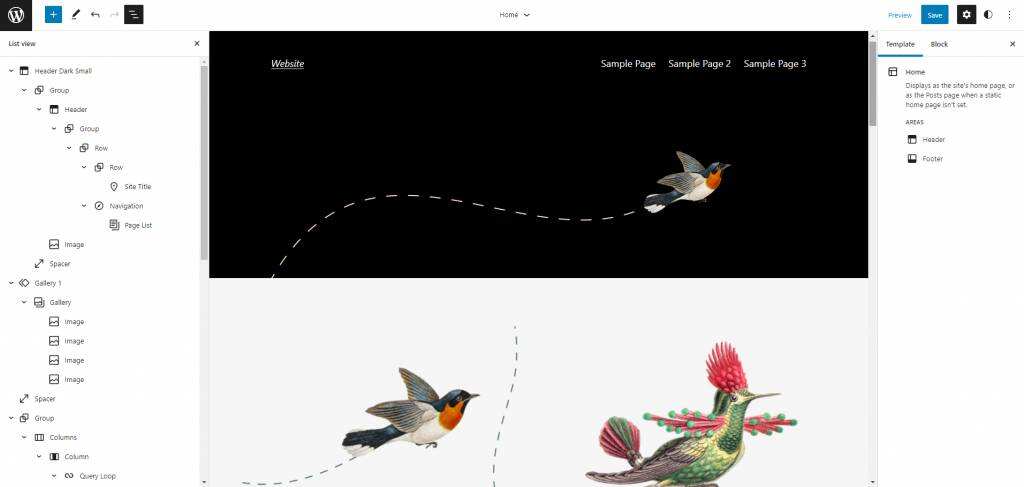
breaks down site elements such as titles, text, and images into blocks, making them easier to manage and customize.
selects any block that you can customize individually, such as setting different background colors or typesetting without affecting other blocks or elements. This provides site editors with more customization options and flexibility.
‘s new user-friendly interface allows new users to quickly learn how to use WordPress. All blocks are listed in a collapsible list according to their structure. It is easy to reposition them on the site because users only need to drag and drop blocks in the list view.
users can add blocks by clicking the plus (+) button on the top bar or page preview. Each block of
has different configuration and design tools. For example, the paragraph block has tools for changing color and typesetting. On the other hand, the image block has tools to add alternative text and resize the image.
‘s new site-wide editing approach also reduces the need for coding and custom CSS. The new block editor introduces a global style panel that controls theme.json files. This allows users to change the style of the entire site, such as adding custom colors and changing typesetting directly on the default editor.
‘s use of the Gutenberg block editor
Gutenberg editor interface may confuse first-time users or anyone accustomed to using classic editors. Here are some guidelines for building Web sites and managing content through the Gutenberg editor.
1. Add a new blog post or page
create content for your site first use the Gutenberg Block Editor to add a new article or page.
blog posts have a release date and usually appear on the site in reverse chronological order. At the same time, pages are static and provide timeless information, such as About, Privacy Policy, and Contact pages.
if you are going to create a new article, please visit the article-& gt; on your WordPress dashboard to add new content. When
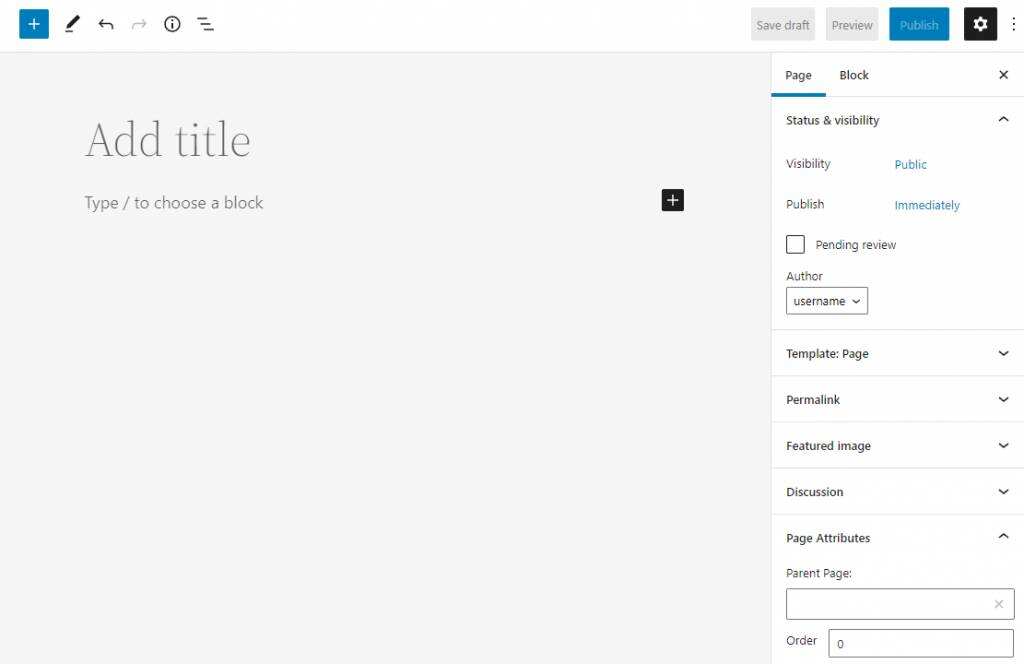
enters the default content editor, you will see a blank draft containing the title of the article and placeholders for the first paragraph block. Add an article title and a new block to create content.

found the article settings in the right sidebar. Here you can set up the article author, article template, permalink, and article category. Creating a new page by
is a similar process. Navigate to Pages-& gt; Add New, and you’ll see the same interface as the one that created the article. The only difference is the page property setting in the right sidebar, which specifies the parent page and page order. The page also has no category or label settings.
2. Global style Interface
the current WordPress editor has a global style interface that allows you to customize the color, layout, and layout of the entire site without coding.
, however, this feature is only available when using block-based topics in WordPress 5.9, including block-based subtopics. Enter the site editor by navigating to the appearance-& gt; site editor and click the black and white icon in the upper right corner of the screen. The global style interface appears on the right. There will be four aspects of
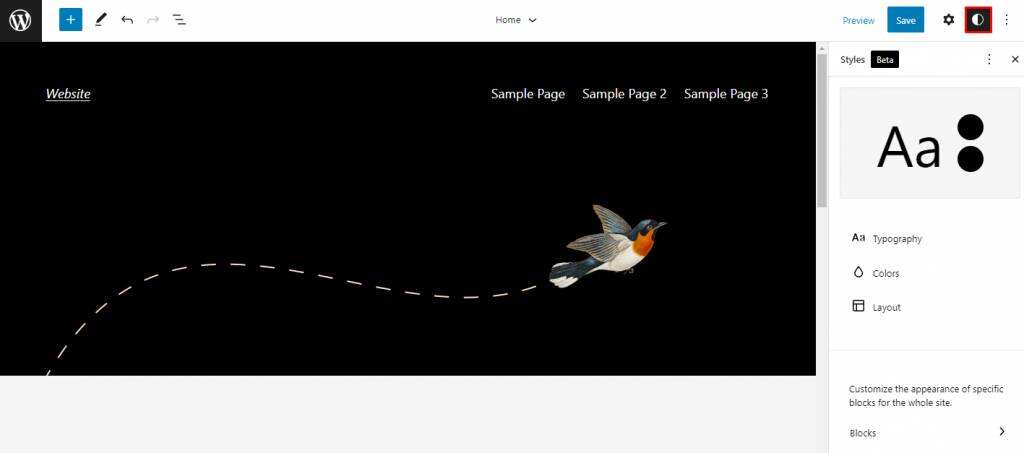
that need to be modified-typesetting, color, layout and blocks.
Manage the font family, size, line height, and font appearance of text and links in typesetting settings.
in the color settings, you will find two main items– palettes and elements. The color palette displays the colors available for site elements-the theme palette and default colors are available for the entire site. The custom color picker allows you to add more colors to the palette. The element section of
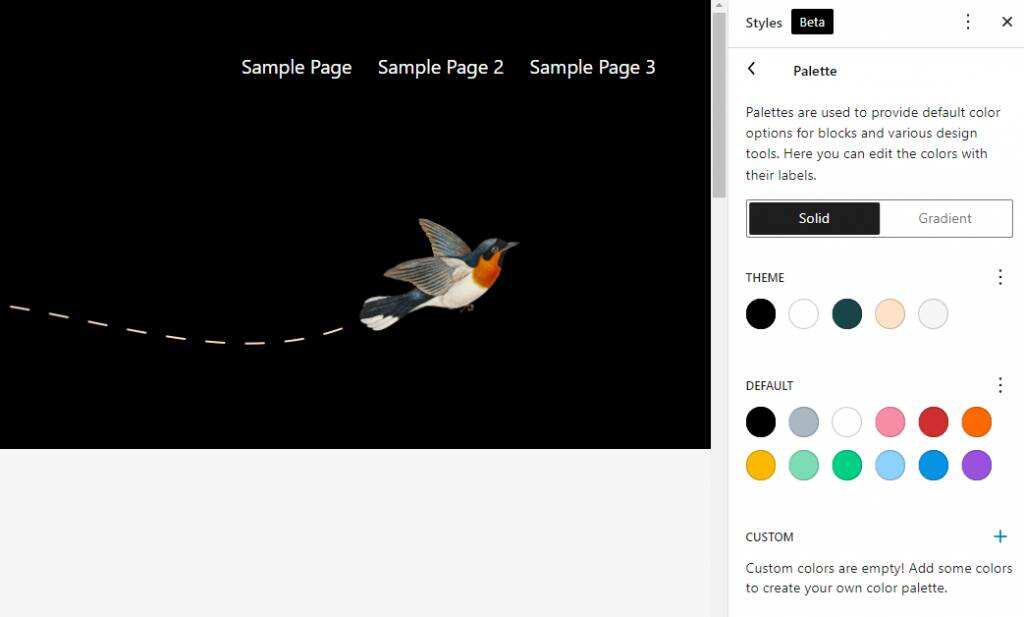
color customization includes three aspects-background, text, and links. Click any of them to customize its color. The next item in the
global style is layout. In essence, this allows you to specify a fill for each site element. The last item in the
global style interface is the blocks tab, which allows you to customize specific blocks. Select this option and you will see a list of available blocks. Select any one of them to start customization. Depending on the block, you can modify its layout, color, typesetting, or all of these.
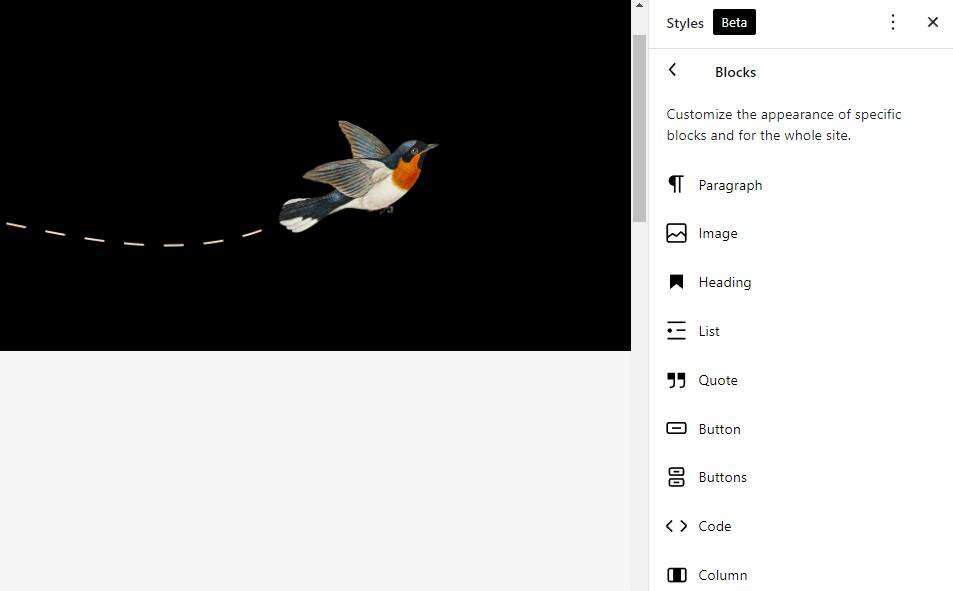
3. Template editing mode
the new WordPress Block Editor includes template editing mode. Most block-based themes are compatible with this feature, so you can use the Block Editor to edit theme templates for articles, pages, or 404 pages. It even allows you to create a new template.
navigates to Appearance-& gt; Site Editor and goes to the site editor. Open the collapsible navigation sidebar by clicking the WordPress logo in the upper left corner of the screen and selecting Templates. You should see a list of available templates and add new buttons in the upper right corner.
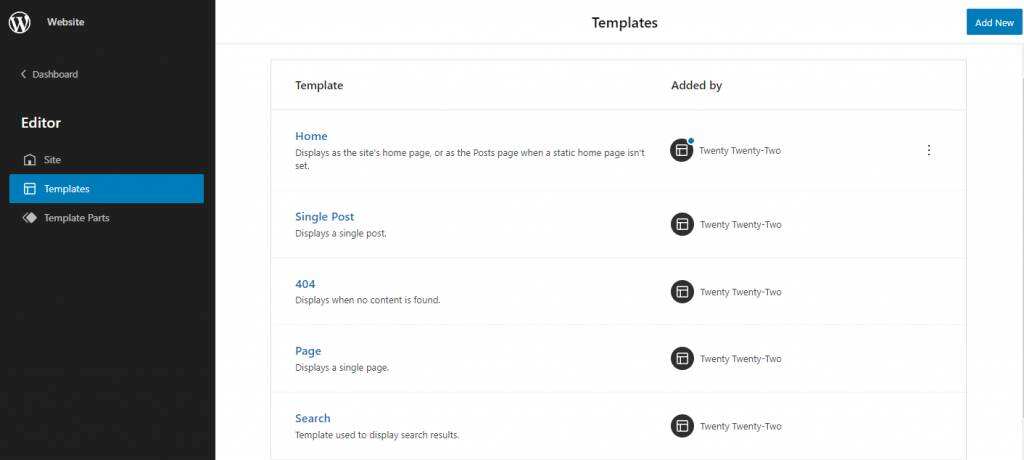
4. Insert Block template
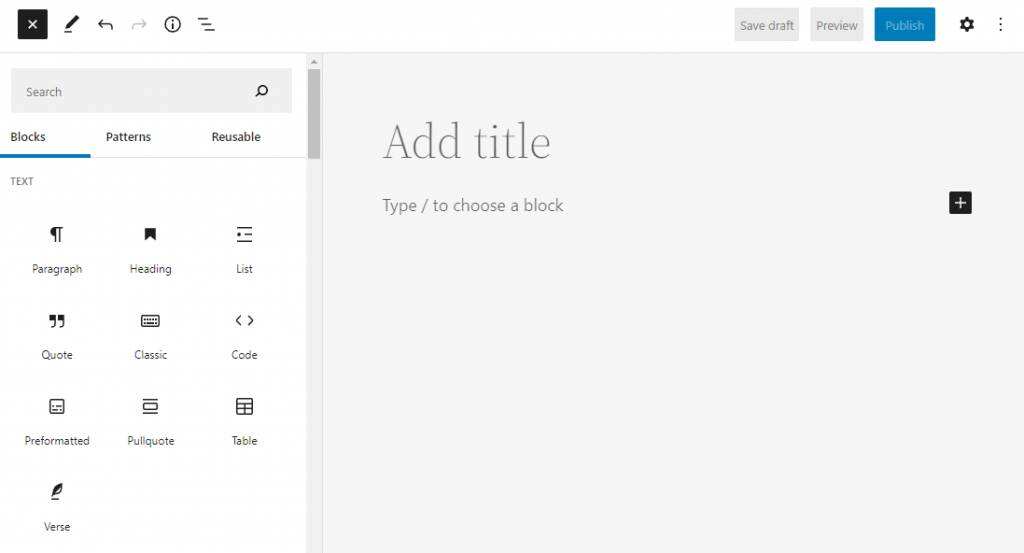
if you do not have time to customize each block, you can use the built-in block template. Click the plus (+) button at the top of the editor screen, and then select the Patterns tab to find several different styles of prebuilt block templates.
clicks the drop-down menu to browse the block templates for buttons, columns, galleries, and titles.

5. Adding a new block
block is a core feature of the Gutenberg editor. Each block hosts an element, so creating custom content layouts for your articles and pages is easier to access.
if you add a new story or page, the WordPress Block Editor sets the paragraph block as the default content block. It makes it easier to start the content creation process.
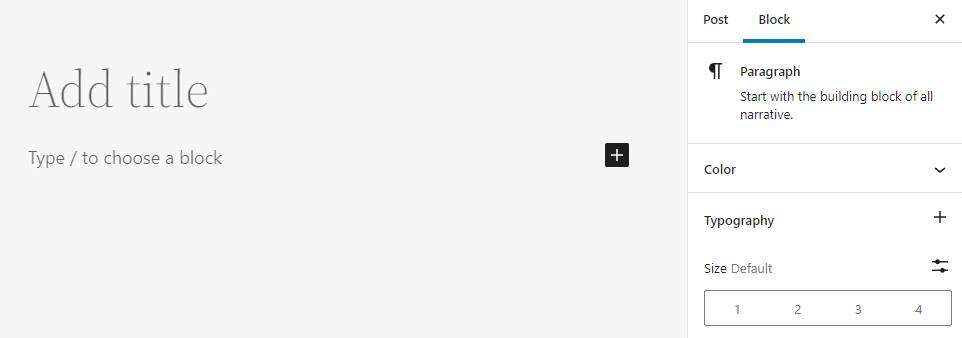
adds more blocks to the content, press enter, and the editor automatically adds another paragraph block, which is convenient for you to use when entering long text.
however, you may want to add other block elements to the text. To do this, click the plus (+) button in the upper left corner of the screen, and then select or search for the desired block.
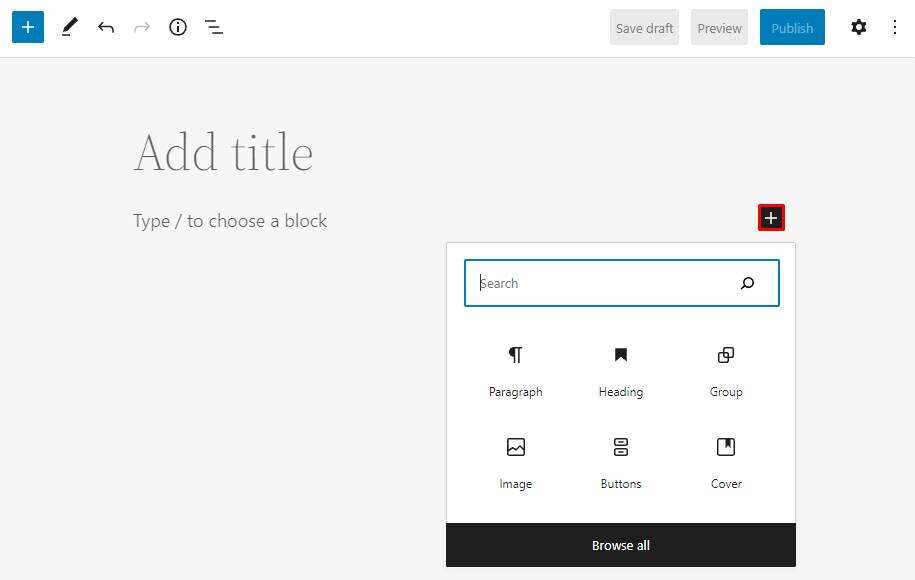
clicks the plus button on the content area to display a pop-up window containing six recently used blocks, making it easier to insert commonly used blocks. Alternatively, use the search bar to find a specific block.
6. The insert gadget
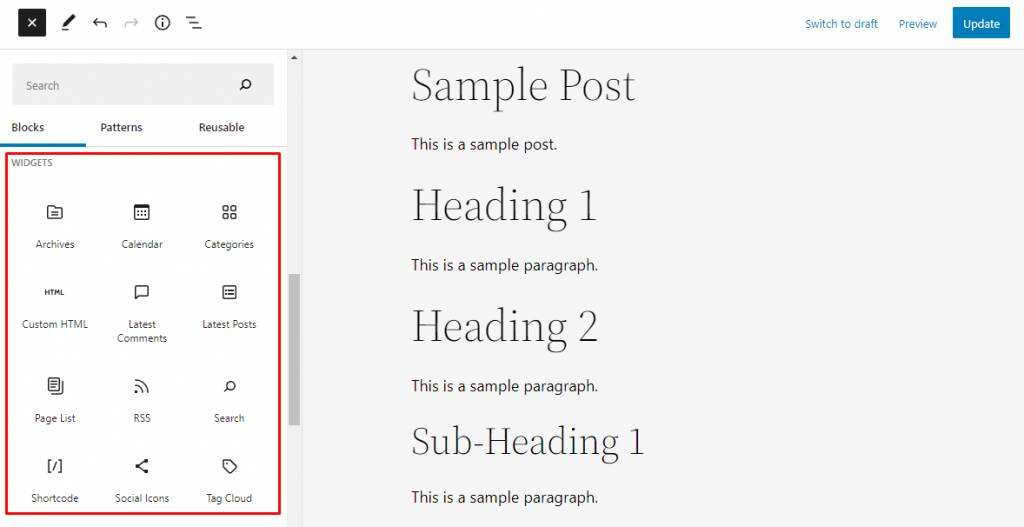
gadget is now integrated into the Gutenberg editor, so adding a gadget is the same as adding other blocks. On the old core version of WordPress,
needed to use gadget-specific page and theme customizers to manage them.
clicks the plus (+) button at the top of the editor screen and selects the Blocks tab. Scroll down to the gadget section to find all available blocks for the gadget.
7. Using Block
to learn how to use Gutenberg blocks will improve your blog experience and speed up your workflow. The new
editor provides a toolbar for element formatting and alignment like a classic editor. It appears at the top of the currently active block and consists of different tools, depending on the block type.
for example, paragraph blocks will have bold, italic, and options to adjust text alignment.
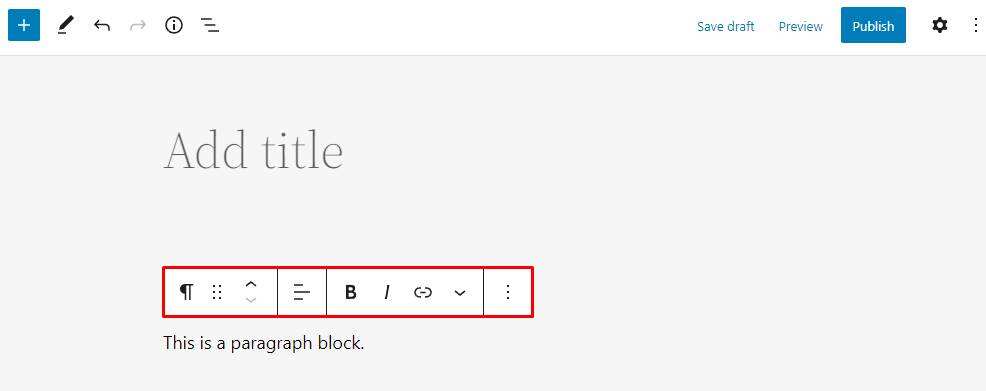
also, image blocks allow you to change the image alignment and switch to a different block type. The
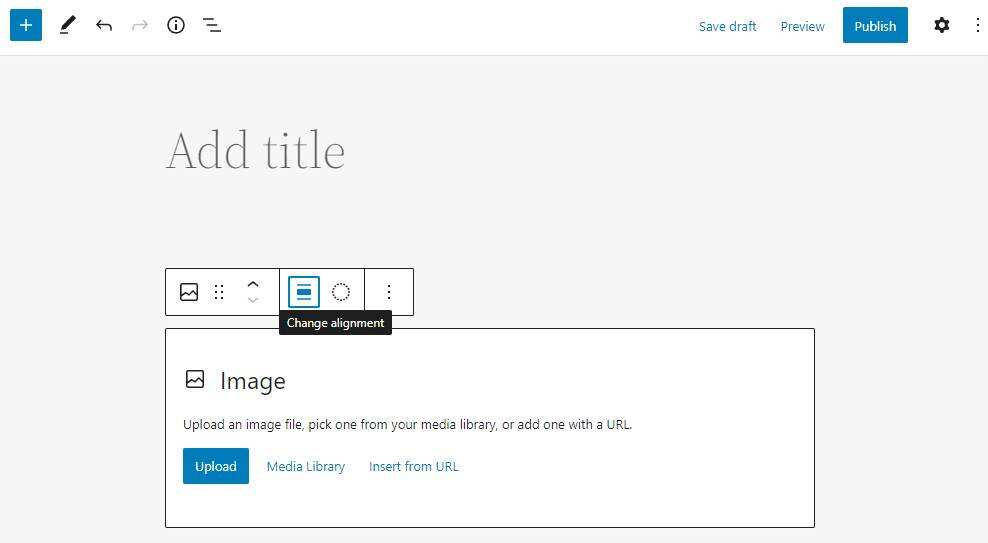
up and down arrows allow you to move blocks to reorder them. Alternatively, click the list view icon at the top of the screen. It displays all content blocks in the order in which they appear on the page.
drag and drop any block to move it to a new location in the list. This feature makes it easier to deal with complex content structures, especially if there are multiple nested blocks.
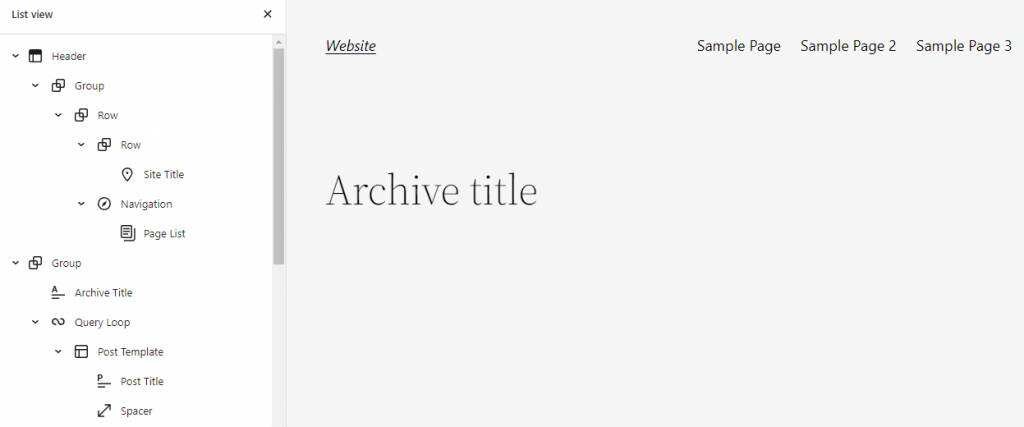
also has different design tools for each block, depending on the type of block. Click the settings button in the upper right corner of the screen, and a sidebar will appear on the right.
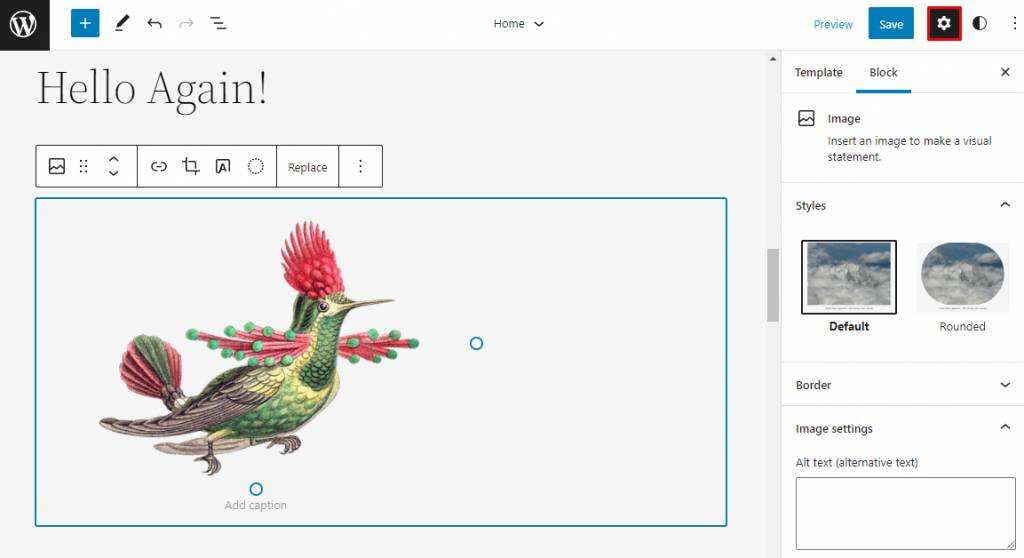
for example, the image block has fields to input alternate text, while the navigation block has layout and display settings.
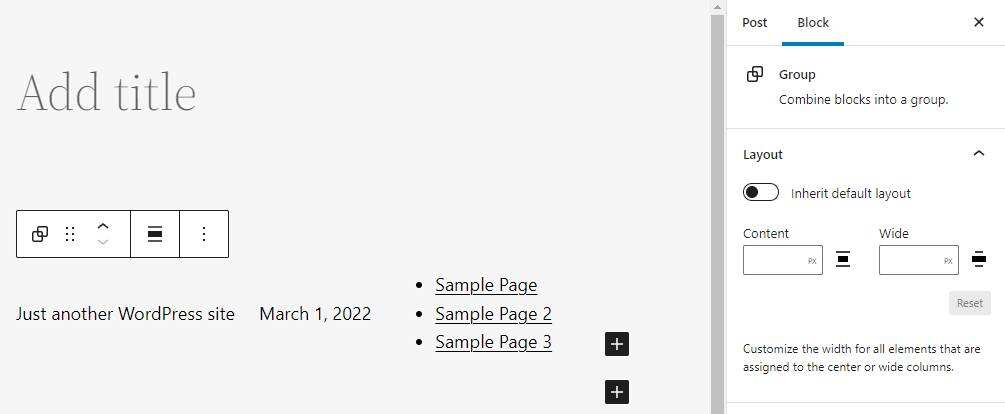
can also add blocks within blocks to create a unique content structure. This applies to blocks such as group, row, and columns, as they act as containers for multiple blocks.
8. The cover text option
Gutenberg provides more freedom in styling headings and paragraph blocks. You can create drop caps and set custom colors for the background of text and blocks. Keep in mind, however, that the cover text option applies only to text-based blocks. The Gutenberg function of
can be accessed through the option & gt; to show more settings in the active block. Additional settings appear on the right side of the screen.
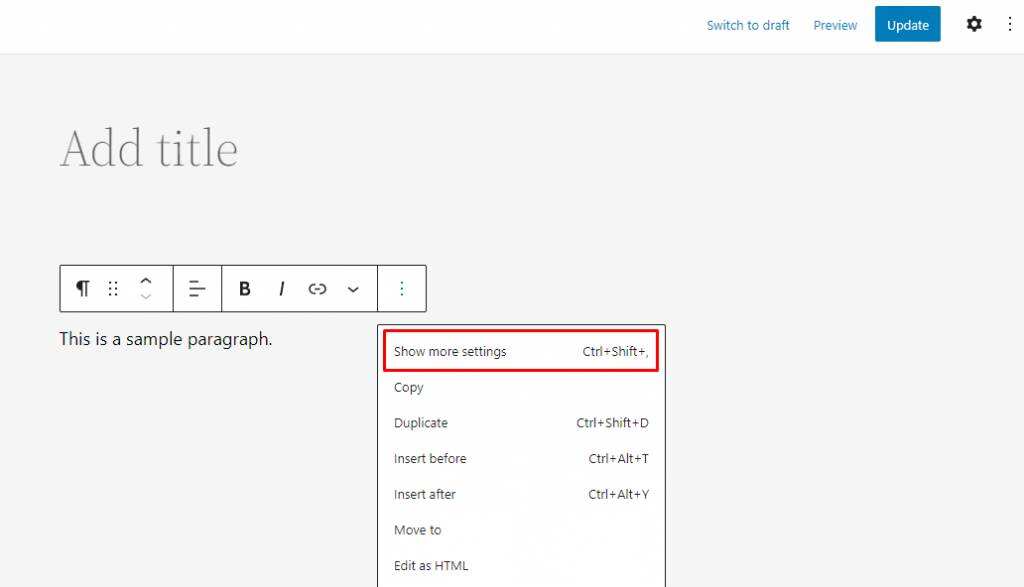
you will find several options for custom blocks in the “blocks” section. Typesetting controls font size and line height, while color settings determine text and background colors. Enabling the drop caps option displays an uppercase letter at the beginning of the paragraph. Another way for
to customize text blocks is to use the global styles panel. This method makes it easy to set specific typesetting and color configurations for all title and paragraph blocks on the site.
9. Content details
to view the content details of articles and pages in the WordPress Block Editor, simply click the details button.
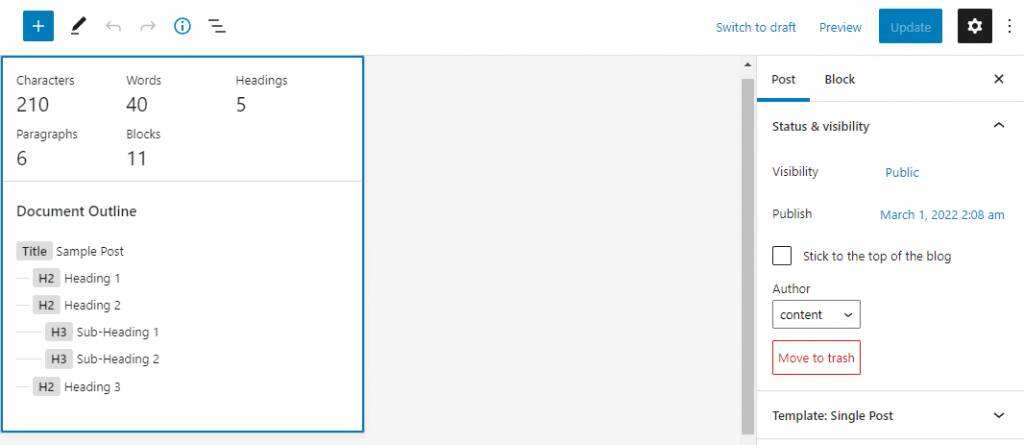
You will see information about the number of words, characters, titles, and chunks on the content to help you create the optimal content length. Another piece of information that will appear in
is the document outline. This section is available only if you use multiple headings. It will display the title structure to help you organize your content and improve your SEO.
10. Anchor support
anchors are links that allow readers to jump to specific blocks of WordPress content. This feature helps highlight specific parts of the content and provides a better context for site visitors.
can also be used as a fast navigation tool for long content. You can add navigation text at the beginning of an article linked to a specific title. Anchor support is also valid when sharing URL that points to a specific title.
the following steps will show you how to create an HTML anchor in Gutenberg.
- creates a new block or selects an existing block.
- from the block’s toolbar, click the option-& gt; to display more settings.
- in the blocks tab, expand the Advanced menu.
- adds a unique HTML anchor to the HTML anchor text box. After
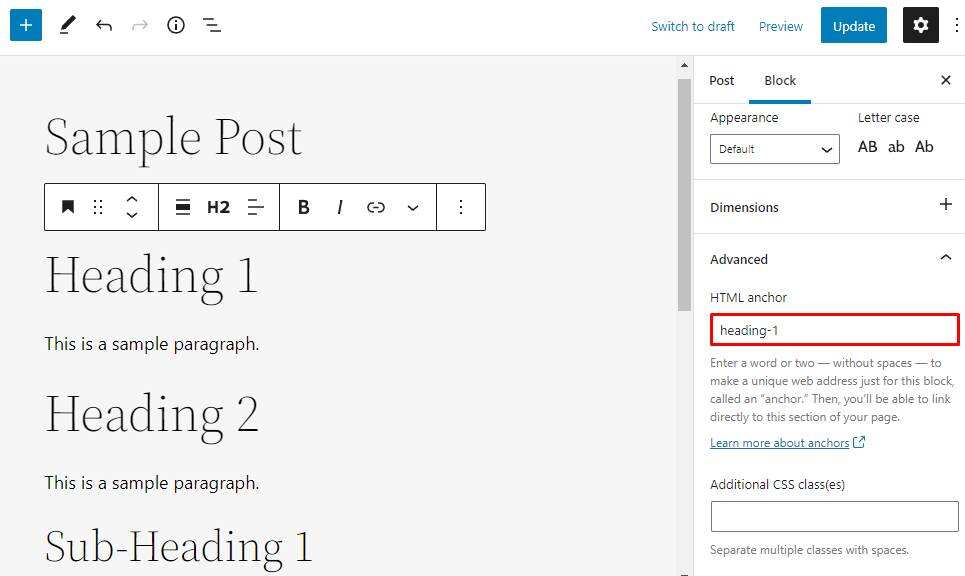
creates an anchor, you only need to link it to the desired element.
- highlights the contents of the anchor point to be inserted. It can be text, an image, or a button.
- clicks the link button in the block toolbar.
- insert the topic label (#), followed by the desired HTML anchor, and then press Enter or click submit.
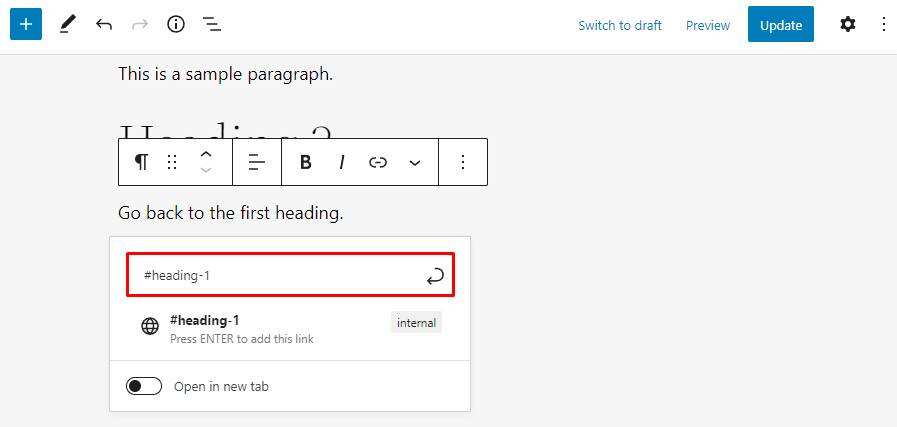
anchor links apply only to published pages or articles. When
creates an anchor in a new editor, keep in mind that
- must be unique.
- it is case sensitive.
- cannot contain spaces, but can contain hyphens (-), underscores (_), colons (:), and periods (.) Wait for symbols.
- it must start with a letter.
11. When you insert an image block on content using Image Block
, the WordPress Block Editor provides the option to upload an image from your computer, select an image from the library, or link to an image URL. The new
editor also allows you to drag and drop images anywhere in the content without first creating new blocks.
all you have to do is open the file manager and drag and drop the selected image into the Gutenberg workspace. The Block Editor automatically creates an image block to host the file, which you can customize as needed.
opens the block settings and you will find the fields of alternative text and image size options for the image.
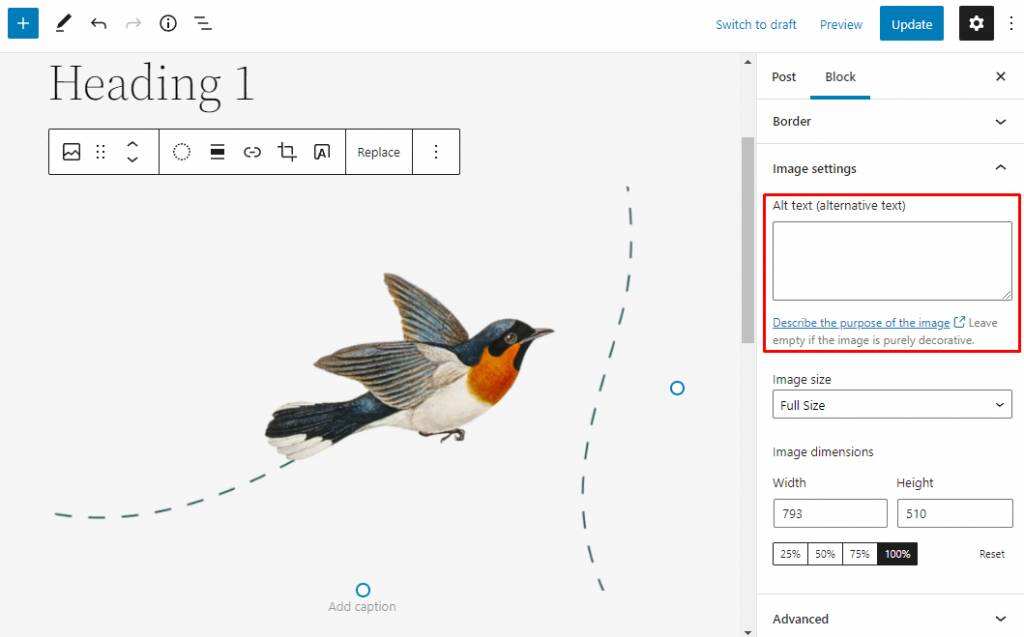
Gutenberg also provides title space at the bottom of the image. Click to activate it and add text.
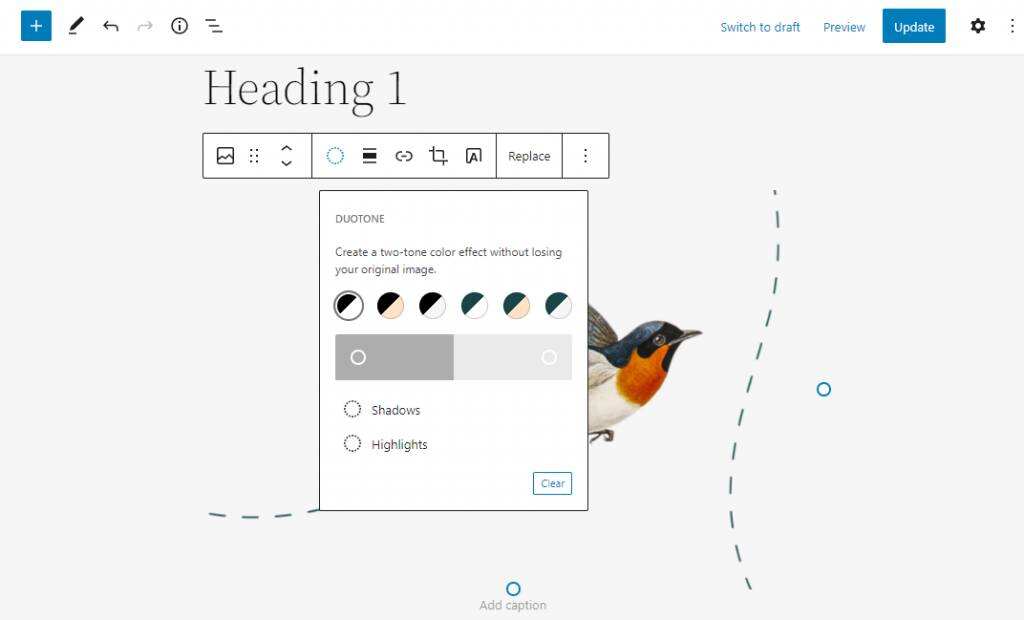
you can set image links and alignment in the toolbar of the image block. There is also a duotone feature that can use any available duotone preset to convert image colors. Another way for
to process images is to use image library blocks. This is the container block type used to add a set of images. You can set the column number of the gallery to create a beautiful grid-style display. All image blocks in the
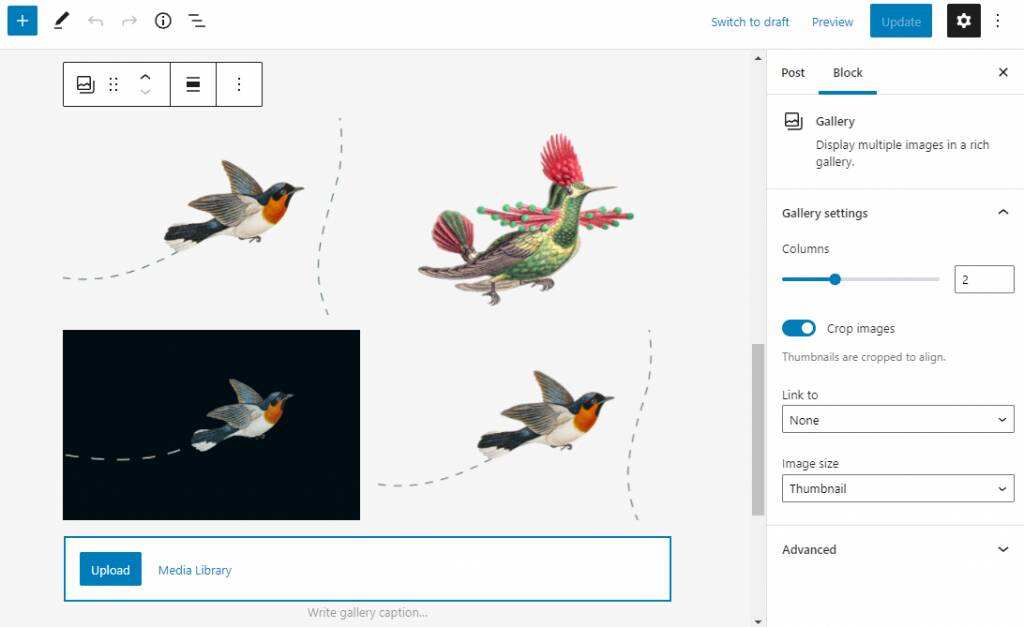
gallery will be counted as a single block. This allows you to customize each image with unique borders and alternate text.
12. Reusable blocks
Gutenberg Block Editor makes it easier to save and reuse blocks in other pages and articles. If you reuse the same block type, it will save you time to customize it over and over again.
here is how to save and reuse Gutenberg blocks:
- selects the blocks to save and then clicks the option-& gt; to add to the reusable blocks.
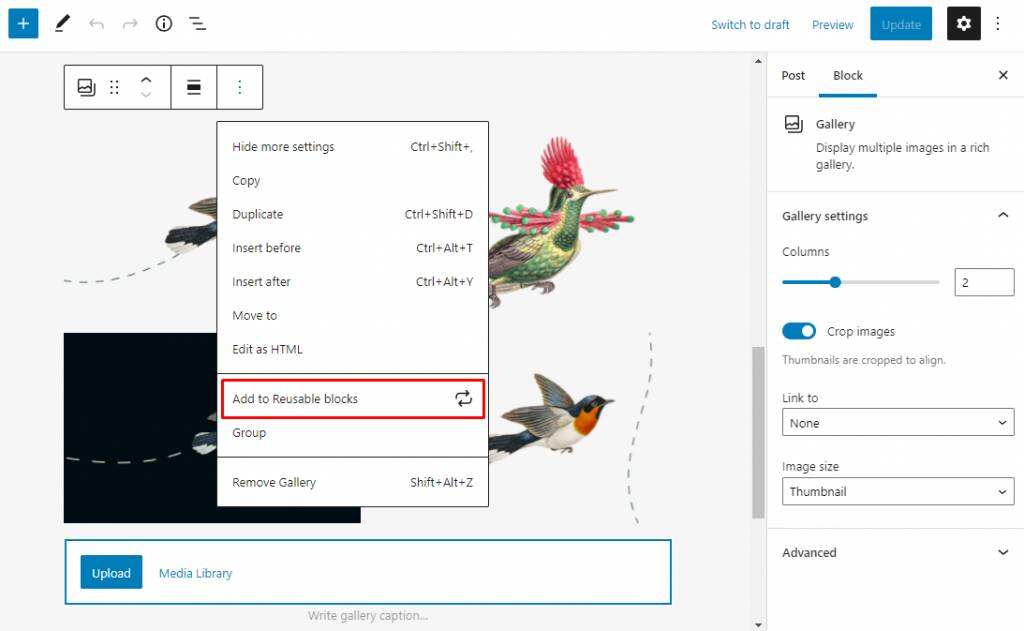
- enter a name for the block and click Save. To reuse a block in
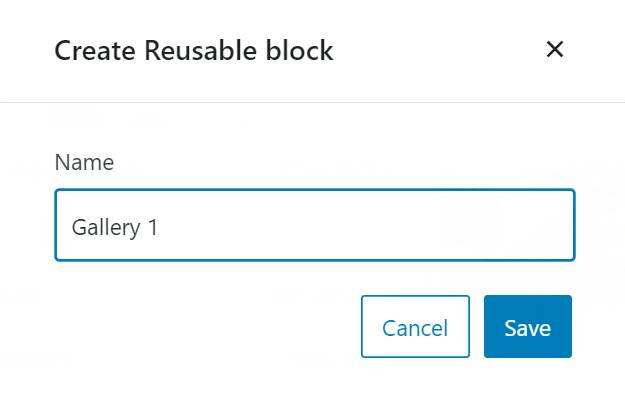
- , create a new block in the Gutenberg editor.
- click the plus (+) icon and browse all. Open the Reusable tab, where you will find all reusable blocks.
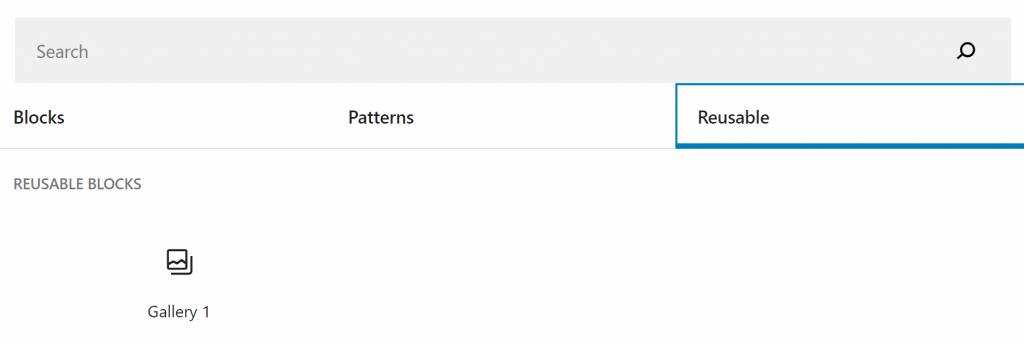
- inserts the block you saved earlier.
you can delete or edit any reusable block through the Block Manager. To do this, select manage Reusable blocks in the Reusable blocks tab.
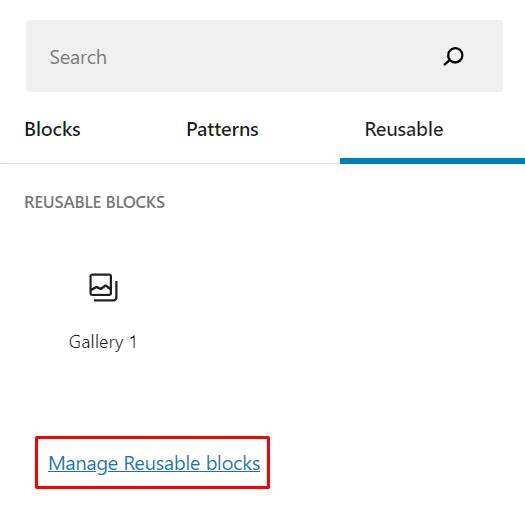
deleting the page or article where you created a reusable block will cause errors in other projects that use that block.
13. Table blocks
Gutenberg improves WordPress table functionality by introducing table blocks, eliminating the need to install table plug-ins or use custom HTML code.
the following is how to create a table using the Gutenberg Block Editor.
- drag and drop table blocks from the block directory to your Gutenberg workspace.
- sets the number of columns and rows, and then click Create Table.
- Gutenberg will create a new table with response column blocks. The
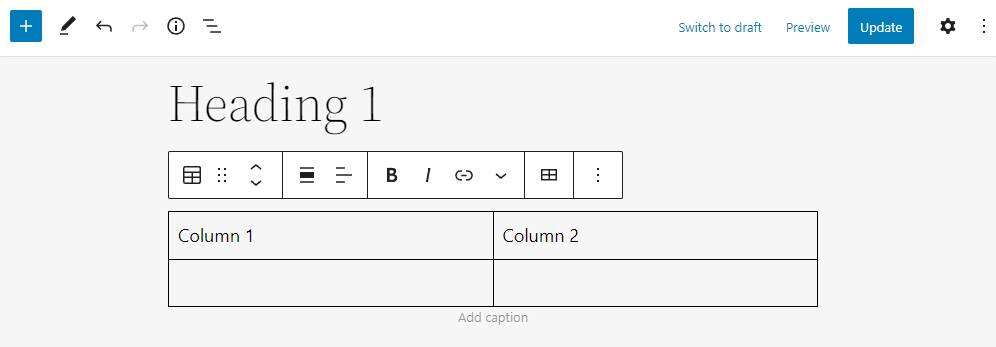
Block toolbar has several customization options, including text formatting, row, column insertion, and text alignment. Two pre-designed styles are available in the
block settings panel. In addition, the block comes with designer tools to customize colors and border styles.
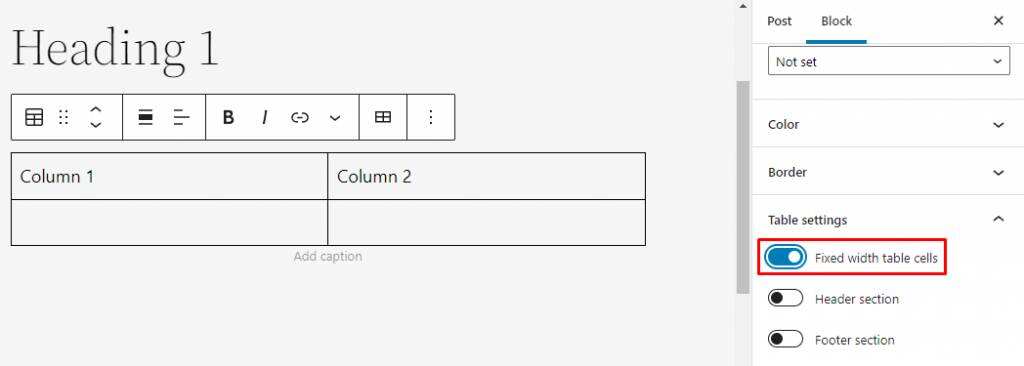
by default, tables created with this block will have responsive column widths. However, you can change it in the table settings. Scroll down the block settings panel, expand the table settings section, and then open the fixed width table cell option.
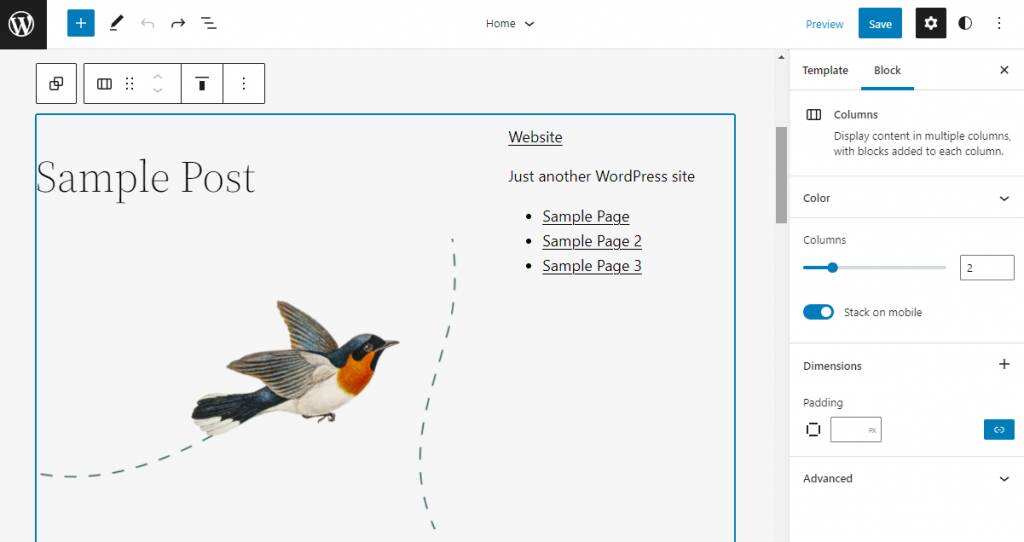
14. Column blocks
columns blocks provide an easy way to split content into up to three columns. This feature helps improve the readability of the content by adding visual elements next to the text.
or use this new block to improve the space efficiency of your site, displaying multiple content types without requiring visitors to scroll down too much. The following steps of
will show you how to add a new column block to your site.
- clicks the plus (+) icon and selects the column block.

- selects one of the available column modes. The
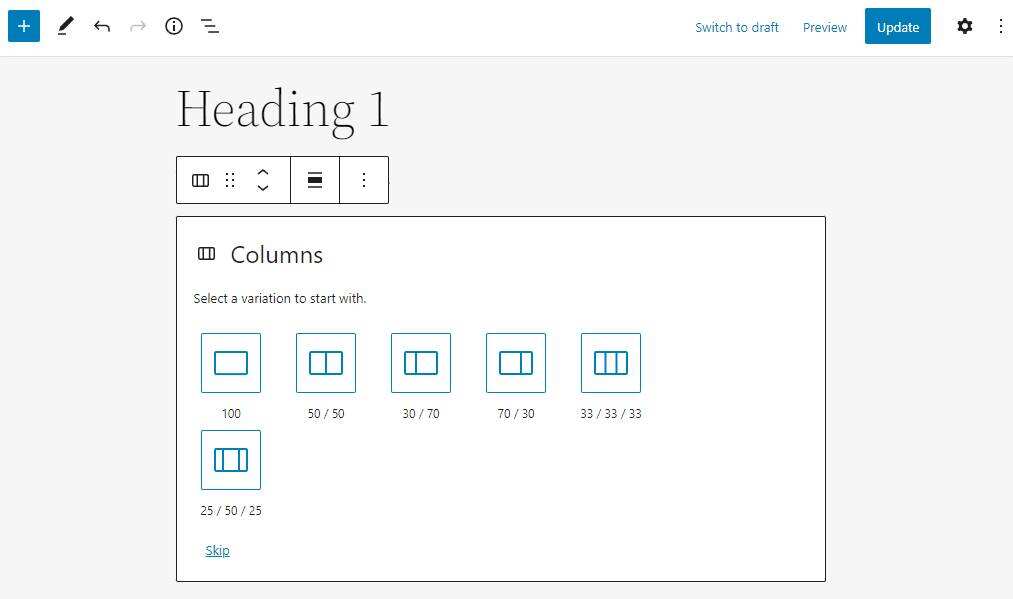
- Gutenberg editor generates a new block based on the selected style. Click the plus sign (+) icon to add new elements to these blocks.
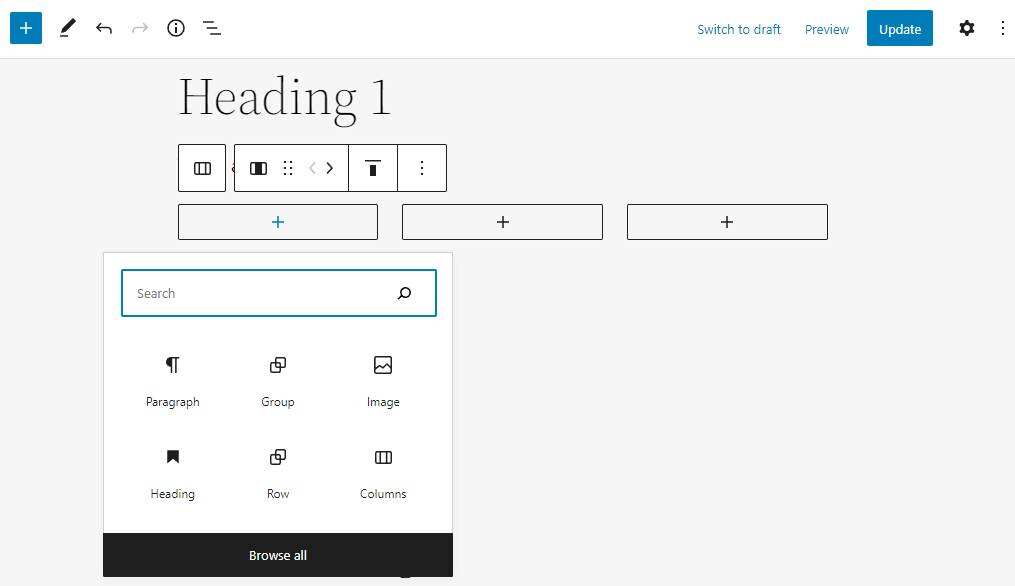
A good use of the column block is to create a sidebar. Select the variant of the 30UX 70 or 70ram 30 columns and insert the query loop block in the larger column. Use smaller grouping blocks to contain the gadget blocks of the sidebar.
15. Real-time HTML Block
the new WordPress Block Editor has a real-time HTML block for code preview. This feature allows you to check that your code is working properly on a WordPress site without having to switch back and forth between a visual editor and a text editor.
here is how to insert custom code using the Gutenberg editor real-time HTML block:
- clicks the plus (+) icon and finds the custom HTML block.

- inserts a custom HTML in the block that will appear.
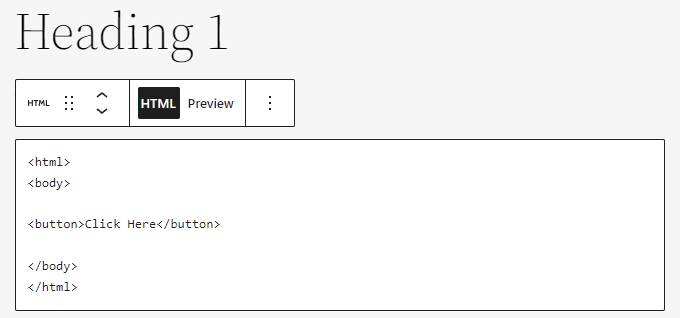
- Click Preview to see how the code looks on your WordPress site.

16. Embedded element
adding audio or visual elements from your WordPress library or other sites such as YouTube, Reddit, and Twitter will help make your content more attractive. The
block editor makes it easier to embed such elements in the content because there is a large number of media and embedded blocks available.
Embed media files
The
media block allows you to upload and display a variety of files on the website, providing different block settings depending on the media. Select the correct block based on the type of file you want to upload.
inserts the media block by following these steps:
- opens the block inserter by clicking the plus (+) icon.
- scrolls down to the media section and selects the appropriate block.
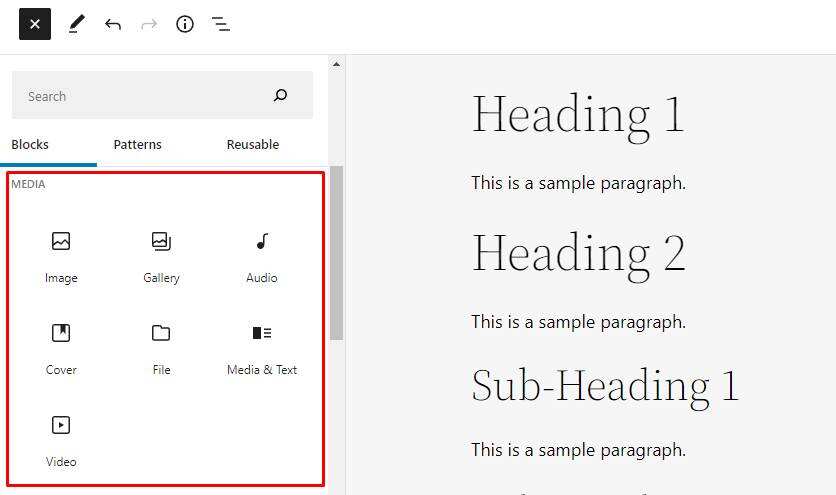
we have discussed embedding images using image and gallery blocks. Now let’s take a look at other media blocks.
- Video-embeds a video player into your content with configurable settings such as playback controls, auto playback, and video loops. It also allows you to display poster images when the video is not playing.
- Audio-add an audio player with a simple configuration for automatic and circular playback.
- Cover-add an image or video with a text overlay. This block is useful for creating a title or banner with an image or video background.
- File-add a link to the media file and optionally include the download button. This block also supports PDF viewers, so you do not need a PDF viewer plug-in to embed PDF files.
Embed external content
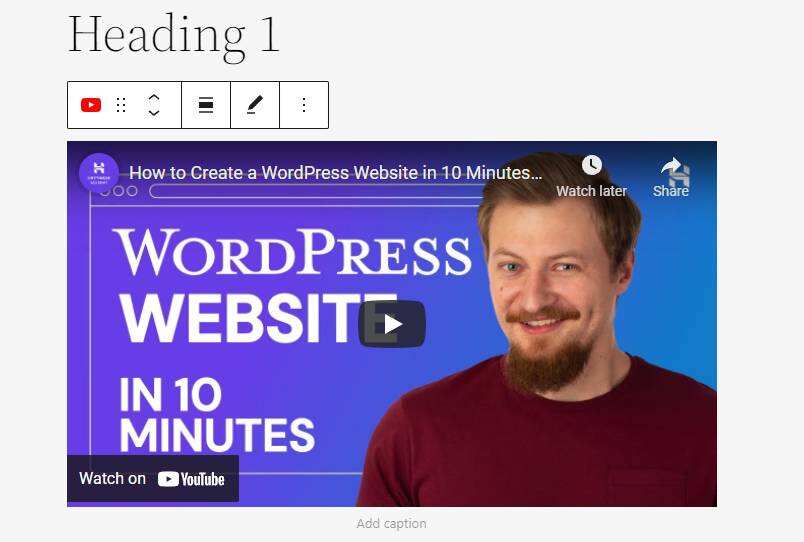
‘s next set of blocks, embedded blocks, allows you to integrate content from external sites such as YouTube, Twitter, and Spotify. Using embedded blocks is simple because you only need to copy and paste the URL you need.
- clicks the plus (+) icon and scrolls down to the embedded section.
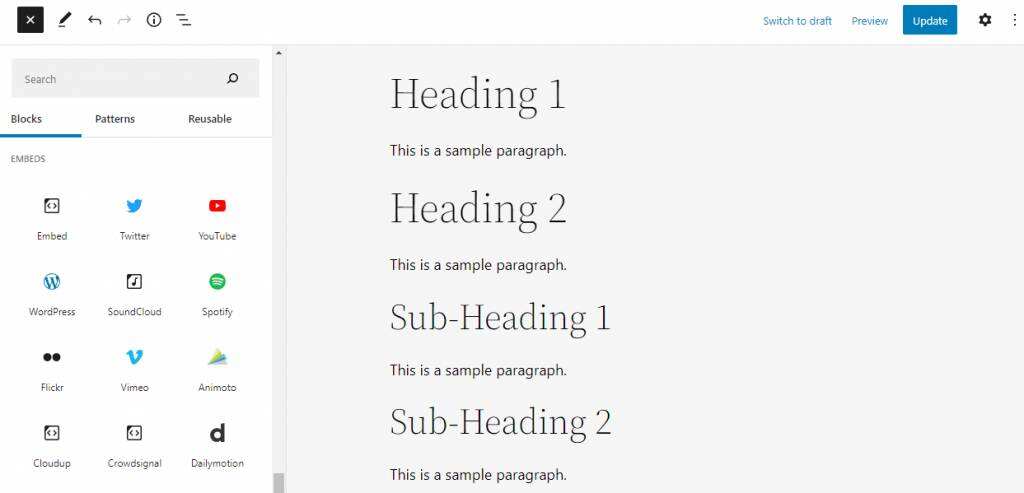
- if the site is not listed, use embedded blocks. For this example, we will use the YouTube block.
- copies the URL of the media you want to embed and pastes it into the text box provided.
- Click embed, and the media will appear on the WordPress page or article.
17. Buttons
buttons allow visitors to interact with the site, whether to navigate or perform specific operations. They also help improve your conversion rate by registering or buying goods using the buzzword button. The
Button Block helps you insert buttons anywhere on the site, including articles. Here is how to insert a button using the WordPress Block Editor:
- opens the block inserter by clicking the plus (+) icon and selecting the button block.

- types the label in the button block. For example, we will create a subscription button.
- Click the link icon to add a link to the button. The Block Editor also provides the option to open a link in a new tab.
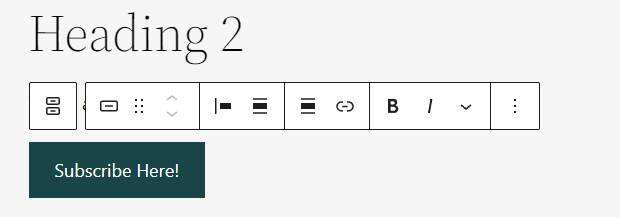
- Click submit to save the changes.
- to add more buttons to the group, click the plus icon in the lower right corner of the block group.
18. Citation and reference blocks
use Gutenberg to make it easier to create block references for citations from external sources. In addition, the new citation blocks help highlight important information in WordPress pages or articles.
here is how to create a citation block using WordPress Gutenberg:
- navigates to Block Directory-& gt; Pullquote.

- writes the quotation in the block.
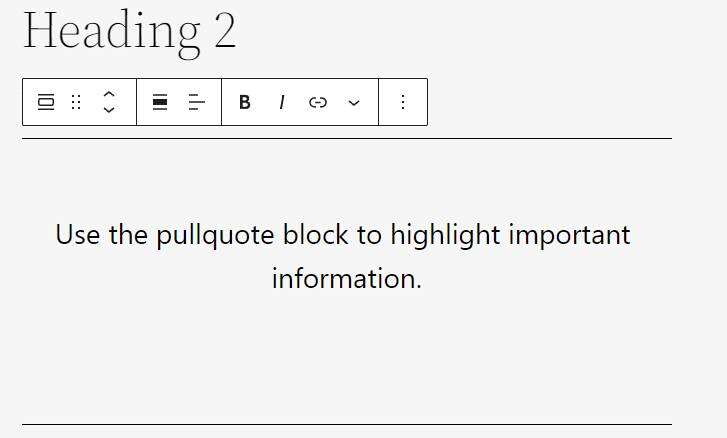
- changes the alignment of the citation to fit the rest of the text. In addition to the standard settings, Gutenberg also provides full width and width alignment. The steps for
to add references are similar to citation blocks. The only difference is that it uses reference blocks. What does
think of the Gutenberg editor? The
Gutenberg editor is a development that surpasses the classic WordPress editor in terms of customization and flexibility. However, the Gutenberg editor still has its advantages and disadvantages.
advantages
- The least code. Using the global style interface, you do not need to write code to customize the appearance of the theme. The various blocks in the Gutenberg editor also make content creation and editing easier.
- Mobile friendly. Gutenberg provides better responsiveness than the WordPress classic editor. Being able to post content anytime, anywhere can improve your workflow, especially if you travel a lot.
- Fewer plug-ins. Some blocks provide functionality to replace the additional plug-in requirements. If you think the default block is not enough, you can install the block plug-in to add more options.
- Flexible custom blocks. Gutenberg allows developers to create custom blocks for themes and plug-ins, adding value to add-ons and opening up more customization possibilities.
- Meta-box support. The Gutenberg editor is compatible with most meta boxes used to create custom fields and add metadata to articles.
disadvantages
- Learning curve. WordPress users who have no experience with page builders or are more accustomed to older WordPress editors may need time to adapt to the new layout and tool placement.
- Compatibility issues. The Block Editor is available only when using block-based themes.
although Gutenberg provides more freedom to customize projects, it is not a page builder. Understandably, the WordPress block lacks some of the design options provided by most page builders. Fortunately for
, you can use block plug-ins to extend the functionality of Gutenberg. Here are some of the most popular block plug-ins to consider.
- Stackable: a free value-added page builder plug-in that provides block design and user interface toolkits. It allows you to create hover animations and change block typesetting settings.
- Gutenberg Blocks: another free block plugin that provides convenient blocks to help you build tables, taxonomies, and timelines.
- Orbit Fox: it provides tools to improve conversion rates, such as uptime monitoring, Google Analytics integration, and shared icons.
- PublishPress Blocks: a free multi-function plug-in that provides 20 new blocks and access control to blocks.
installing plug-ins for WordPress blocks will bring you a better user experience and faster workflow. The
summary
Gutenberg editor introduces a new way to edit content using blocks. This is part of WordPress’s goal of achieving complete site editing and improving the user experience.
‘s new block editor integrates with core software from WordPress 5.0 or later. If you are still using an older version of WordPress, install the Gutenberg plug-in to use the editor.
‘s use of blocks will make site customization easier because you can easily reorganize your site by moving blocks. The available block templates also allow you to change the layout immediately.
blocks also help simplify your project through features such as reusable blocks to avoid duplication of effort. In addition, the global styles panel allows you to change the design of the entire site without any CSS code.
finally, don’t hesitate to install the WordPress block plug-in. Improve your workflow by introducing many new WordPress blocks, which will add more design options to your editor.

