In the Python world, many developers like NoSQL database Redis because it is fast and has a variety of powerful client libraries. In the WordPress world, Redis is usually the preferred technology when persistent object caching is needed to speed up back-end data access.
you can combine these two worlds when using Python applications to process WordPress content.
in this tutorial, we will demonstrate how to publish content directly to Redis by building a Python application that uses the popular redis-py library, and how to publish content through WordPress REST API.
Redis or remote Dictionary Server is a fast NoSQL database and memory cache developed by Salvatore Sanfilippo and maintained by Redis Limited (formerly Redi Labs). (formerly Redi Labs) maintenance. The open source version of Redis is licensed under Berkeley Source Distribution (BSD), and Redis Co., Ltd. also offers commercial enterprise and cloud versions of the server.
Redis differs from other NoSQL databases in its data storage mechanism. It is often called data structure storage because it stores the same data types as in many programming languages, including strings, collections, lists, and dictionaries (or hash values). In addition to supporting simple structures, Redis also supports advanced data structures that can be used for tasks such as geolocation and stream processing. Prerequisites for
Python applications
before you start creating the application, you need to install the following three projects locally:
Redis-if you need some guidance, please refer to the official Redis installation guide.
- WordPress-check out our WordPress installation guide for Windows, macOS, and Linux. Ensure that the WordPress front end is connected to the MariaDB or MySQL database.
- Python and pip-Pip (Python package installer) has been included by default since Python 3.4. Once
- has installed the prerequisites, it’s time to get everything up and running. Specifically, you create a Python application that gets the user’s WordPress posts in dictionary format and saves them to the Redis cache.
creates Python applications to store posts in Redis caches.
Redis caching is an efficient website caching mechanism. It can store frequently requested information for faster and more convenient access. The cache stores information in key-value data structures.
first, create a new folder called python-redis for your project. Then, start the command terminal,
to python-redis and run the following command to install redis-py:cd. After the installation is complete, create a new file called main.py in the python-redis directory. Open the file with your favorite text editor and enter the following code block.
pip install redis
first imports the newly installed redis-py library and sets the Redis host and port address:
now defines the value of the WordPress post as a key / value pair in the dictionary. Here is an example:
import redis
redis_host = 'localhost'
redis_port = 6379
Note: in practice, the content of the post may come from the HTML input form.
post = {
'ID': 1,
'post_author': 1,
'post_date': '2024-02-05 00:00:00',
'post_date_gmt': '2024-02-05 00:00:00',
'post_content': 'Test Post
related blog post',
'post_title': 'My first post',
'post_excerpt': 'In this post, I will...',
'post_status': 'publish',
'comment_status': 'open',
'ping_status': 'open',
'post_password': 'my-post-pwd',
'post_name': 'my-first-post',
}
adds the
function in the code, which will connect to the local Redis server, store the above posts in the Redis cache, and print the values successfully created to the console:redis_dict()unless you start Redis in Docker, please use the following command to call the Redis command line interface:
def redis_dict():
try:
r = redis.StrictRedis(host = redis_host, port = redis_port, decode_responses=True)
r.hset("newPostOne", mapping=post)
msg = r.hgetall("newPostOne")
print(msg)
except Exception as e:
print(f"Something went wrong {e}")
# Runs the function:
if __name__ == "__main__":
redis_dict()
now runs the Python script: after
redis-cli
executes the script, the post will be added to the Redis key value store. You should see the following response in the terminal console: the
python main.py
console output shows that the Python application post has been added to the Redis store

you have successfully stored an article in the local Redis database.
now, let’s use WordPress REST API to upload posts to the WordPress site and store them in the default MariaDB or MySQL database instead of Redis.
uses REST API to upload posts to WordPress.
WordPress REST API provides a set of endpoints that you can call from your application to interact with WordPress. We use the post endpoint to create a post in WordPress.
step 1: setting the application password in WordPress
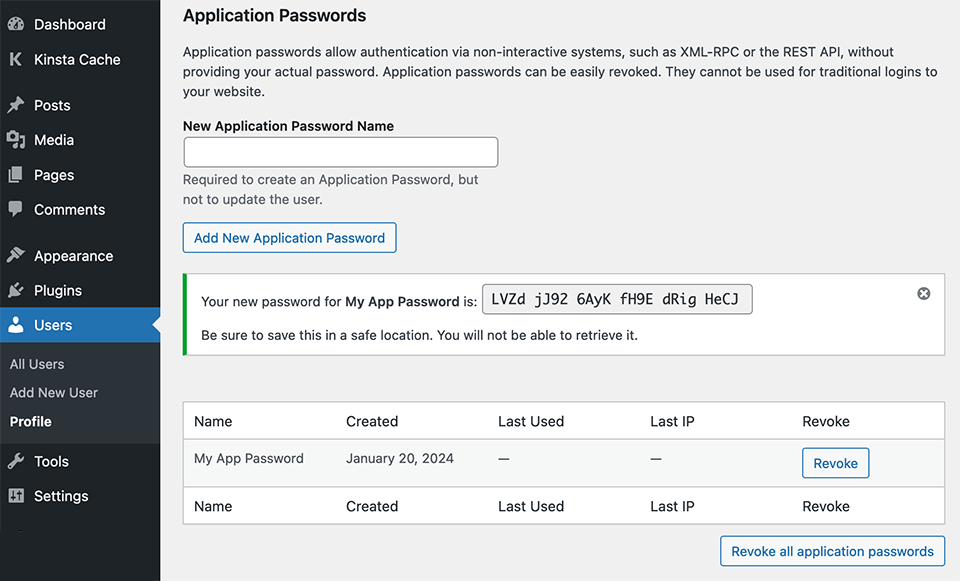
WordPress API requires an application password to allow your application to access data from the WordPress website. The password is a 24-character key that you must include in each request to the REST API.
generates the application password on the user profile page of the WordPress control panel. You can specify a user-friendly name for each application password, but after you generate the password, you will not be able to view the password itself (so make a copy now):
generates the application password in the WordPress control panel

Note: WordPress requires a secure connection to access REST API in a production environment. If your development environment cannot use SSL connections, you may need to add the following line to wp-config.php to “force” WordPress to ignore security restrictions:
define (‘WP_ENVIRONMENT_TYPE’,’ local’);
step 2: use the Python application to post to WordPress
first, install the Python request library for sending HTTP requests to WordPress API. To do this, run the following command on the terminal:
Then, create a new file called app.py in the python-redis folder. Then, open the file with a text editor.
pip install requests
first imports the requests, json, and base64 modules:
defines the API basic URL and WordPress username and password. For password variables, use the application password you generated in WordPress:
import requests
import json
import base64
now connects
url = 'http://localhost/wp-json/wp/v2'
user = ''
password = ''
anduser, encodes the result, and passes it to the request header:passwordthis is the body of the post:
creds = user + ":" + password
token = base64.b64encode(creds.encode())
header = {'Authorization': 'Basic ' + token.decode('utf-8')}
sets the POST request to the application interface and the command to print the response status:
post = {
'author': 1,
'date': '2024-02-05 00:00:00',
'date_gmt': '2024-02-05 00:00:00',
'content': 'Test Post
related blog post',
'title': 'My second post',
'excerpt': 'In this post, I will...',
'status': 'publish',
'comment_status': 'open',
'ping_status': 'open',
'password': 'my-post-pwd',
'slug': 'my-second-post',
}
runs the script in the terminal using the following command: if
r = requests.post(url + '/posts', headers=header, json=post)
print(r)
receives a 201response (“created”) Indicates that the resource was added successfully. The
python app.py
response code will be returned when

is released successfully. You can confirm this in the WordPress dashboard or in the MySQL/MariaDB database of the website.
uses Redis caching directly in WordPress
WordPress Web sites can use Redis caching to temporarily store objects such as posts, pages, or users. Objects can be accessed from the cache when needed. This approach saves valuable time, reduces latency, and improves the scalability of the site and the ability to handle more traffic.
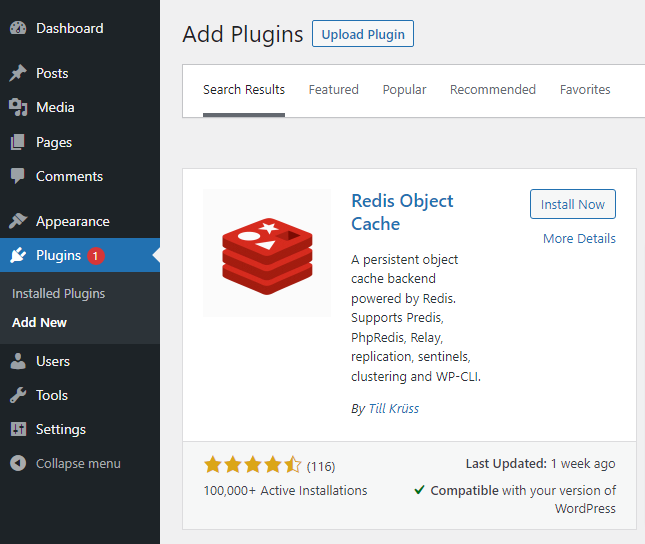
needs to install a dedicated plug-in on your WordPress website.
for example, let’s install the Redis Object Cache plug-in on the local WordPress website. The
Redis object cache plug-in

opens the wp-config.php file with a text editor and adds the following code to the custom configuration variables section:
Note: the Redis host address depends on the server configuration.
define('WP_REDIS_CLIENT', 'predis');
define('WP_REDIS_HOST', 'localhost');
define('WP_REDIS_PORT', '6379');
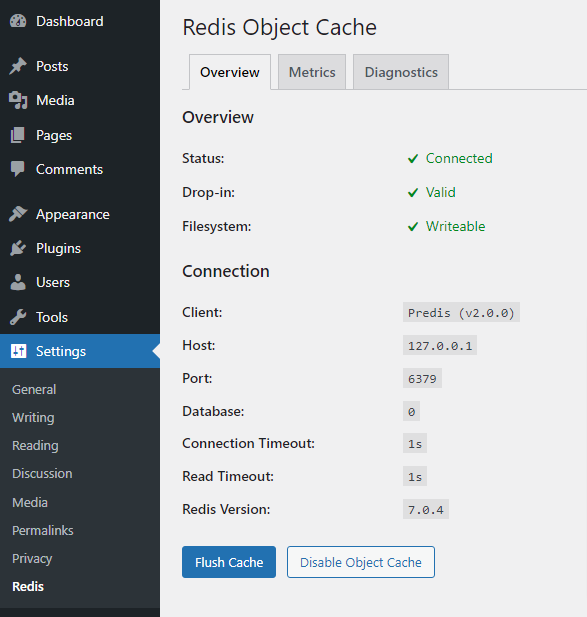
navigates to the setting & gt; Redis in the WordPress panel. You should see something like this: the
Redis object cache plug-in appears in the Settings tab

now that the Redis cache has successfully replaced the previous MySQL database.
in addition, the cache used by the foreground WordPress website is the same as that used by the background Python application. You can open a new terminal and run the following command to test this: when
browses the website, the website request will be output to the command prompt:
redis-cli monitor
uses redis-cli in the terminal monitoring server request

is now synchronized, you can use the Python application to add new articles to WordPress through REST API.
to do this, modify the POST object in app.py to contain the new article, and then run
to add the article to the cache.python app.pySummary
in this article, we learned how to use the Redis Python client to connect a Redis database to a Python application. The client supports multiple Redis data storage formats: lists, collections, dictionaries, and other command data types.
We also saw how to integrate Redis into WordPress sites through REST API and Redis Object Cache plug-ins.
‘s use of Redis memory caching in the website makes it a powerful and flexible development tool. Redis is extremely effective in improving database query speed, website performance, and the overall user experience.
在网站中使用 Redis 内存缓存的功能使其成为一种强大而灵活的开发工具。Redis 在提高数据库查询速度、网站性能和总体用户体验方面异常有效。

